Wednesday, 5 September 2018

Whatever happens, we have got the Maxim gun, and they have not...

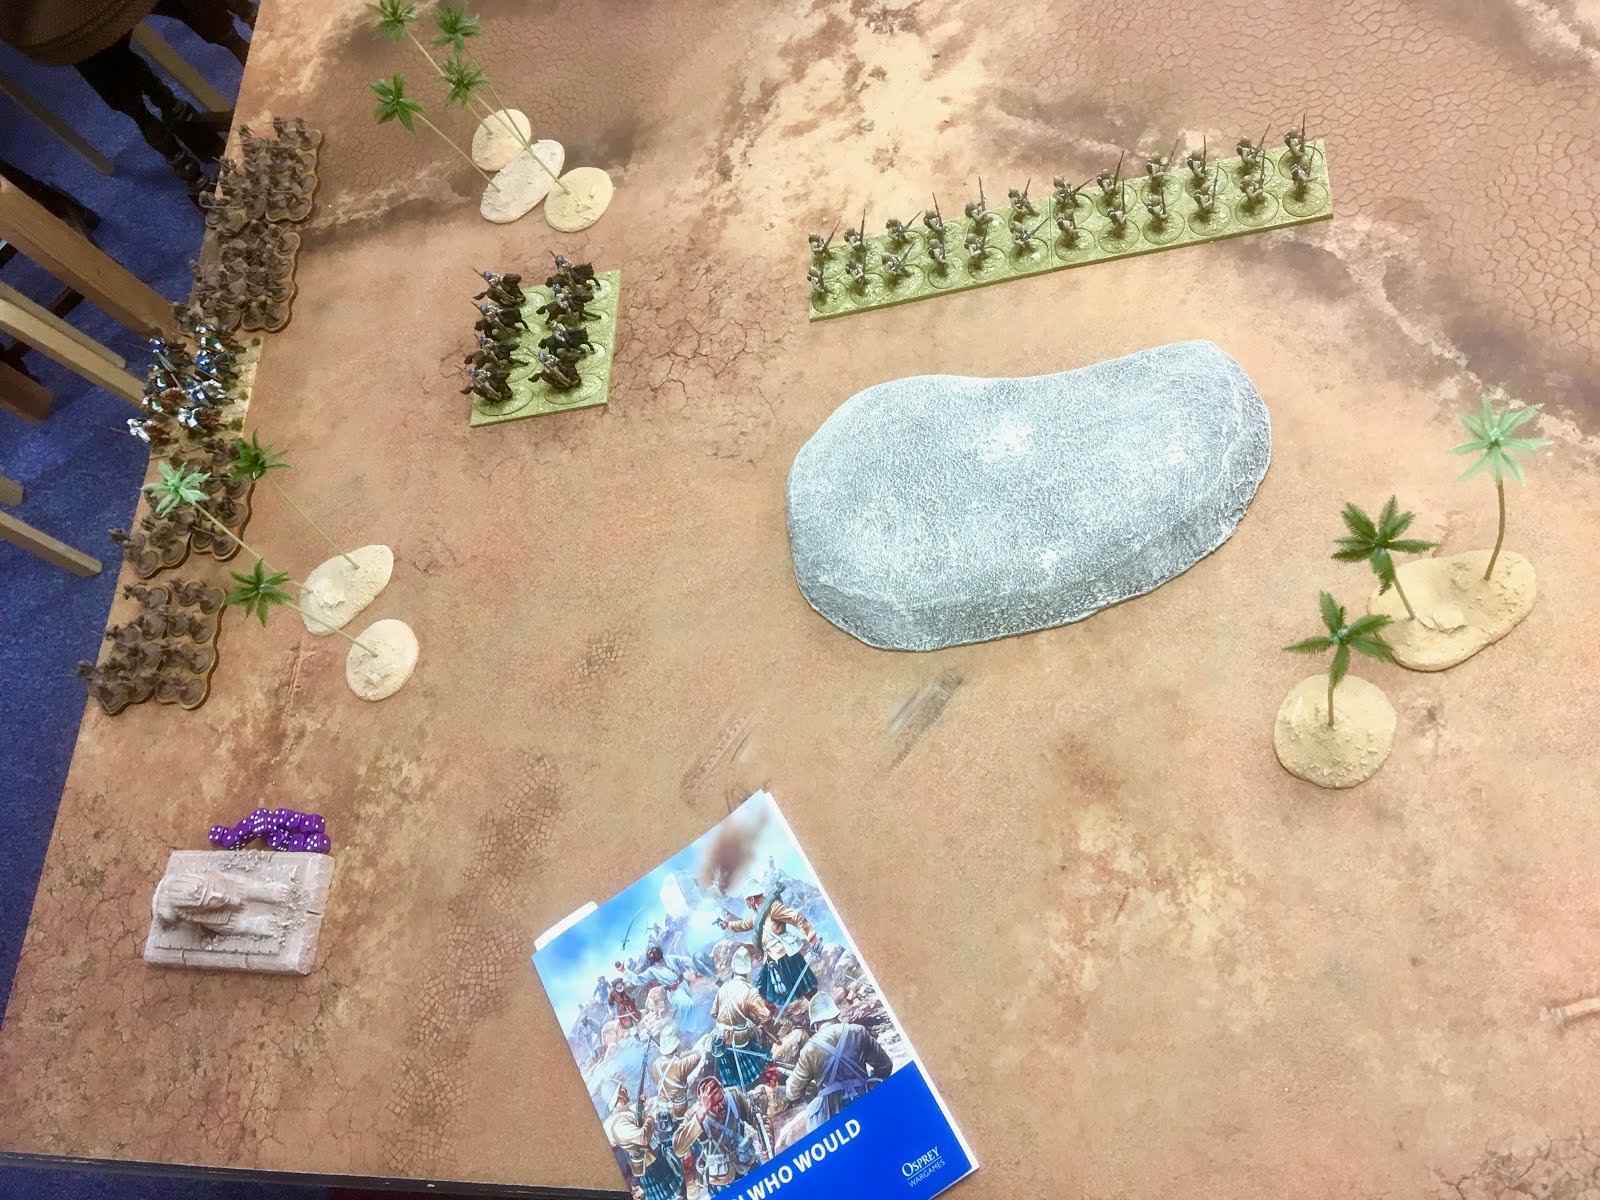
As part of the 'arms race' in our games of The Men Who Would Be Kings, George and I have decided to increase our Field Forces to 36 points, so he can include some natives with pointy sticks on camels, and me some artillery! :-)


My Perry Miniatures order arrived yesterday so I haven't had time to paint up the 9 pounder for tonight's game, but I have painted up (dipped) two Old Glory Maxim on Gun Carriage and crew! I am applying a bit of the 'rule of cool' here and the Hollywood approach to force composition as the Maxim is a bit late for the early Sudan campaigns, but in the game it is just a machine gun so the fact it is more 1897 rather than 1885 won't make any difference gaming wise.


The pack contains two guns and six crew, which is a bit of a pain, as the rules require four crew a gun, but as a Field Force can only contain one artillery piece (cannon or machine gun) I have enough for tonight and will source a couple more miniatures in case the 'arms race' ends up with us trying to re-create Omdurman or something...


Thursday, 30 August 2018

The Men Who Would Be Kings: Sand an' Ginger!

The fully painted 66th went into action last night with a contingent of Bengal Lancers. Madhi George (as he prefers to be known) once again took command of his Madhist Beja tribesmen against the might of the British Army in our latest The Men Who Would Be Kings adventure in the desert!

We rolled up the Seek and Destroy mission, a punitive expedition to level a rebellious village. Both our Leader Traits rolls resulted in us both having a pretty useless bunch of officers in both forces!


The British set up for a rapid advance to the village, where the Madhists had two units of poor Unenthusiastic Irregular Infantry stationed in the village, with four units of stabby Fierce Veteran Beja Tribal Infantry rapidly coming to their rescue.


The British Regular Infantry quickly pinned the two Irregular Infantry units whilst the Bengal Lancers started demolishing the first building, reducing it to just one structure point in two turns.


Two units of Beja stormed up the right towards the British, one unit of Irregular Infantry inflicting the first casualties on the advancing British. The other unit of Beja on the right were proving stroppy and refused to advance at the double when ordered.


Unfortunately as the Bengal Lancers had not destroyed the building, it allowed the fourth unit of Beja Tribal Infantry to get into contact. A swift skirmish saw four casualties per side and the Beja pushed back.


The Lancers then finished demolishing the building,  destroying the Irregular Infantry inside and exposing the Beja to the Cavalry's carbines...


In the centre one unit of Beja reached one of the British Regular units and quickly seven brave Englishmen became two and they were pinned down!


They did manage to rally next turn and added their two rifles to the fire from the other two Regular Infantry units, gradually knocking down the Madhists and pinning them down.


One unit of Beja did manage to unpin itself and get into contact, but the three brave natives faced twelve stout Englishmen with their dog and soon, only the Beja leader was left alive!


Fire from the other Regular Infantry unit had reduced the other Beja unit to just three and the Cavalry  was picking off the one in the village with their carbines. At this stage I was quite pleased with how things were going, even though the last Beja Tribal Infantry unit had now decided to join the fray...


They attempted to charge the British line but came up short, looking down the barrels of twelve rifles...


A crash of gunfire and fifteen charging Beja became four pinned Native Infantry!

However, thing started to unravel a bit at this point...

The Unenthusiastic Native Infantry in the village, who had spent most of the game pinned down, got their ginger up and shot the Bengal Lancers and then three Regulars in the central infantry unit, pinning them, something they never recovered from.

The sole surviving Beja Leader (with a Swordsman trait) also managed to unpin and charged the two British in the centre, cutting them down before himself being shot.

And then that was the end of turn 12 and the game...

Checking the Victory Conditions, I scored 3 points for destroying one building and George scored 12 for having four buildings remaining and having destroyed two of my units! A resounding Madhist victory that will not go down well in Horse Guards...

Despite the one sided result, the game had felt much closer as we were playing it and it was great fun with some abysmal dice rolling by both myself and George! :-)

I had misread the victory conditions and thought I also was getting 2 points for destroying each enemy unit, which I wasn't, not that it would have changed my tactics much as there was little chance of me destroying many buildings without artillery, so my only real hope was to wipe out George's force, which I came quite close to (he ended with just five Beja out of the sixty four and the pinned Irregular Infantry). If only the British Regular's had rolled a couple more 5's and 6's on a more regular basis, victory would have been mine!

Off to buy a cannon now! :-)

Wednesday, 29 August 2018

North-West Frontier: 66th (Berkshire) Regiment of Foot IV

In time to be stabbed by men with pointy sticks in tonight's game of The Men Who Would Be Kings I have managed to complete the third and final unit of British Regular Infantry from the Perry's plastics box.


The colours are from the instruction sheet/uniform guide that is included in the box, unfortunately they are printed on a slightly glossy thick paper (perfect for a uniform guide!) that isn't as easy to play with as printed flags from the like of Solway. That said they look ok and I am happy enough with the end result.

I also painted up Bobbie the dog (the 66th's mascot who comes on the command sprue) but forgot to put him in the photo. Maybe tonight I can grab an action shot of him nipping some Beja's heels...

Thursday, 23 August 2018

The Men Who Would Be Kings: 'Ere's To You Fuzzy-Wuzzy!

My British Field Force played a game of The Men Who Would Be Kings last night at BIG and I have the unfortunate duty to report that things did not go very well for the Sons of Empire and Gordon has still not been relieved!

Playing Mad Mullah George, we rolled up the 'It's Awfully Quiet Out There...' scenario, meaning as defender I had to reduce my Field Force to 18 points, so I decided to stand down one unit of Regular Infantry (as they were only undercoated!) and try putting the natives of the Sudan in their place with two units of Regular Infantry and one of Regular Cavalry.

I had to deploy the Field Force first, expecting George and his bally Bejas to attack from the flanks, which of course he did not do, deciding to attack from the rear (a typically non-English thing to do).


His Tribal Cavalry immediately attacked my Bengal Lancers Regulars (who had left their lances at home) inflicting three casualties. However the Pride of the Raj killed several of the enemy and pushed them back, pinning them. The native cavalry subsequently failed to recover and fled the battlefield due to their commander having rolled up the 'Hapless' trait before the game and having an 10+ Leadership!


As the Regular Infantry tried to get into position, my cavalry (led by a 'Wheezy' commander preventing the cavalry having a useful Double Move ability), rashly decided to try and stop one group of Beja Fierce Infantry getting too close to my Infantry. Unfortunately sixteen bloodthirsty natives against six cavalrymen, even with the infantry having to roll two hits to cause a cavalry casualty, saw the Bengal Lancers all perish except for their inept officer!


On the other flank, the first unit of Regular Infantry opened up against the Beja, forcing one unit back but, despite having a leader 'Destined for Greatness', they failed a critical Close Order roll and the Fierce Beja got amongst them killing all bar one of the brave 66th Foot!

In the centre the other unit had more success taking all but two Beja down in one round of firing. The Wheezy Lancer commander decided to try and finish the remaining natives off, but did not manage to do so.


The remaining unit of the 66th took the two Beja out but was now faced with three Fierce warbands advancing on them! It was looking grim, but two rounds of sharp firing cut holes in the native ranks and for a time it looked as though the thin khaki line might stand true!


Unfortunately though, despite inflicting casualties of 50% or more on two of the Fierce Infantry groups, the third swept in on the remaining unit of the 66th and nine brave Englishmen fell to only one Beja.


The end was in sight and next turn the Beja overran the final three brave Englishmen, the only survivor able to recount the horrific saga, the gin-befuddled Bengal Lancer officer!

Overall, despite a shocking start and rather inept use of cavalry, (I had imagined they would ride down their foe with near impunity), this was a very enjoyable battle and at one point it did look like the British might recover and the dead eye shooting of the 66th hold off and force back the natives. Sadly that was not to be, but who knows what might happen next week when we return to the deserts of the Sudan?

Wednesday, 22 August 2018

North-West Frontier: 66th (Berkshire) Regiment of Foot III

I managed to finish off a second unit of Regular Infantry for my 24 point British army for The Men Who Would Be Kings. As before these Perry plastics were undercoated Bleached Bone, flesh and equipment blocked in and then dipped in Army Painter Soft Tone dip (well they had the dip painted on for better control).


12 left of these to do and a dog!

I have also 95% finished a unit of Perry Miniatures Bengal Lancers which should be ok to use for tonight's planned game...

Wednesday, 15 August 2018

North-West Frontier: 66th (Berkshire) Regiment of Foot II

I wanted to try and get one unit of the 66th Foot finished for tonight's try out of The Men Who Would Be Kings and have just given the first 12 a spray of Anti-Shine...


The Perry plastics were just undercoated Army Painter Bleached Bone, the flesh, webbing and guns blocked in and then "dipped" in Army Painter Soft Tone dip. Think it has worked well and I'm happy with the result. 24 more to go...

Monday, 13 August 2018

North-West Frontier: 66th (Berkshire) Regiment of Foot I

Playing some games of Outremer at BIG over the last couple of weeks led in a round about way to conversations about colonial wargaming and George said he fancied trying out Osprey's The Men Who Would Be Kings and would I be interested if he brought along a couple of Field Forces for it, even if they were only undercoated? Of course I would...

We will be doing Sudan as George has a number of boxes of Perry Madhists which he said he would try and stick together over the weekend and after a little pondering (and reading the rulebook) I thought I could jump in by raising a British Field Force, three units of Regular Infantry requiring the same number of figures found in one box of Perry's plastic British Infantry (Afghanistan and Sudan) 1877-85, so I popped in BIG on Friday and bought a box. I just need to find my Bengal Lancers now to complete a 24 point Field Force...

Over the weekend I've stuck them together and based them, along with three Warbases 12 figure movement bases which I had sitting around...


Now whilst George is bringing along a pile of Madhists, I have to confess that the North-West Frontier floats my colonial boat more so I have used the Afghanistan covered pith helmets rather than the uncovered Sudan ones and will paint them up as the ill-fated 66th Berkshire along with the regimental mascot Bobbie, who is also found in the box.

The figures look perfect for a dipping approach, so I am going to spray them a bone colour and see if dip will darken that to a Khaki look, otherwise I will find a darker sand colour and use that.

Postscript: As the BBC Weather forecast got it wrong and it did not poor down with rain after lunch, I sneaked outside and undercoated them...

Thursday, 9 August 2018

Outremer: Death in the Dust!

Popped down to BIG last night for some more Outremer with George, Matt and Tom. Unfortunately no plan survives contact with the enemy and Tom was unable to make it so I volunteered to "umpire" a game between George and Matt - the Caravan scenario.

This was good as it allowed me more time to get to grips with the rulebook with a real life game going on. At its heart Outremer is a really a very good game with some great ideas and mechanics and I do like it a lot. However it clearly has not been blind-playtested properly (I suspect people read it rather than played it). For example, the only reference to terrain is a line that "more is best" but the scenarios would benefit from some indication of what would be reasonable given the objectives of both sides and I can't imagine playtesters playing these scenarios would not have flagged this. That said it is not anything experienced gamers should not be able to cope with.

I suspect we should have had more terrain on the table as Matt's Crusaders struggled against George's Arabs with their missile fire advantage. That said he did manage to get his caravan to within one move of safety before his final character was taken down.

I then played George at the Rescue scenario. I had made a few changes to my warband. My new leader was now an Arif, I removed two Ahdath spear and added another Peasant with a bow. Having seen how kick ass George's two characters with the Sneaky trait were last week I had come up with a cunning plan to thwart them (which I promptly forgot and split my band into two like I did previously).

George's sneaky guys (bottom left) move up the sand dune having emerged from their hiding place...
His Sneaky guys took out one of my peasant bowmen in turn one and my Arif then failed a Faith test and ran off the board! My Mamluk tried to get into hand to hand combat but went down under arrow fire...

Mamluk and Peasant down! My Leader having ran off!
My other group had a bit of success taking down one of George's bowmen, but under bow fire from in front and the flank, I lost two more men before fleeing the battlefield and leaving the captured hostage in enemy hands.

One bad guy down, the Scavengers advance across the desert... 
Next time I shall try and remember my cunning plan to deal with them Sneaky types!


Tuesday, 7 August 2018

Panzerfäuste: Dwarf Pilot

Hysterical Games are giving away a Dwarf Luftbest Pilot this month with any order £25 or more. A lovely little figure I couldn't wait to slap some paint on him...


Not quite sure what I'll use him for, probably a scenario objective, but he is a great miniature...

Saturday, 4 August 2018

Outremer: Frankish Warband I

A rummage in the attic at Blease Towers looking for a Coolbox at the behest of SWMBO led to the re-discovery of a tin full of (very) old Citadel Norman infantry (the slottabase tabs say 1985). They are mainly infantry with a number of duplicates and whilst there doesn't appear to be enough of anything other than unmounted knights for use in Saga, there is enough useful models for Outremer!

So I have based up eight and undercoated them to make a Frankish warband to go alongside my Saracen one...


I won't need all the models for a 750 Livre warband but what I have pulled out the tin gives me some options to play with.

Thursday, 2 August 2018

Outremer: Death in the Sand!

Played two scenarios from Outremer: Faith and Blood at BIG last night, with hugely differing outcomes...

Game One: Camp Assault

Salah's Scavengers surround and attack Tom's Crusader camp with the aim of seizing four loot objectives.


I split the Scavengers into three groups to surround and assault the camp from various points. I rashly advanced one peasant bowman straight over the sand dune and he soon found himself under fire from a Frankish archer. However he had Allah's blessing as the infidel arrows missed and he took the Frank down with his return fire (I must note here that Tom had the worst ever series of die rolls I have ever witnessed rolling five 1's and one 2 in a row at the start of the game which greatly helped my stupid tactics).


Nothing seemed to go well for Tom's Crusaders. I took down his second archer and one of my spearmen took out an axe armed warrior - again the Dice Gods looking after me. Another archer took out Tom's leader and his remaining warrior decided to flee the battlefield.


Tom's extremely poor dice rolls certainly worked in my favour in this battle which flagged up a few problems with the rules, the scenario Victory Conditions especially, as we were unsure whether I could claim the Loot as "seized" as I had not picked it up before Tom fled, although I controlled the battlefield within the game turns. As this meant 80 Livres for either the attacker or defender we applied common sense and gave the Loot to the victorious attackers, though technically the scenario victory conditions say objectives not seized give the defender the Livres.

This led to a lengthy discussion were we concluded it would actually benefit the Defender to flee the battlefield in turn one before the Attacker has the opportunity to seize any objectives and pocket the 80 Livres! :-)

Game Two: Skirmish

The Scavengers next battle was against George's Arabs and I think my guys had been smoking hashish with their winnings against the Franks!

George's band was a little more experienced than mine and had an advantage in two of his characters had the Sneaky trait allowing them to set up pretty much anywhere on the board after I had deployed.


As George was advancing from the opposite table corner (apart from his two sneaky guys) I decided to split my band into two and try and attack from two fronts. Unfortunately this did not work that well!


As one group advanced down the right hand side of the table, one of George's sneaky Arab's burst through a side door and attacked my spearmen taking his down. He then engaged my leader and after a couple of rounds of hand to hand combat took him down too.


Elsewhere the remaining spearmen in this group was shot by an archer and my archer having bottled his Faith test was cut down by George's remaining sneaky Arab!

With half my band down I decided I was going to flee the battlefield at the start of the next turn but was not able to do so before George slit the throats of my leader and archer to gain extra XP!

So unfortunately with Mohammed Salah viciously slain in his second battle, the leaderless Scavengers have disbanded and I will have to roll up a new Band of brigands before the next game...

Wednesday, 1 August 2018

Outremer: Salah's Scavengers

Off to BIG in a little while for another spin with Osprey's Outremer. I'm hoping I remember some of the rules(!) However I did manage to point up my own 749 Livre warband and finish off two more figures, conversions using Gripping Beast Viking bodies and Arab infantry heads, shields and equipment, to give me a couple of armoured figures that hopefully won't die quite as quickly as the rank and file.

Sub-Arif Mohammed Salah and Mamluk Amhed Hassan
Spear armed Adath's Essam El-Hadrid, Mohammed Awad and Ahmed Hegazi
Bow armed Peasant's Saad Samir, Sherif Ekramy and Ramadan Sobhi
Yes, all the character names are taken from the Egyptian World Cup football squad!

Thursday, 5 July 2018

Outremer: Kick Off in the Kasbah!

Tom kindly ran a game of Osprey's new Crusades skirmish game Outremer: Faith and Blood yesterday evening at BIG. Matt, George, Steve and myself all used identical forces of Arabs in a four way battle of a leader, two spear and sword armed warriors and three peasant bowmen.

My guys advance into town!
The game was a free for all but largely developed into two separate skirmishes as the bulk of my and Steve's bands of brigands clashed in the marketplace.

Steve's leader and warrior burst into the market square!
The rules are fairly straightforward with some nice touches, like making a Faith roll to charge into combat, combat using different dice types depending on the skills of the fighters, modifiers generally seeing dice move up or down a type as appropriate. Each figure is allocated a playing card and this drives when they can take their two actions in the turn as the cards are drawn from a shuffled deck.

Bloodbath in the marketplace!
Combat between unarmoured or lightly armoured figures is pretty brutal and bows soon make you regret not using cover (Steve's archers atop a building taking out both fighters in Matt's and my band!)

We need find some issues that may or may not be covered in the rules (this was our first play and the rulebook layout is not the best) such as disengaging from combat but things generally went smoothly and the game sped up as we became more familiar with the rules and the card deck grew smaller as characters became hors d'combat!

Stand and Face Me You Cur!
Overall all four of us had a great time (thanks Tom) and are looking forward to taking part in a campaign over the next couple of months. If you have been thinking of getting hold of a copy of the rules, I recommend you do.

Wednesday, 4 July 2018

Outremer: Saracen Warband III

I painted the dip on the Saracens late Monday night so they would have 24 hours to dry whilst I was working on London on Tuesday. I should have guessed there was something wrong with the (rather old) tin of dip from the 5mm thick hardened crust on the surface that I had to hack through with a pair of scissors and whilst it seemed to go on ok, it seemed to dry very quickly. The next morning I had a quick look for heading off and was dismayed by the effect, it had dried matt and was akin to an ink wash not the dip highlight that normally saves time with shading.


I was rather despondent about it all day yesterday and decided as I sat on the train home at 1am this morning to treat it as an ink wash and highlight the figures. Looking at them in the cold light of day they aren't as bad as the quick glance on Tuesday morning so the tunics had a quick drybrush with thr original colour, as did the metal bits. I decided against touching the white areas so they are very grubby looking but wouldn't you be after months in the field chasing down the infidel?

I painted and drybrushed the bases and have had a crack at some hand painted shields (these still need a quick ink wash) which aren't too bad.

Not my best painting but they are almost done and a dozen will take to the field tonight!

Monday, 2 July 2018

Outremer: Saracen Warband II

I've decided that the quickest and most effective way of getting these figures painted and on the tabletop is the trusty old dip, so today was all about block painting!


I'm not too keen on figures being too bright given the rigours of the battlefield and the lack of Persil so I am hoping the dip with subdue the sky blue which is a little brighter than I would like.

Just got to decide what to do with the shield designs now, the LBMS decals are lovely but do I really want to spend six quid on buying them for dipped figures?

Sunday, 1 July 2018

Outremer: Saracen Warband I

Tom at BIG has suggested we run an Outremer: Faith and Blood campaign in July and August (Outremer being the new Crusade skirmish rules from Osprey).


The game looks like a lot of fun requiring very few figures and having a box of the Gripping Beast  plastic Arab spearmen and archers I volunteered to join in. Whilst Tom has figures for both sides I thought I'd get gluing this morning and sat out in the garden snipping bits of plastic off the spures and sticking them together.


As everyone at BIG is well into Saga as well I decided to stick together enough figures for 3 points of Saracens as well!

I have a trial game of Outremer on Wednesday so will report back how it goes...

Thursday, 31 May 2018

OSC: Fighting the Bear

Matt from Evil Bear offered to play a game of his OSC Modern Skirmish Rules with me at BIG yesterday and I have to say what a great little set of rules!


A fireteam level modern skirmish set, OSC has some very simple mechanics but plays exceptionally well and engages both players at all times. The inclusion of Action, Event and Resource cards is a great touch and adds a lot of flavour to the game.


OSC can be played 'properly' or (as I did) 'Hollywood fashion! We played a near future game each with an Encased Armour trooper and teams of regular troopers attempting to recover various Objective Counters.

It was a close fought battle ending in a draw, I almost blew it in the final turn but the Gods of Dice saved me (again). OSC has a lot to recommend it and I'm looking forward to playing it again soon.


Friday, 25 May 2018

Saga: Saxon Hearts

The second game I played with Rich was Saga, and this time Rich decided to play as Anglo-Saxons against my Vikings.


This was a hugely enjoyable game and the Saxons proved to be a tough opponent, providing lots of tactical challenges, their battleboard if used well seems like it could be decisive, especially with abilities counting units as having 10 or more models!

The battle ended in a draw and to be fair probably would have been a victory for Rich if I had heard what he was saying in a decisive combat between my Beserks and his Thegns (there were a lot of games going on around us and looking at the Saxon ability used I should have rolled a few less dice but didn't hear this and Rich didn't notice at the time). Still it was good fun and we both enjoyed the game.

WH40K: Wrath of the Space Wolves

Played a couple of games against Rich at BIG yesterday. First off he suggested we try the current edition of 40K. Not having played a game since 1989(!) I wasn't sure what to expect. We played two different Space Marine 750 point armies. The game was fun and ebbed back and forth, but I still couldn't get my head around the relative infectiveness of missile fire in what is supposed to be an SF game.


The melee combat was fun (the game showing its fantasy roots) and advantage swung back and to, I thought I was about to win, but some poor dice rolling let me down at the death and Rich emerged the victor...

Overall, I'm happy to play the odd 40K game like this, but I can't see myself getting into it in any major way...


Thursday, 24 May 2018

A (brief) Partizan Snapshot!

Went to Partizan on Sunday to help on the Hysterical Games stand so I didn't really get a chance to have a proper look around and take photos but a few things caught my eye...

Martian Practice (VSF Sharp Practice):


World War One:


Suez 1956: