Thursday 31 December 2020

A Cunning Plan (or two...) for 2021!

So here we are once more... Well 2020 was... well it was, wasn't it! Gaming has been a bit hit and miss due to the lockdowns, rules of six and other restrictions but I got a few games in thanks to  Jim and Ellen at BIG and the excellent facilities there (and Ellen's wonderful Covid rules!).  They are a shop that does mail order as well as a gaming venue so please support them in 2021 if you don't already, they do offer nice discounts... Thanks also to George and Andy who have been my main opponents when 2020 allowed! 

So as 2020 comes to a close, what cunning plans do I have for next year? 

Well hopefully to play some games! :D My first cunning plan here is the rescue of the games room. At the beginning of the month I needed to clear it out as we had to have the electric meeting replaced. This was a major exercise (with lots of long lost toys rediscovered!) during which I made the decision to reduce the size of the table from 6'x6' to 6'x4' which makes it easier to walk around and put some storage around it. Hopefully following the festive period I can progress the recovery project further.

Looking at the 2020 Cunning Plan I should probably port it across to 2021, but where is the fun in doing that?! :D Yes I want to crack on with the Mutiny in 2021 and the Malburian First Peninsular War as I have the figures for these, and having done a bit of dabbling with Contrast paints I aim to target by Sharp Practice Italians next month. I have progressed the 'other' Sharp Practice force and will let them out the bag when I slap some paint on therm soon.

A couple of new projects are on the horizon. I was intrigued by the news of Warlord's Epic Black Powder ACW set as I am a sucker for smaller scale stuff and did buy a copy of the new Wargames Illustrated to get a sprue to play with. There is some mumbling of 6mm Napoleonics down BIG using Black Powder so I am tempted to pick up the starter set to check it out, the ACW figures are nice and I reckon two starter sets gets you all you need for some really big battles at a very good price (a regiment being around half the price of the Brigade boxes).


Secondly is the new version of Pony Wars (or B Troop Ain't Coming Back) which gamers long in the tooth may recall being produced by TTG back in the eighties. I've pre-ordered the new version and a small amount of 10mm US Cavalry from Lancashire Games to have a play with. IIRC the original version required a LOT of miniatures but apparently the new edition tells you how to downsize it and it can be played solo which is something to consider depending on how quick the vaccine is rolled out.


Finally Santa brought a copy of Battlegroup NORTHAG which I'm currently reading through and am thinking of using for my 6mm Arab-Israeli and maybe some 6mm WW3 if I can remember where I put that.


I'm sure there will be other things that come along and upset these plans (after all, no plan survives contact with etc) and there is still last year's plan to fall back on! :D

Finally thanks to everyone who reads my occasional ramblings and posts nice comments, they are all appreciated. Have a great, and safe, 2021, ok?

Wednesday 30 December 2020

Sharp Practice: Confrontation at Georgetown Crossroads...

The evening before the country entered the second national lockdown of the year, Andy and I met at BIG to get in a game of Sharp Practice to see if I could stop his run of victories (is two in a row a run?). The basic scenario was taken from the Swamp Fox campaign supplement (scenario nine - Georgetown) although as we don't have the requisite forces yet for Swamp Fox (how many mounted militia do I need?!!), we drew up our forces based on what we had to hand. The scenario is a meeting engagement with the aim to defeat the enemy and control the crossroads...

The game started with three groups of brave Continental Line marching down the road towards the crossroads commanded by Captain Blackmore (accompanied by a drummer and 'holy man' Molly Pitcher)


Any hope of stealing a march on the British was thwarted as the three groups of British Line Infantry under the command of Captain Haddock (assisted by Sergeant Wakefield) appeared on the opposite edge of the field of battle.


A group of Militia Skirmishers under the command of Corporal Glover appeared next rushing across the fields to take up a position protecting the Continentals flank.


A second group of Militia Skirmishers enter the field under the command of Corporal Paice and screened the Continental Line.


Suddenly more lobsterbacks were spotted, two units of Light Infantry in Line under the command of Ensign Harrow pushing forward towards the right flank of the Americans.


The race was on to reach the crossroads first with the Line infantry of both sides marching to an inevitable confrontation!


Meanwhile on the American right Harrow's redcoated Lights advanced on Corporal Glover's Militia Skirmishers hunkered down behind the rail fence.


Whilst on the left of the battlefield Corporal Stringer and a unit of British Light Infantry skirmishers deployed for action...


With Haddock's men advancing towards them, Captain Blackmore ordered his men into line and to Present, poised ready to deliver a crashing volley into the redcoats!


Unfortunately though the Command chips fell Andy's way allowing him to also deploy into line, before the Continentals could do anything...


And unleash an uncontrolled volley at the brave Patriots!


Four Continentals fell dead and the Americans reeled with several points of accumulated Shock.


Unfortunately for the Americans Tiffin came next and then Haddock's token was pulled again. Another volley crashed into the Continentals killing another four and piling more Shock on them.


Blackmore's men stood bravely and managed to return a volley, inflicting Shock on all three of the British Line groups.


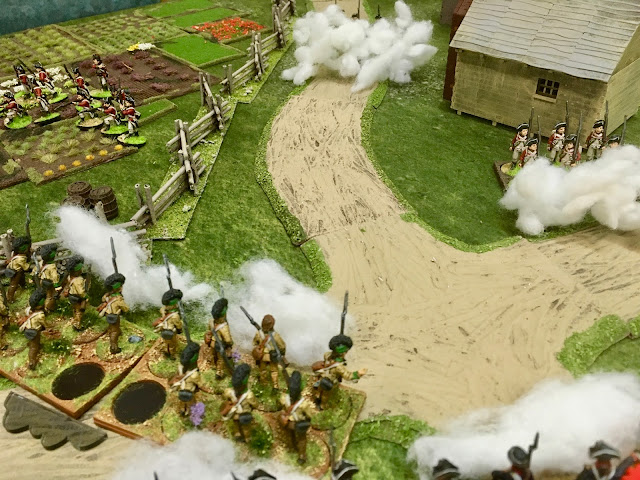
Meanwhile on the right flank Ensign Harrow attempted to rush Glover's Militia Skirmishers who had been joined behind the rail fence by Paice's group. The Militia picked off a Lobsterback and inflicted Shock on the Light Infantry.


The battle at the crossroads grew bloodier with Patriots and Redcoats falling to traded volleys and both sides accumulating more Shock.


Whilst this was happening Sergeant Lord and his Continental Skirmishers armed with rifles sneaked through the orchard unnoticed and deployed on the American left...


Opening fire into the flank of Haddock's redcoats! Unfortunately they failed to kill even on Lobsterback or inflict much in the way of Shock. Very disappointing...


Haddock's men continued to pile uncontrolled volleys into the Continentals to their front...


And eventually one group of Patriot Line breaks and flees...


Fortunately for the Americans Lieutenant Gillan with his two groups of Light Infantry in Line had just arrived...


And throwing tomahawks on their way in, they charged into Haddock's redcoats...


Forcing them back and breaking them into two formations as they were unable to fall back in line!


On the right Harrow's Light snapped into line to engage the pesky Militia Skirmishers...


But their Presented Volley only killed one and inflicted just one point of Shock on the second group of Militia.


The Militia returned fire, inflicting Shock on the Lights.


At this stage the battle was finely balanced. Both sides Line units had been badly mauled but both still had strong units of Light Infantry in Line with Skirmish units in support.


On the right Sergeant Lord's Continental Skirmishers traded fire with Corporal Stringers's Skirmishers...


Whilst Lieutenant Gillan snapped his Legion Light Infantry into Line and poured fire into Harrow's Redcoats.


Pushing the disparate groups back once again.


The smaller group commanded by Sergeant Wakefield firied back at the Legion with minimal effect.


With the battle starting to swing the American way, Corporal Stringer's Light Infantry Skirmishers charged Sergeant Lord's Continental Skirmishers...


Killing Lord and routing his men! (how many of my Leaders has Andy killed now?


Suddenly the American left flank was exposed, could Andy snatch victory?!


Captain Blackmore Dressed the Ranks of his remaining two Line Infantry groups into one and despite being wounded ordered his men to fire at Sergeant Wakefield's redcoats to their front.


The fire from the Continentals was the final straw for Wakefields's men who fled the battle...


Running through Harrow's Light Infantry causing one group of them to break and flee as well!


This was the final stray for the British with their Force Morale dropping to zero. 

After a bloody battle, the field was controlled by the brave Patriots!

That was one helluva battle and hugely enjoyable, swinging one way then the other before I finally managed to snatch victory. I had thought I had the edge when I managed to deploy my Line infantry into line before Andy, but the god of Command Chips deserted me at this vital point allowing Andy's Line to pummel mine with a series of volleys. Fortunately the brave Continentals stood up to this long enough for the Legion Light Infantry to arrive and charge the British Line. 

A mention in despatches mush go to the the Militia Skirmishers under the commands of Corporals Glover and Paice who managed to hold off Harrow's Light Infantry (the British equivalent of the Legion) and protect the American right flank, ultimately ensuring victory fell the American way.

Sadly this was the last game of 2020 as the next day we entered the national lockdown and a fortnight later emerged into tier two (so no gaming) and then a week later tier three. I'm not sure when we'll get our next game in, but huge thanks to Andy for introducing me to Sharp Practice this year, it has been a lot of fun.

Thursday 24 December 2020

Ad Mare Bellum: Slaughter at Salamis

Before the November lockdown I did manage to get a couple of games in down BIG as we were (then) Tier One, I have just been a tad tardy on writing up the after action reports for one reason or another... The first of these was our refight of Salamis using Long Face's Ad Mare Bellum. Following a couple of previous games we'd made a couple of tweaks to the game which had worked well including the inclusion of a 'Tiffin' card which randomly ends the turn (what's the Greek for Tiffin?)

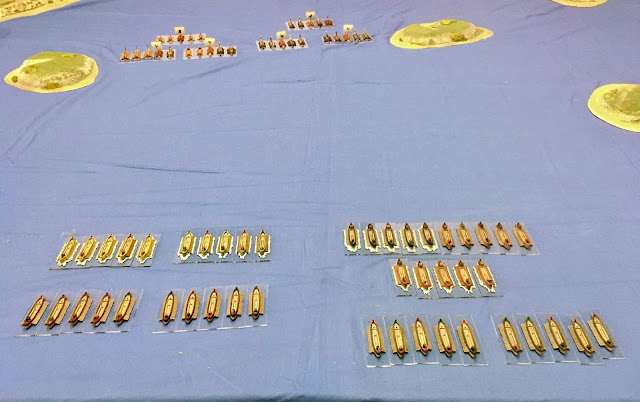
On an 8' x 6' table Steve and Bryan commanded the Greeks (deployed at the top in the photo below), whilst George and I command the larger fleet of Persians, Ionians and Egyptians... The numbers of ships was taken from the scenario in Poseidon's Warriors.


Turn one started with the Greeks drawing two phase dice in a row (the dice bag contained four a side plus the end turn dice), but decided to remain in position using the two small islands to protect their flanks. The third dice was Persian so mine and George's fleets started rowing towards the pesky Greeks.


The next dice was Greek and Bryan decide to push one of his triremes forward...


The next phase was Persian so one of my Egyptians decided to ram the Greek galley in the flank. Unfortunately, despite such a prime target, the Egyptians only damaged the Greek vessel not sink it.


The Greeks took the opportunity to retaliate inflicting a Crew casualty on the Egyptian vessel.


George's loyal Ionians took the opportunity to lock horns with the Steve's Greeks and board their vessels.


Unfortunately as they rowed forward they took a number of Crew casualties (shown by the coins) and one vessel was boarded by the Greeks and captured (the white dice signified a captured ship).


One the other flank Bryan captured one of my ships but was swarmed by my reserve squadron.


The next phase was Persian again and I recaptured the lost ship and boarded and captured three of Bryan's.


The fight between Steve and George was turning into a rugby scrum with ships being captured...


... and then recaptured!


The next dice pulled was Persian again (the third phase in a row) and I used thus to pull the captured enemy ships out of the way and attempt to punch a hole in Bryan's line.  


The next dice was the turn end one, so all the dice went back in the bag.

The first one pulled out for turn two was... Persian! (I blamed this on Steve's negative vibes not being seen favourably by the Gods of Dice).

George pushed his reserve forces forward and used them to board and recapture lost ships and capture two of Steve's defensive line.


On the other flank Bryan's line was disintegrating as more his ships fell under Persian control, one squadron was now completely captured...


The aim now was to row the captured Greek galleys out of the way and push through the gap into the reserve Greek squadron and the flank of Steve's galleys...


The Fates looked poorly on the Greeks again as the next phase dice was Persian (the sixth in succession - we did check the Greek dice were in there!)

My Egyptians pushed through the gap in Bryan's line and looked to bear down on his remaining squadron.


Meanwhile George's managed to sink one of Steve's galleys and pull another out the defensive line having captured it.


At this stage there was clearly no route to victory for the Greeks and they conceded control of the seas to the mighty Persian Empire!

The battle turned out rather one sided, not helped by the Persians drawing six phases in a row allowing them the initiative to attack the static Greeks. The odds of that happening are of course rather unlikely but the Gods of the Dice decided to that was the way things were to play which was a shame as it had not happened like that in the two smaller games George and I had previously played and led to a rather unsatisfactory game for Steve and Bryan...