George and I got another Rebels and Patriots game in recently down BIG, borrowing Andy's lovely rail fencing, to play out the Sunken Road scenario from the rulebook. As is our wont we ignored the 24 point suggestion and played with a lot more points than that!
The scenario starts with the Americans defending a fence line but having to fall back behind a second and prevent the British crossing that. Balancing fighting the advancing lobsterbacks whilst falling back to the second fence line over open ground was going to be tricky.
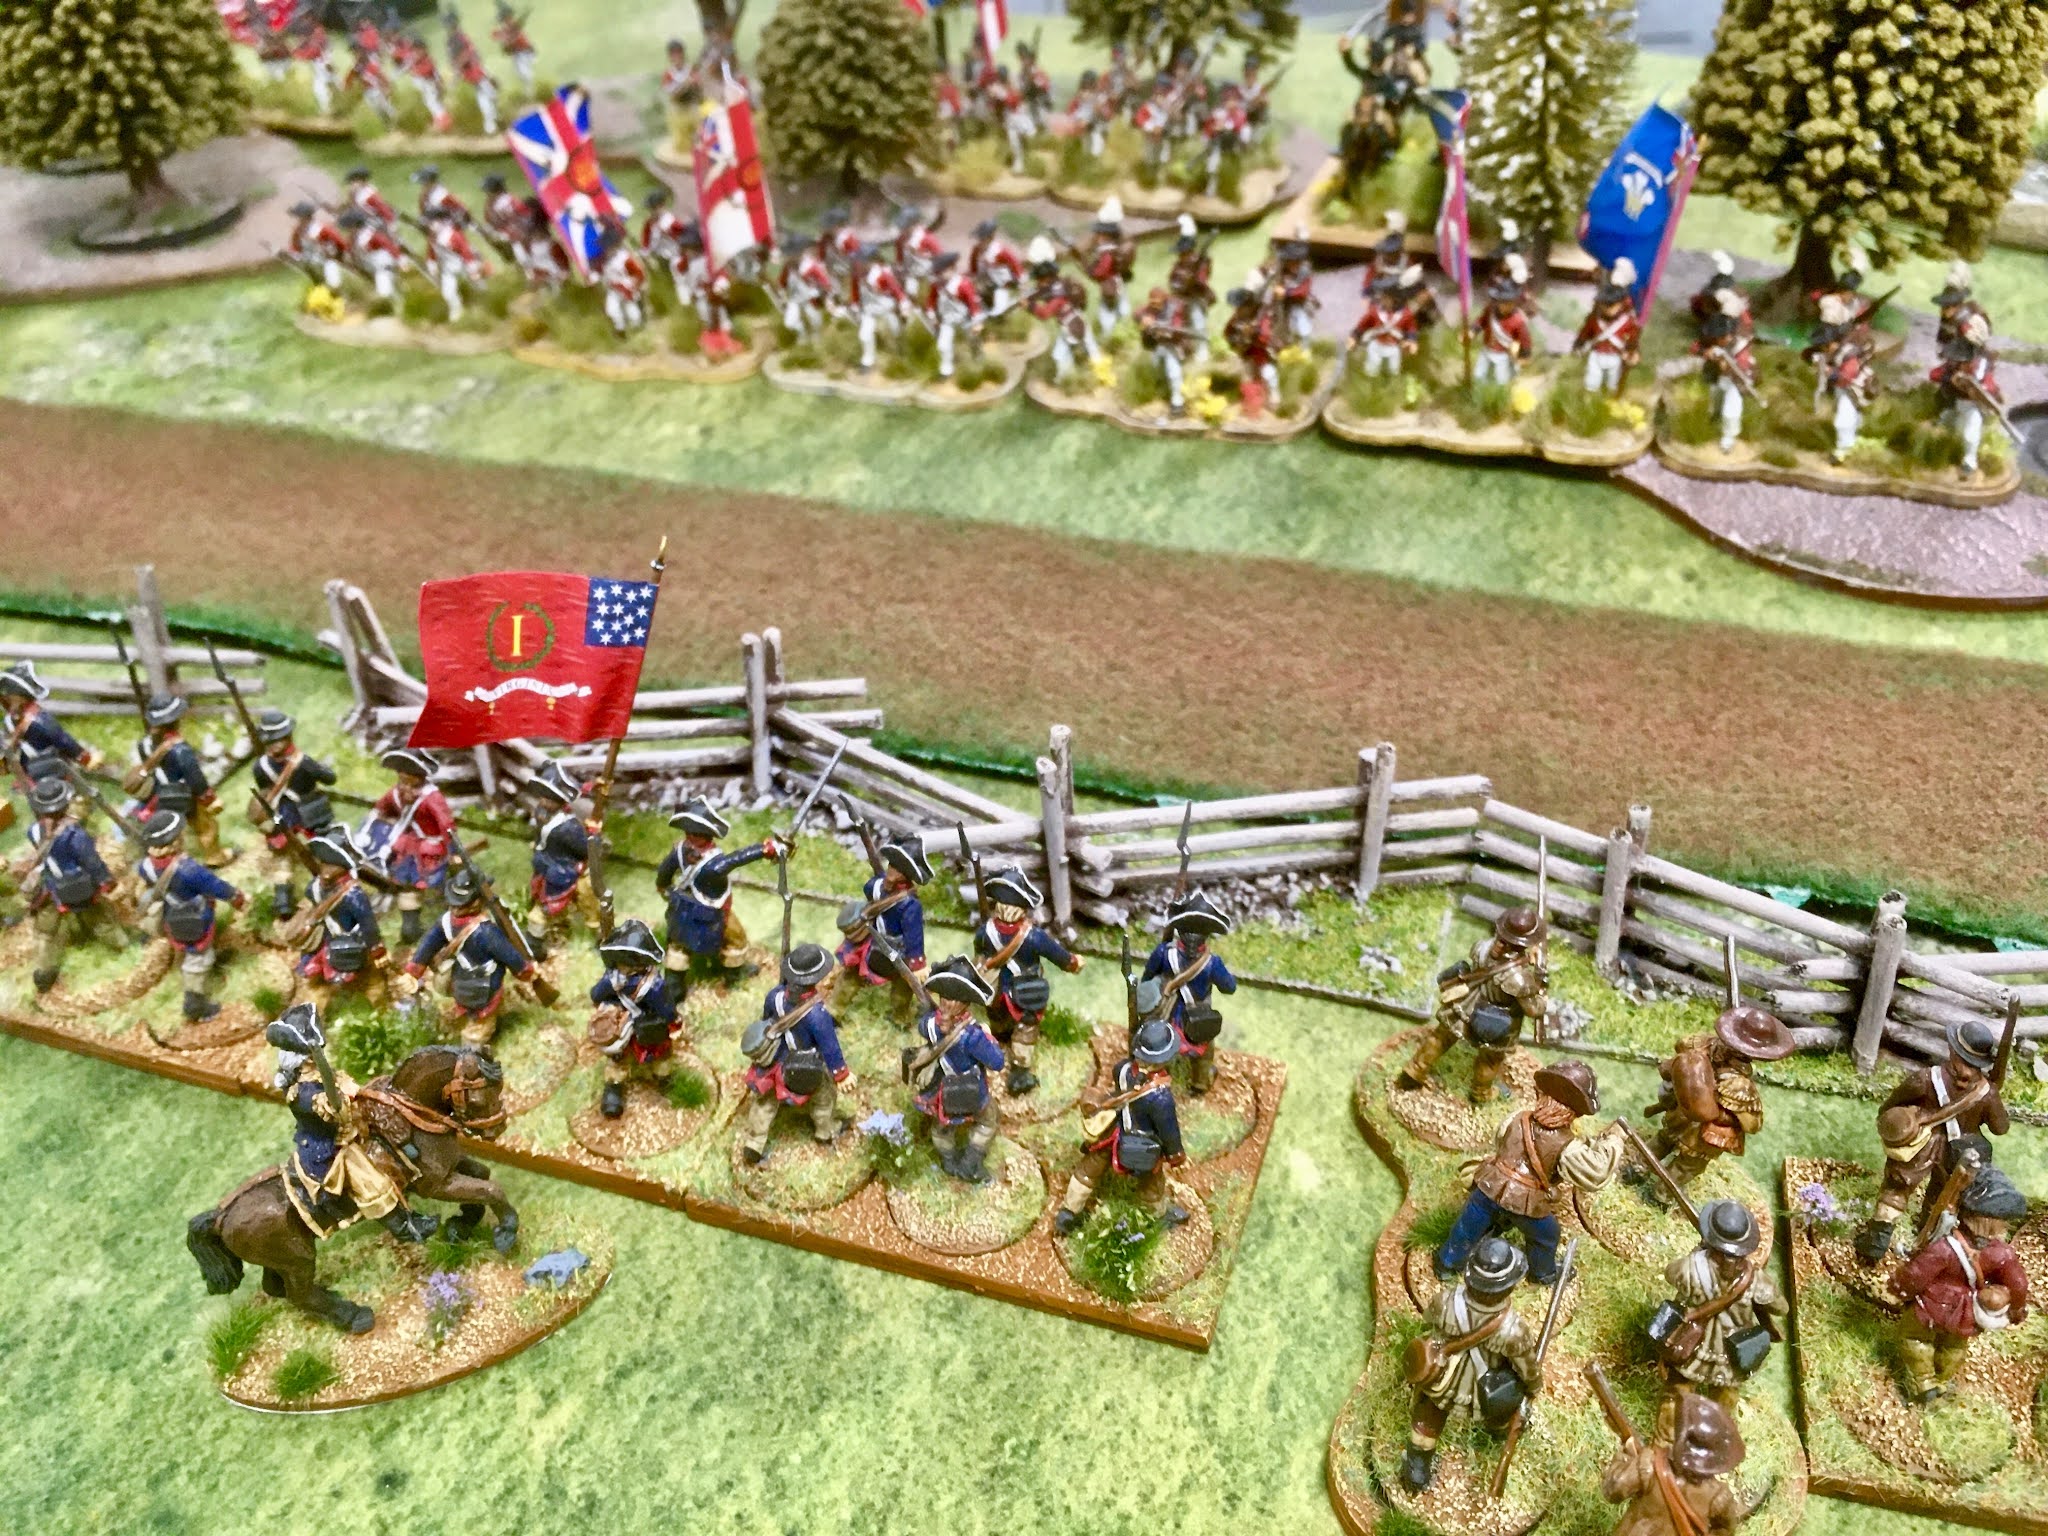
The line of Patriot troops facing the British looked daunting but a large number were 'Timid' militia units (who fight at half effect in melee) so would not present much of a speed bump, even with the obstacle of the rail fence.
The 23rd Foot (Royal Welsh Fuzileers) and 17th Foot led the British advance towards the American defensive line - and the 1st Virginia...
Two Welshmen falling to the initial Continental volley.
With the Continentals staying in place, the Militia were ordered to fall back, though the North Carolina regiment refused its orders and stayed in put.
British Light Infantry skirmishers in the tree line opened fire on the Americans...
Killing one Militia skirmisher. Their Morale check roll was so poor they took two Disorder markers and were Broken. They could now do nothing except attempt to Rally in their turn.
The 2nd Maryland, one of the three Continental Line units, suffered a casualty and failed its morale test taking one Disorder marker (meaning they would fight at half effect unless they Rally it off).
The North Carolina Militia who had initially refused their order to fall back subsequently obeyed orders and started to retreat towards the second fence line...
As did the Virginian Militia on the American right. The second Virginian Militia regiment in the centre were less inclined to retreat in the face of the enemy and stopped in the middle of the pasture to admire the wild flowers!
Despite having taken some casualties, the 17th and 23rd pushed forward to the first fence line with the 71st Highlanders and British Legion cavalry moving up behind...
Which now looked less intimidating with gaps where the Militia had fallen back.
However the 1st Virginia still stood baring the way, supported by Lee's Legion...
As did the 1st Maryand Continentals.
From the edge of woods the British Legion fired...
Killing three of Kirkwood's Lights who gained an automatic Disorder for reaching half strength - and then rolled abysmally on their Morale check picking up two more. Three Disorder markers saw them rout and all friendly units within 12 inches take a morale check.
In the centre the 71st tried to take advantage of a Disorder marker picked up by the 1st Virginia and charge the Continental unit which will only fight at half effect.
Unsurprisingly the Virginians were defeated and forced back, picking up a second Disorder marker causing them to become Broken. Fortunately as they were defending an obstacle the aggressive Highlanders could not follow up which probably would have finished off the Continentals.
Next turn the 71st crossed the fence line, but before they could attack the Broken Continental unit to their front...
They are charged in the flank by Lee's Legion!
In a rare example of the gods of war(gaming) favouring my dice rolling (so much so that I took a picture) they killed four Scots only losing one of their own.
The 71st were forced to fall back but passed their Morale check.
Fortunately the 1st Virginians passed their Rally test and both their Disorder markers were removed.
On the American right the first Virginian Militia regiment crossed over the fence and took position behind it in the sunken road. The second regiment had reached the fence, no doubt now wanting to gain a safer position with the British now in the pasture!
Moving past the 17th and the 23rd (Welch), the British Legion cavalry moved up...
Whilst their foot colleagues killed two the 1st Maryland who failed their Morale check and were Broken.
Another burst of British musket fire saw two more Marylanders fall and failing another Morale check the regiment collected a third Disorder marker seeing them rout!
Suddenly the American right flank looked wide open...
With Lee's Legion having begun to fall back, and despite carrying a Disorder marker, the 71st Highlanders charged the 1st Virginia!
Despite fighting at half effect, the Highlanders were still Aggressive and gained an advantage from charging. Whilst they only killed one Virginian, the Continentals badly failed their Morale check, taking two Disorder markers, becoming Broken.
Sensing blood, the 71st (being Aggressive) were able to follow up the American line who had fallen back in an attempt to inflict a third Disorder marker and rout them!
Another Virginian fell to the Scottish cold steel but fortunately for the Continental troops they did not fail their subsequent Morale check so did not take a third Disorder marker. They did however fall back another half move.
Despite being close to the protection of the second fence line, the sight of the British cavalry crossing into the open ground was extremely worrying for the Broken Continentals...
The Disordered 71st came under fire from Lee's Legion losing a man and themselves become Broken following a failed Morale check.
As they fell back the 1st Virginia passed their Rally test and shook off their Disorder markers.
Meanwhile British Light Infantry skirmishers...
And the 1st Battalion of Light Infantry fired into Lee's Legion...
Who lost men and picked up an automatic Disorder marker for falling to half strength.
The British Legion cavalry charged the 1st Virginia Continental Line...
Who lost one man which saw them, as Lee's Legion before, acquire an automatic Disorder marker. A failed Morale roll saw them pick up another but despite now being Broken they managed to scramble to the relative safety of the sunken road behind the fence line.
The 23rd Welch and the rest of the British force began to move forward to cross the first fence line which had now been completely abandoned by the Americans.
From the second fence line one of the Virginia Militia units opened fire on the British Legion cavalry...
Killing three! They might be Timid in melee combat but the good ol' boys can shoot!
Back in the centre the 71st, having rallied off its Disorder markers charged into the Disordered Lee's Legion.
Two fell to the Scots but they passed their Morale check. However before they had a chance to do anything they were charged by the remnants of the British cavalry!
Another American Light Infantryman fell dead and the survivors were pushed back, but they passed their Morale test again.
As they were Shock Cavalry, the horsemen were able to follow up...
But in an amazing feat of arms the Americans killed two of the cavalry for no loss before falling back over the fence! The British Force commander (was it Tarleton?) was left isolated in front of the American line!
The 23rd Welch advanced on the new American line focussing on the remnants of the 1st Virginia...
Whilst the British commander rode for safety hiding behind the 71st!
Like a relentless blood red wave the British now moved across the open ground towards the American second line which now comprised of some weakened bloodied Continental line and three regiments of Militia.
The 71st Highlanders pushed forward hoping to break the 1st Virginia...
But crashing volleys from the Continentals killed three and the survivors became Broken, falling back on a failed Rally test.
This left the British force commander exposed to enemy fire and a skirmish unit of Kirkwood's Lights fired two musket balls into his black heart (I decided it was Tarleton!)
The loss of their General rocked the British and several units failed their Morale checks picking up Disorder markers.
But not the 23rd Welch who reached the enemy defensive line and attacked a Militia skirmish unit defending one section...
Putting the Militia to the bayonet and inflicting two Disorder markers on them, the 23rd crossed the second fence line.
If the 23rd could finish this turn without a Disorder marker of their own the British would automatically win the game!
The 1st Virginia then refused an order to fire on the 23rd! Fortunately their Militia colleagues did not and poured a volley in, killing two lobstercoats. The 23rd failed their morale test and took a Disorder marker. No victory for the British this turn!
A failed Rally test then saw the 23rd fall back Broken having picked up another Disorder marker...
And the 71st were Broken again after being hammered by American Militia musket fire.
With the 23rd and 71st Broken, their General lying dead and the British Legion starting to take casualties from the Militia to their front, the British concluded that they did not have enough troops left to carry the American line and ceded the field to the Americans.
That was a great game which swung back and forth with victory snatched out of George's hand by one failed Morale check (he needed to roll 7 or more on 2D6 to avoid that all important Disorder marker).
Whilst it might be marketed as a small scale skirmish game, the mechanics of Rebels and Patriots are so good that they easily cope with games much larger than they were designed for.