My fourth and final battle of the En Avant II event was against Jim who'd come up from Kent for a weekend of Sharp Practising. In this scenario Jim's British were tasked with escorting Lieutenant Lightswiche of the Royal Engineers ensuring he was able to repair a prototype heliograph in a monks tower overlooking the Valley of the Tres Cojones. My Italians were ordered to stop him!

The British were first to deploy with two groups of Line escorting Lieutenant Lightswiche accompanied by the British force commander.

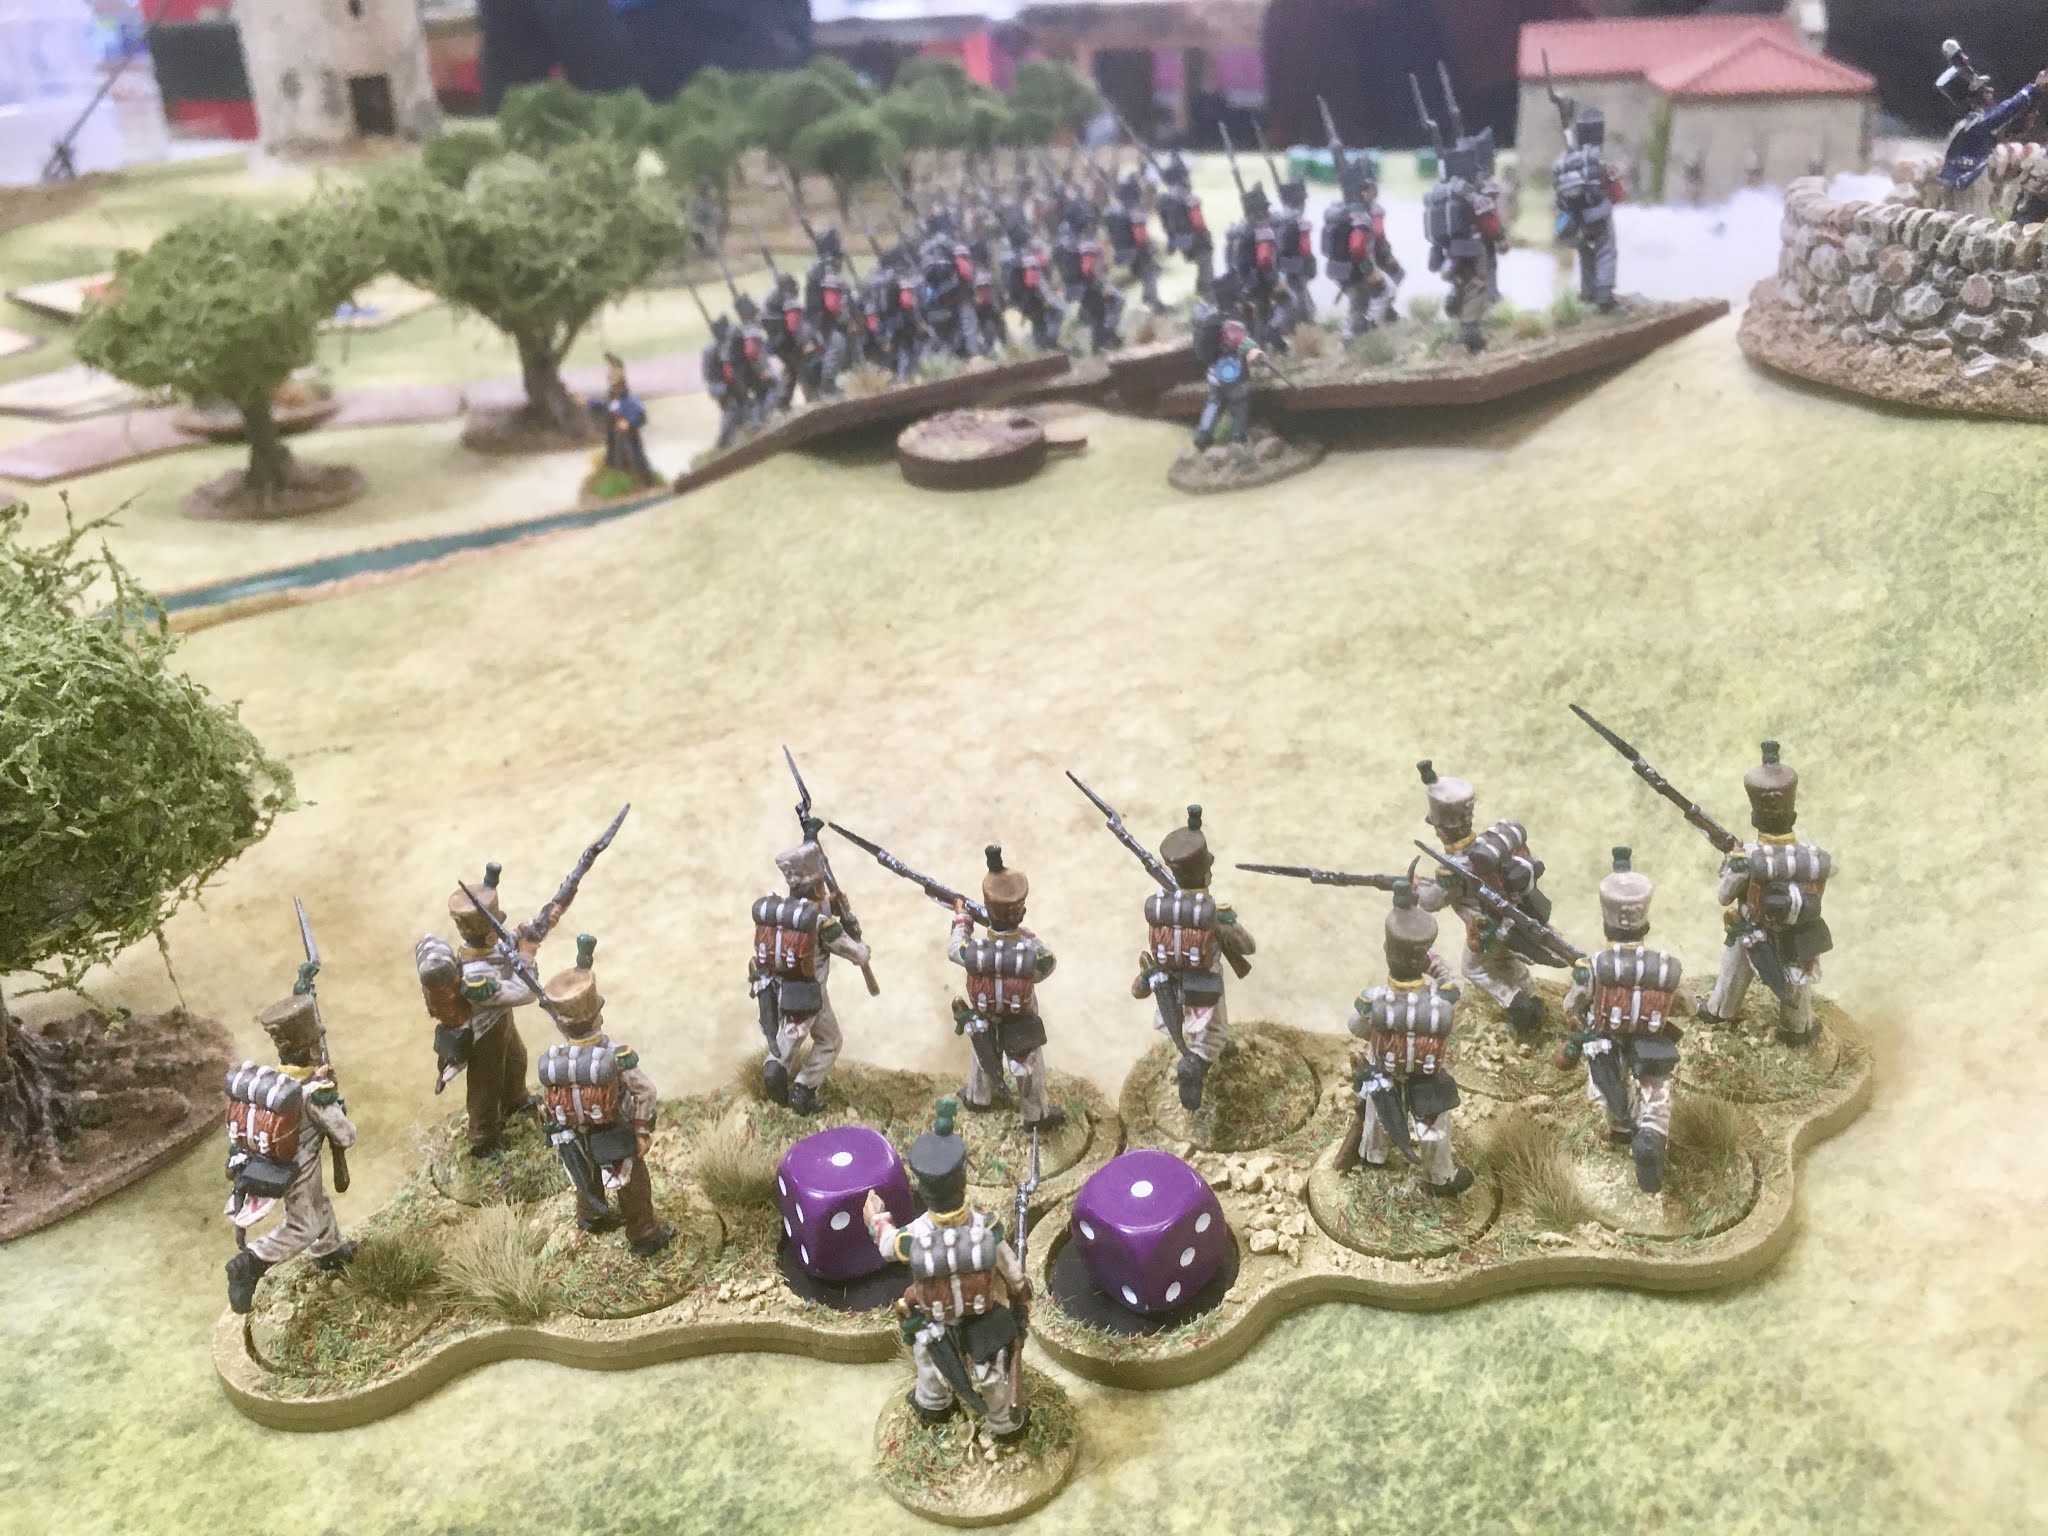
The first Italians to arrive were the line Volteggiatori who deployed behind a wall overlooked by the monks' tower.

They were followed by the Granatieri who marched boldly down the road.

Whilst Jim deployed a cannon with a wonderful clear view of most of the battlefield!

The Granatieri were soon joined by the Fucilieri. Yes, the attack column was back!

Clearly upset for having been benched for the last two battles the Granatieri moved swiftly down the road towards the British.

Whilst the Volteggiatori were more circumspect and just jumped over the wall.

Their martial ardour aflame the Granatieri were half way across the board in no time...

Straight into the line of fire of the enemy cannon!

The round shot narrowly missed the Granatieri but the close miss did see them take a fair bit of Shock.

Faced only by some sheep and chickens the Volteggiatori decided to make a rush for the tower and try to capture it before the British could repair the heliograph...

Only to see the infamous 95th Rifles cross the brow of the hill they were charging up! Merda!

The Volteggiatori fired first taking the 95th by surprise! Two green jackets fell dead and the front group took Shock.

Meanwhile the Granatieri snapped into line but before they could present and shoot the cannon fired another round of fire into them.

The result was devastating, six grenadiers fell dead and one group broke!

The heliograph guard attempting to add further misery to the Granatieri by shooting them in the rear but fortunately fired wide.


The Fucilieri moved up to support the remaining Granatieri group.

But before the Granatieri could move aside the cannon fired at them again!

The brave grenadiers took more Shock and whilst they did not break they were forced back breaking the Fucilieri attack column and passing Shock onto the line troops! Madre di Dio!

The second group of 95th Rifles deployed on the hill ridge and fired at the Italian skirmishers but only caused one point of Shock on each group.

A movement event saw the light infantry Volteggiatori Tenenete twist his ankle reducing his units movement - but they could still fire...

And a volley slammed into the British heliograph guard killing one, piling Shock on them and wounding Lieutenant Lightswiche who had given up staying with his slow moving escort...

The Fucilieri formed into two columns one under the force commander, the other under a Sergente. Stealing themselves they advanced forward again towards the enemy cannon...

Which fired its third and final round of grapeshot into them. The Italians faltered under the double Shock...

But they sucked it and and kept marching slowly and inexorably towards the cannon! (looking at the photos here I'm not sure why they didn't stay on the road with its extra D6 of movement instead of advancing into the stream which formed an obstacle and reduced their movement!)

Meanwhile Lightswiche reached the Heliograph and started his repairs...

At this point the game was quite delicately balanced with the slow moving British force commander having just arrived with two groups of British line to bolster the faltering tower guard.

In a bold move the line Volteggiatori loosed a volley of musket fire at the 95th on the ridge and charged in, bayonets gleaming in the Spanish sun!

Bayonets and sword bayonets flashed, two brave Italians fell but the infamous 95th were broken and fled the battlefield! Are you reading this Bernard Cornwell? :D

The unlikely Volteggiatori heroes then swept around the hill behind the flank of the British line, the chickens no doubt clucking with admiration!

Once again the cannon fired at the advancing Fucilieri, once again they stood firm!

Sensing the battle might be slipping away from them the British opened fire on the unbroken group of Granatieri stood forlornly in the middle of the battlefield...

The volley dropped two more Grenadiers and the excess Shock caused them to break dropping the Italian Force Morale. down to just 4!

The Fucilieri advanced another inch towards the cannon...

Which fired yet again at them... but once again could not stop them!

The Volteggiatori light infantry skirmishers opened fire on the British line who had broken the grenadiers...

Wounding the British Force Commander!

Meanwhile the line Volteggiatori moved up to the rear of the British line...
And opened fire! The volley was not as devastating as I'd hoped but the double Shock on the British was pleasing and one group was teetering on excess Shock.

Remembering to use 'sharp practice' as I had two cards my Volteggiatori fired again in the rear of the British who started to waver under the Shock (unfortunately the group on equal Shock to men did not take more).

The light infantry Volteggiatori joined in the firing and whilst they were not able to cause double Shock...

Their volley caused the teetering group of British line to break and flee down the hill! This took the British Force Morale down to a very worrying 2! The Italians were still on 4.

Knowing they could not take another volley in their rear the British line about-faced and presented their muskets at the line Volteggiatori...

Two Volteggiatori fell dead but they took no Shock so stood firm.

Meanwhile despite the chaos surrounding him Lieutenant Lightswiche had finished his repairs and now started sending his important message. On his activations he would roll 1D6 and each score would be recorded. When the total reached 8 his message would be sent and the British would be victorious! On his first activation he scored 5!

After taking three rounds of canister and several of round shot the Fucilieri reached the infernal British cannon. Battered, bruised and carrying a lot of Shock they pointed their bayonets at the British artillerymen and prepared to exact their revenge! Vendetta!

Fisticuffs! The Italian steel pushed forward and two artillerymen fell dead, a point of Shock was inflicted and their leader wounded! Jim rolled on the 'bad things happen' table but no one cared that an artillery officer was wounded. The British Force Morale stayed on 2.

Unfortunately the resistance by the artillerymen was fiercer than I expected and after bravely marching through hell across the field of battle both groups of Fucilieri broke and their Capitano fell dead! This meant three rolls on the 'bad things happen' table which saw the Italian Force Morale collapse from 4 to 0! Merda!
Right at the death, the day was Jim's! Oddio!

Well that was a damn close run thing that!
In retrospect my tunnel vision in trying to get the Fucilieri into Fisticuffs with the cannon crew cost my Italians the battle, especially as I was not expecting them to be such a tough nut to crack in a melee. I had enough opportunities to snap the Fucilieri into line and shoot the gunners down and did not do so. Lesson learnt (possibly!)
Regardless it was an exciting battle that went right to the wire and I'm still chuffed my Volteggiatori routed the vaunted 95th Rifles! Take that Richard Sharpe! :D
Great looking game and figures.
ReplyDeleteNeil