Sunday 28 October 2018

Give Me Liberty, Or Give Me Death!

The news that Osprey will be releasing their latest Dan Mersey rules Rebels and Patriots in the new year has piqued my interest.

The rules will apparently cover small North American battles (similar in size to The Men Who Would Be Kings from the French Indian Wars through to the American Civil War.

I have to confess I am pretty much game for any American war from this hundred odd years, they all have some appeal, but having had a chat with George the other week the Revolutionary War appealed most to him so I said I was happy to raise a small army for that.

As he already had a box of Perry AWI British infantry I have agreed to go American which is ok with me as there is no lace to paint and I don't like tea! :-)

Having read a couple of playtest AAR reports, it looks like unit size is pretty much as per previous Mersey rules, regular/militia infantry 12 figures a unit, skirmishers and cavalry 6 and (possibly) Native American warbands at 16 (not 100% sure about this), so a box of Perry Continental infantry will give me the bulk of a 24 point army.

One thing that has always appealed to me with the war is the campaign weary look of the American troops and I have dug out an old Military Modelling Christmas special that included an article by the late Rick Scollins on the Battle of Guilford Courthouse and some wonderful artwork by him of campaign weary British and American troops.


I think this is a look I can achieve with some liberal use of dip so for Rebels and Patriots I think my brave revolutionaries will be based around Major General Nathanael Greene's army that fought Cornwallis on March 15th 1781...


Friday 26 October 2018

The Men Who Would Be Kings: Play Up! And Play The Game!

Having been in France earlier in the week, my regular excursion into the Sudan with George was pushed back to last night. We decided to try the Seek and Destroy mission we played back in August again with the British tasked with destroying a Mahdist village in 12 turns, this time we would use 36 point Field Forces and I had a cannon! :-)


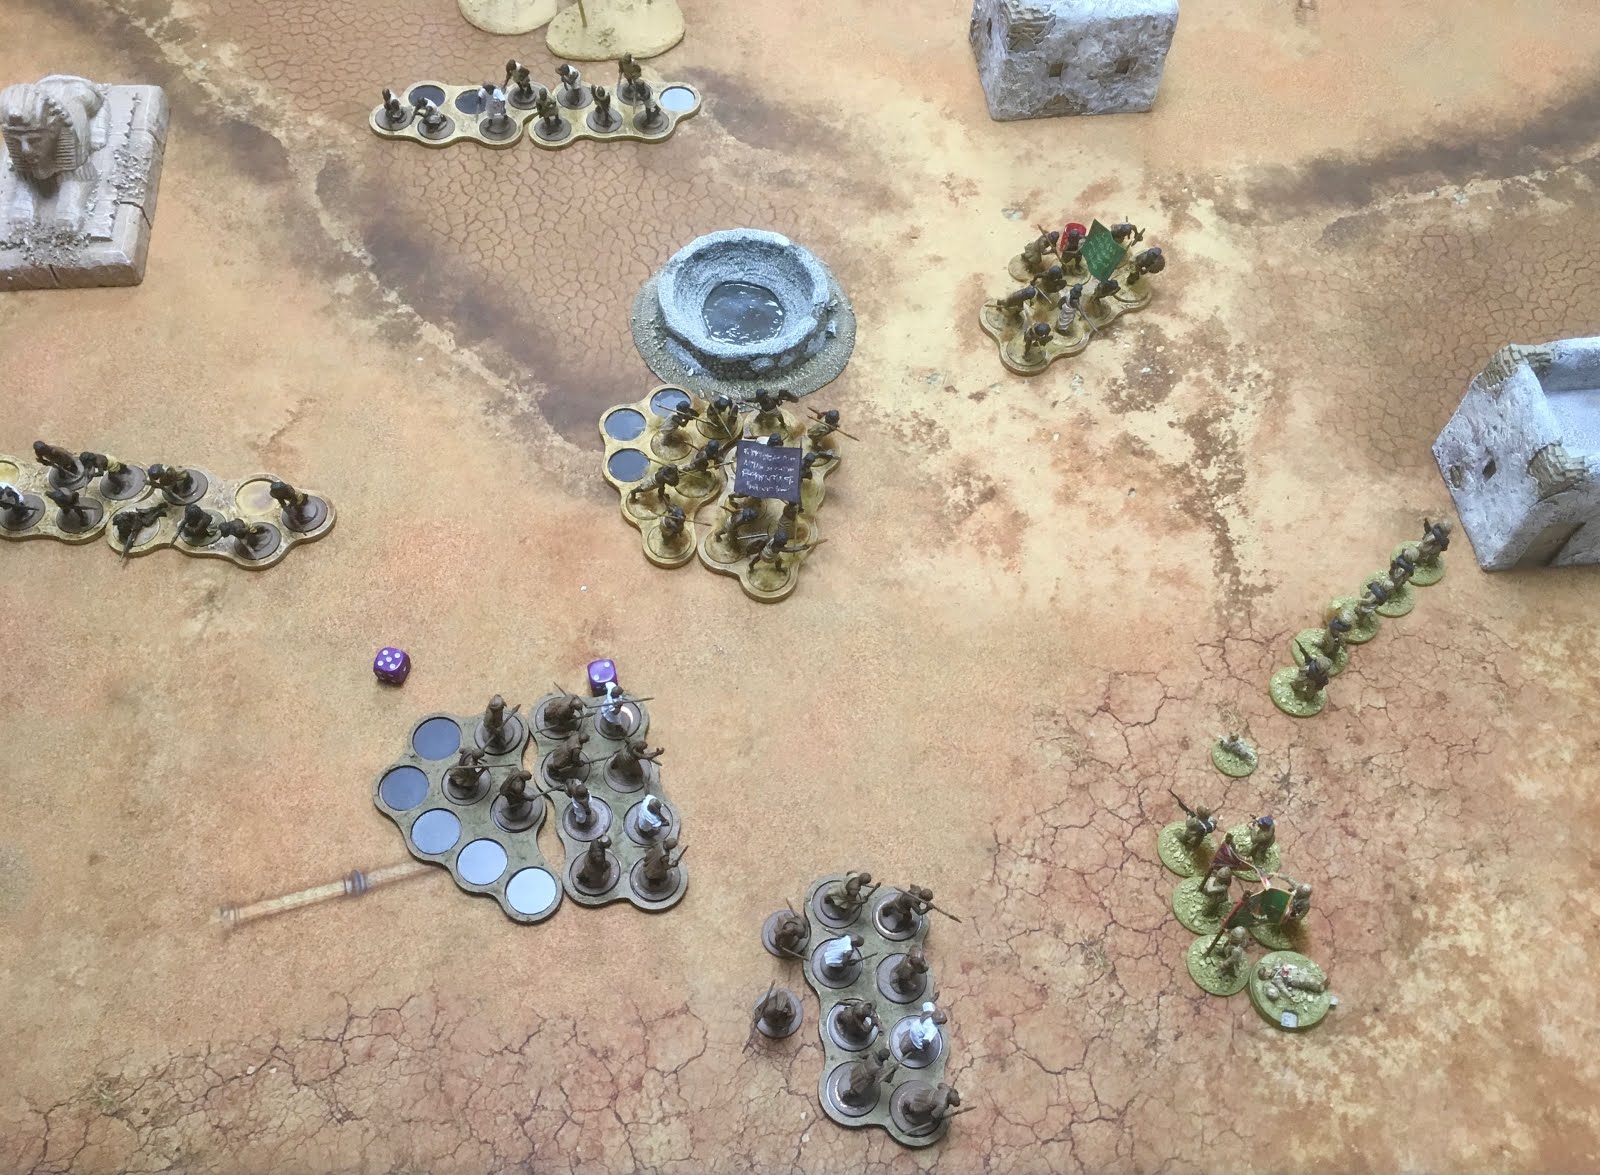
The game started with my Field Force deployed to attack the lightly defended village with George's stabby spear armed guys rushing up to reinforce the village.

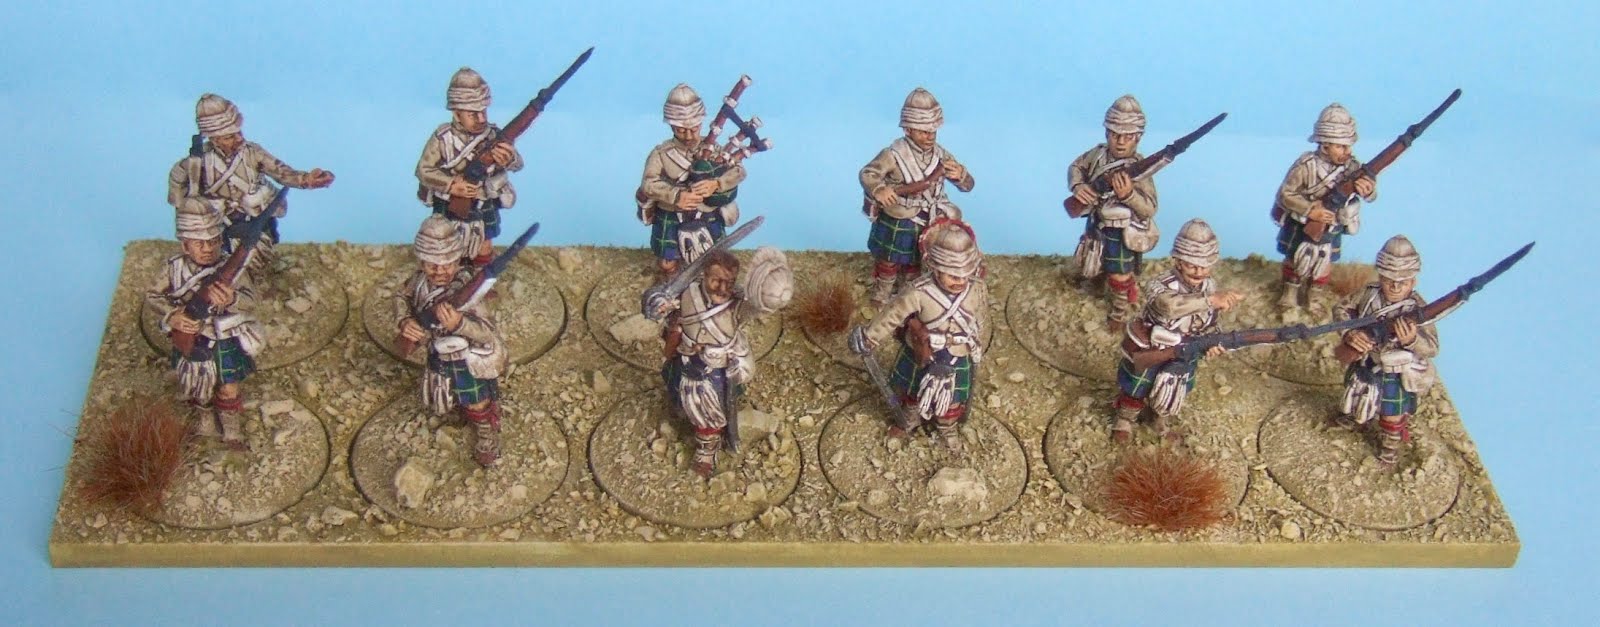
My artillery opened up causing 3 points of damage to the first building, whilst the 92nd Highlanders 66th Foot and 15th Sikhs all advanced towards the village.  The Bazingers (out of shot to the left) decided to ignore orders to advance!


On turn two my cannon failed their order to fire which was frustrating, as was the failed command rolls attempting to get the 1/66th and 15th Sikhs into Close Order. The Bazingers again refused to advance!


To add insult to injury George's Irregular Infantry rifles in the village fired at long range at the 1/66th and killed one of the brave Englishmen...

Next turn the 2/66th opened up on the Irregulars inflicting several casualties and Pinning them, the 92nd opened fire on the Beja in the neighbouring building killing one, the Bazingers moved forward(!) and the cannon fired causing a further 5 points of damage to the enemy building. The 15th Sikhs again refused to form Close Order!


Another turn and the artillery brought down the first building, destroying the unit of Irregulars within.  The 1/66th then formed Close Order and the 2/66th and 92nd concentrated their fire on the Beja in the second building, Pinning them and subsequently seeing them Retreat after a failed Rally roll.

At this stage I was feeling reasonably confident, although once again the 15th Sikhs refused the form Close Order which with half the Mahdist army advancing on them was somewhat concerning...


With his reinforcements advancing swiftly up the table, George decided to launch one of his Beja units who had been hiding in some rough terrain at the Sikhs. Unfortunately his dice roll didn't go his way and they ended up short of their target and next turn came under fire from the 15th Sikhs, 1/66th and Bazingers, killing 11 and pinning them.


However the respite for the Sikhs was short as the main block of Beja rushed into contact! A fierce and bloody melee ensued and the noble Fierce Sikhs fought off the attacking stabby spear armed natives but lost five men doing so.

Elsewhere the cannon kept chipping away at building number two though the 92nd Highlanders now decided that they wanted a rest and refused orders to advance on the village (my calling them Jacobite sympathisers at this stage may not have helped!)


Again the Sikhs came under attack and despite once again proving quite vicious with the bayonet, the odds were heavily stacked against them and they were wiped out...


Next turn though the 1/66th and Bazingers gained a measure of revenge mauling two units of Beja and River Arab Tribal Infantry (after the initial problems of getting them to move, the Bazingers proved surprisingly valuable as riflemen, inflicting a lot of casualties on the Mahdists though the game).

Elsewhere the cannon took down building two and the 2/66th pinned the remaining Irregular Infantry who had tried to skirmish out of cover towards the hill that was blocking them shooting at the Bazingers.


With my brave lads punching holes in the Mahdists and George having some abysmal dice rolls (the Pinned Beja in the village rolled 2 on a Rally roll and routed) I had what can only be described as a "blonde moment" (I put it down to jet lag) and did something that turned the game (not that I noticed at the time!) - I advanced the 2/66th!

The brave Bazingers then beat off an attack by the remnants of one of the Beja units...


...and the 1/66th wiped them out next turn.

My mistake in advancing the 2/66th to pursue the enemy rifles was that it took them across the line of fire of the cannon, meaning that for the final three turns of the game it could not attempt to fire at the remaining buildings in the village.

This would not have been an issue if the 92nd had not once again refused to advance. If they had, they would have been able to smash down a building or two with 12 dice hitting on 4, 5 or 5 and needing to cause 10 points of damage...


As we entered the final turn this was the position. Almost all the Mahdists had been wiped out and part from the Sikhs and a few Bazingers, British casualties were remarkably light. Even the Highlanders had started to advance...


However...

Once again I had lost track of the victory conditions, all the more frustrating as I had victory in my grasp and threw it away.

I had destroyed two buildings at 3 VP a pieces, George had three buildings remaining at 2 VP a piece AND he had destroyed a unit of mine giving him an additional 2 VP and handing him victory (I gained no VP for destroying his units in this game as my focus was supposed to be razing the village).

A fun game and by and large I think my tactics would have worked and if not for the school boy error in advancing the 2/66th when I need not have bothered, I probably would have destroyed at least one more building securing victory for Her Majesty. Ho hum!

When setting up the game we decided to try the terrain deployment rules from Principles of War and these worked quite well, the rough ground slowing the advance of the 1/66th and the hill blocking line of site impacting both side. Incidentally the blue river represents a wadi as we couldn't find something more suitable last night, and making some suitable terrain for wadis etc is now high on the 'To Do" list!


Thursday 25 October 2018

North-West Frontier: 92nd (Gordon Highlanders)

When ordering the Sikhs for my British Field Force from Perry Miniatures I decided to purchase a couple of packs of Highlanders from the Sudan range. These are lovely figures, the question was which Highland regiment to paint them as?

I stuck with my initial idea of raising a North-West Frontier themed Field Force (with some flexibility to use elsewhere) and so went with the 92nd (Gordon Highlanders) who fought in the Second Afghan War and the First Boer (and as the Gordon Highlanders in the Anglo-Egyptian War and Sudan). Uniform wise they are not right for the Sudan, they should have grey jackets but perhaps in the desert the grey was covered in a light dust and looked like khaki! :-)


The figures were painted using the same dip process I have used on all my British colonial figures, the only difference being the kilts painted subsequently. These are not 100% accurate, they should have three horizontal bars not two as I have painted, but my eye sight and painting skill isn't up to that level anymore and it looks ok.


North-West Frontier: Royal Horse Artillery 9 Pounder

I managed to finish off my Perry Miniatures 9 pounder in time for tonight's game of The Men Who Would Be Kings. A nice model and fairly easy to construct, though I was initially baffled with the bits for the seats and it took some time to hunt down a picture showing them clearly.


Jim at BIG was kind enough to donate a 60mm base to the cause, as the 50mm used for the Maxims was too small, and used this to mount the gun.

Wednesday 17 October 2018

Test of Honour: Sword and Mind United!

Warbanner have been posting some interesting looking photos on Facebook for their forthcoming Mortal Gods: Test of Courage game and I must say it looks mighty tempting. Apparently it shares the same core gaming engine as Test of Honour and whilst Samurai have never really floated my boat, I thought it would be a good idea to try Test of Honour to see what I thought of the game system.

Fortunately Steve and Matt down BIG both have the game and a pile of figures for it, and the club some Japanese scenery so tonight I took a break from getting beaten up in the Sudan to head off to try not to chop my head off with a katana in the Land of the Rising Sun!

Borrowing Matt's figures, Steve offered to be my teacher and opponent and set up an 18 point a side game so we had a variety of units to play with. I had two samurai and some ashigaru with spears and some with bows. The scenario had three objectives on the board, which to win you had to capture two...


My cunning plan was to advance my samurai and spear armed ashigaru under archer cover and seize two of the objectives.


In the first major clash of the game Steve's big green samurai forced attacked my leader and forced him back inflicting a blood point!


However in the next activation my leader charged back in and slew the mighty green one in a flurry of steel! He then passed a Test of Wits to seize the first objective.


My two samurai then concentrated their efforts on Steve's second guy, whilst my ashigaru advanced down the table. After much sword play Steve's samurai was forced back but I had a new blood point.


Fortunately Steve's dice rolling was pretty abysmal and whilst both my samurai were now wounded his bow armed ashigaru were unable to finish one or both off!


I charged my spear armed ashigaru at Steve's bowmen but failed to inflict any casualties. My bowmen advanced on the nearest objective and my samurai launched another series of acts on his remaining samurai, cutting him down!

As I had killed both Steve's samurai I had won the game!

I must say this was a lot of fun and thanks to Steve for the game and Matt for lending me his figures. The game is quite fluid and ebbed and flowed quite nicely, I liked the randomness of the activation system and some of the challenges it threw up on the decision making front. Steve was pretty consistent at rolling bad dice which helped me no end!

Whilst I'm not sure whether I want to start collecting Test of Honour figures (though I have always had a yearning for the Dixon Legends of Nippon range) I think the game was fun enough that I'll probably take the plunge with Mortal Gods: Test of Courage when that comes out....

Saturday 13 October 2018

The Men Who Would Be Kings: Till the Watchful Bugles Play...

A belated report from the Sudan and another The Men Who Would Be Kings battle fought against George and his Mahdists down at BIG on Wednesday. We decided to try the first scenario we played in August, 'It's Awfully Quiet Out There...', now we had a better grasp of the rules.

As we both have bigger Field Forces we increased the scenario points values from 24 Native and 18 Imperial to 36 and 27, this allowed me to pick three units of British Regulars, one of Fierce Sikhs and  one of Unenthusiastic Bazingers. We also decided to use the terrain rules from Saga as TMWWBK is somewhat vague on this score and George placed a couple of hills on the table that broke line of sight. Wanting clear fields of fire I decided not to place any terrain.

The scenario required me to deploy my Field Force out in column in the centre of the board first before George deploys his natives...


The Mahdists then had the first move and used the cover provided by the hills to get close in...


I decided my best course of action was to get my troops into the open desert, form Close Order and try and blow the Fierce Tribesmen with the sharp pointy sticks away before they got too close. My Bazingers would engage one of the two Irregular Infantry units George had deployed along the flanks.

No plan survives contact with the enemy, this plan didn't survive not getting contacted by the enemy!


Whilst three units moved, the Regular Infantry nearest the enemy refused to budge, as did the Bazingers meaning the Regulars on the far side exposed to the Mahdist rifles resulting with them being Pinned next turn.

The Beja then charged into the Regulars who had refused to move killing 3/4 of them in a frenzy of stabby sticks and then Pinning them.


Next turn they finished the Regulars off and the Irregular Rifles started picking off Sikhs and other Regulars. The Sikhs did manage to form Close Order and avoid being Pinned. The Unenthusiastic Bazingers decided to get involved and engaged the Rifles but did not manage to Pin them.


The Beja on the far side began to close in and whilst I managed to unpin the Regulars, the close proximity of the sharp stabby sticks meant I was faced with a choice of Firing or trying to form Close Order (which would have restricted the arc of fire for the unit in the middle).

The Regulars opened fire killing a number of Beja and pinning one unit who were just an inch from charging into contact...


On the nearside the Beja charged the Close Order Sikhs. In a brutal round of hand to hand combat the Sikhs almost wiped out the Beja but suffered several casualties themselves reducing them below the number required for Close Order. Something of a Phyrric victory given the number of casualties and the proximity of the surviving Sikhs to the remaining Beja....


George decided to give them a stay of execution charging his other Beja into the two remaining Regular units, wiping one out and inflicting a number of casualties on the other.


He then polished off the Sikhs before the Bazingers had their moment of glory almost wiping out one of the Beja units with their rifle fire...


...but their position was not good with the remaining Beja advancing on them and the sole surviving British soldier.


The Beja charged the Bazingers killing 2/3 and Pinning the survivors...


...before finishing off the last British soldier.


Another charge saw the Bazinger leader end as the sole remaining soldier from the Imperial Field Force before the Mahdists took him out with a final flurry of stabby pointy sticks.


All in all a pretty disastrous evening with little, if any, plus points. The scenario is pretty unforgiving and the failure of a number of units to obey Orders or survive Pinning tests made the situation pretty dire from the beginning. That said as a classic Ambush game it was pretty much spot on with the Imperials being surprised and unable to react effectively.

We do need to sort out the terrain issue. The rules are deliberately vague but given the importance to both sides we need to come up with some solution as terrain, or the lack of it, can offer major advantages to either side (like the hills blocking firing lines in this game). Whilst I suggested it I don't think the Saga terrain generation rules are necessarily the answer and George has dug out a copy of Principles of War that has rules we can look at using next time.


Wednesday 3 October 2018

The Men Who Would Be Kings: Go To Your Gawd Like a Soldier...

Due to prior commitments George and I scheduled a Tuesday night game of The Men Who Would Be Kings at BIG and I suggested we play the Get Off My Land scenario in which the British have to temporarily occupy six sites on table. As we were playing with 36 point forces we increased the number of sites to eight.

I had read on the The Men Who Would Be Kings Forum that this was a hard battle to win and so it proved...

Initial set-up was as below, the British entering from one table edge and the Mahdists deploying any non-Tribal units, in this case George's two units of Irregular Infantry (the dreaded "snipers").


My cunning plan was to have two units of Regulars fire at the Mahdist riflemen, Pin them and have the remaining units move swiftly on the objectives. Unfortunately my bad dice rolling returned and I only killed two natives in each unit and failed to Pin either.


They returned fire killing two Bazingers and a Bengal Lancer. Both these units survived a Pin test.

Turn two saw George deploy his hidden Beja Tribal units. In the scenario they could appear in pre-noted areas of the table but not within a speed value of an enemy unit (for Tribal Infantry this is eight inches).


Suddenly the thin khaki line was faced with six units of Fierce Tribal Infantry with stabby pointy sticks! Gulp...


For the first turn of their arrival the Tribal Infantry could not take any addition actions so I had the chance to riddle them with rifle fire and hopefully Pin them.

All my units opened fire on the Beja with very limited effectiveness. One Regular Infantry unit looking for 5's or 6's for kills rolled six 1's three 2's, one 3 and just two 5's!


Out of the six Beja units (all of whom were within potential Charge range next turn) I only managed to Pin one.

The next turn George's Beja charged in forcing one unit of Regular infantry to retreat off the table...


...before destroying the Bazingers and then the Bengal Lancers!

Rifle fire from the Mahdist Irregular Infantry then Pinned the remaining two British Regular units leaving the Sikhs as the only Imperial unit able to fire.


I managed to Rally one unit of Regulars but they had two units of Beja bearing down on them...


One of which Charged into contact and forced them off the table. The other Regular unit failed its Pin test for seeing a friendly unit within 12 inches destroyed and was now on -2 (the Pin markers looked nice I thought!)


Elsewhere the Fierce Sikhs formed Close Order and despite taking some casualties to rifle fire managed to destroy a unit of Beja who charged them. Unfortunately though the stabby sticks killed enough Sikhs to take the unit strength under six and force them out of Close Order.


The Pinned Regulars were charged by another unit of Beja...


...and suffered seven casualties. Surprisingly they Rallied next turn despite being on -3. Not that it was going to do them any good with lots of Fierce Beja with stabby pointy sticks bearing down on them!


Next turn they were wiped out and the Sikhs failed their Pin test after seeing this. The Beja charged in on them...


...and wiped them out to a man!

Disaster in the desert! To be honest I can't see there is a lot that I could have done to win the scenario given the fact that the Tribal Infantry can deploy within Charge range on Turn two. You'd have to be very fortunate with your dice rolling to pin them all.

Possibly I could have put the Regulars into Close Order on turn one but that would have meant them only being able to move just four inches a turn in  game I needed to get to the objectives all over the board and in other games I'd seen the Mahdist rifles quite capable of breaking a Close Order unit through Pinning, so I am not sure that would have worked.

We both agreed that the scenario was weighed heavily towards the Tribal units (to the extent Geogre did ask me several times did I really want to play this particular scenario!) and this reinforced what I had read on the Forum. Thinking about it the scenario might work better of the Tribal infantry appeared from a table edge on a Command roll like in the A Sigh of Relief scenario, all the Tribal units appearing so close to their opponent on turn two seems to unbalance the game.

In the scenario description the placing of the objectives is a bit vague and I could have placed half on my baseline right next to a unit with they could have temporarily occupied on turn one. I didn't think that was what the author intended so didn't do that.

This all said, despite the fact it was clearly only going to end one way (especially given the way my dice were performing), it was still a fun game and George and I are now hunting down old colonial wargame scenarios on the internet to use in addition to those in the rulebook.