To start the New Year, a battle report from the final game of 2022 - a 110 point a side Sharp Practice clash between the Kingdom of Italy and the Austrian Empire in the snows of the Alps! In the scenario, set in the winter of 1813/14 the Italians are retreating from Germany across the mountains back into Italy through an Alpine Pass only to find it blocked by an avalanche. The Italian Zappatore move rapidly to try and clear the obstacle before the main force arrives...
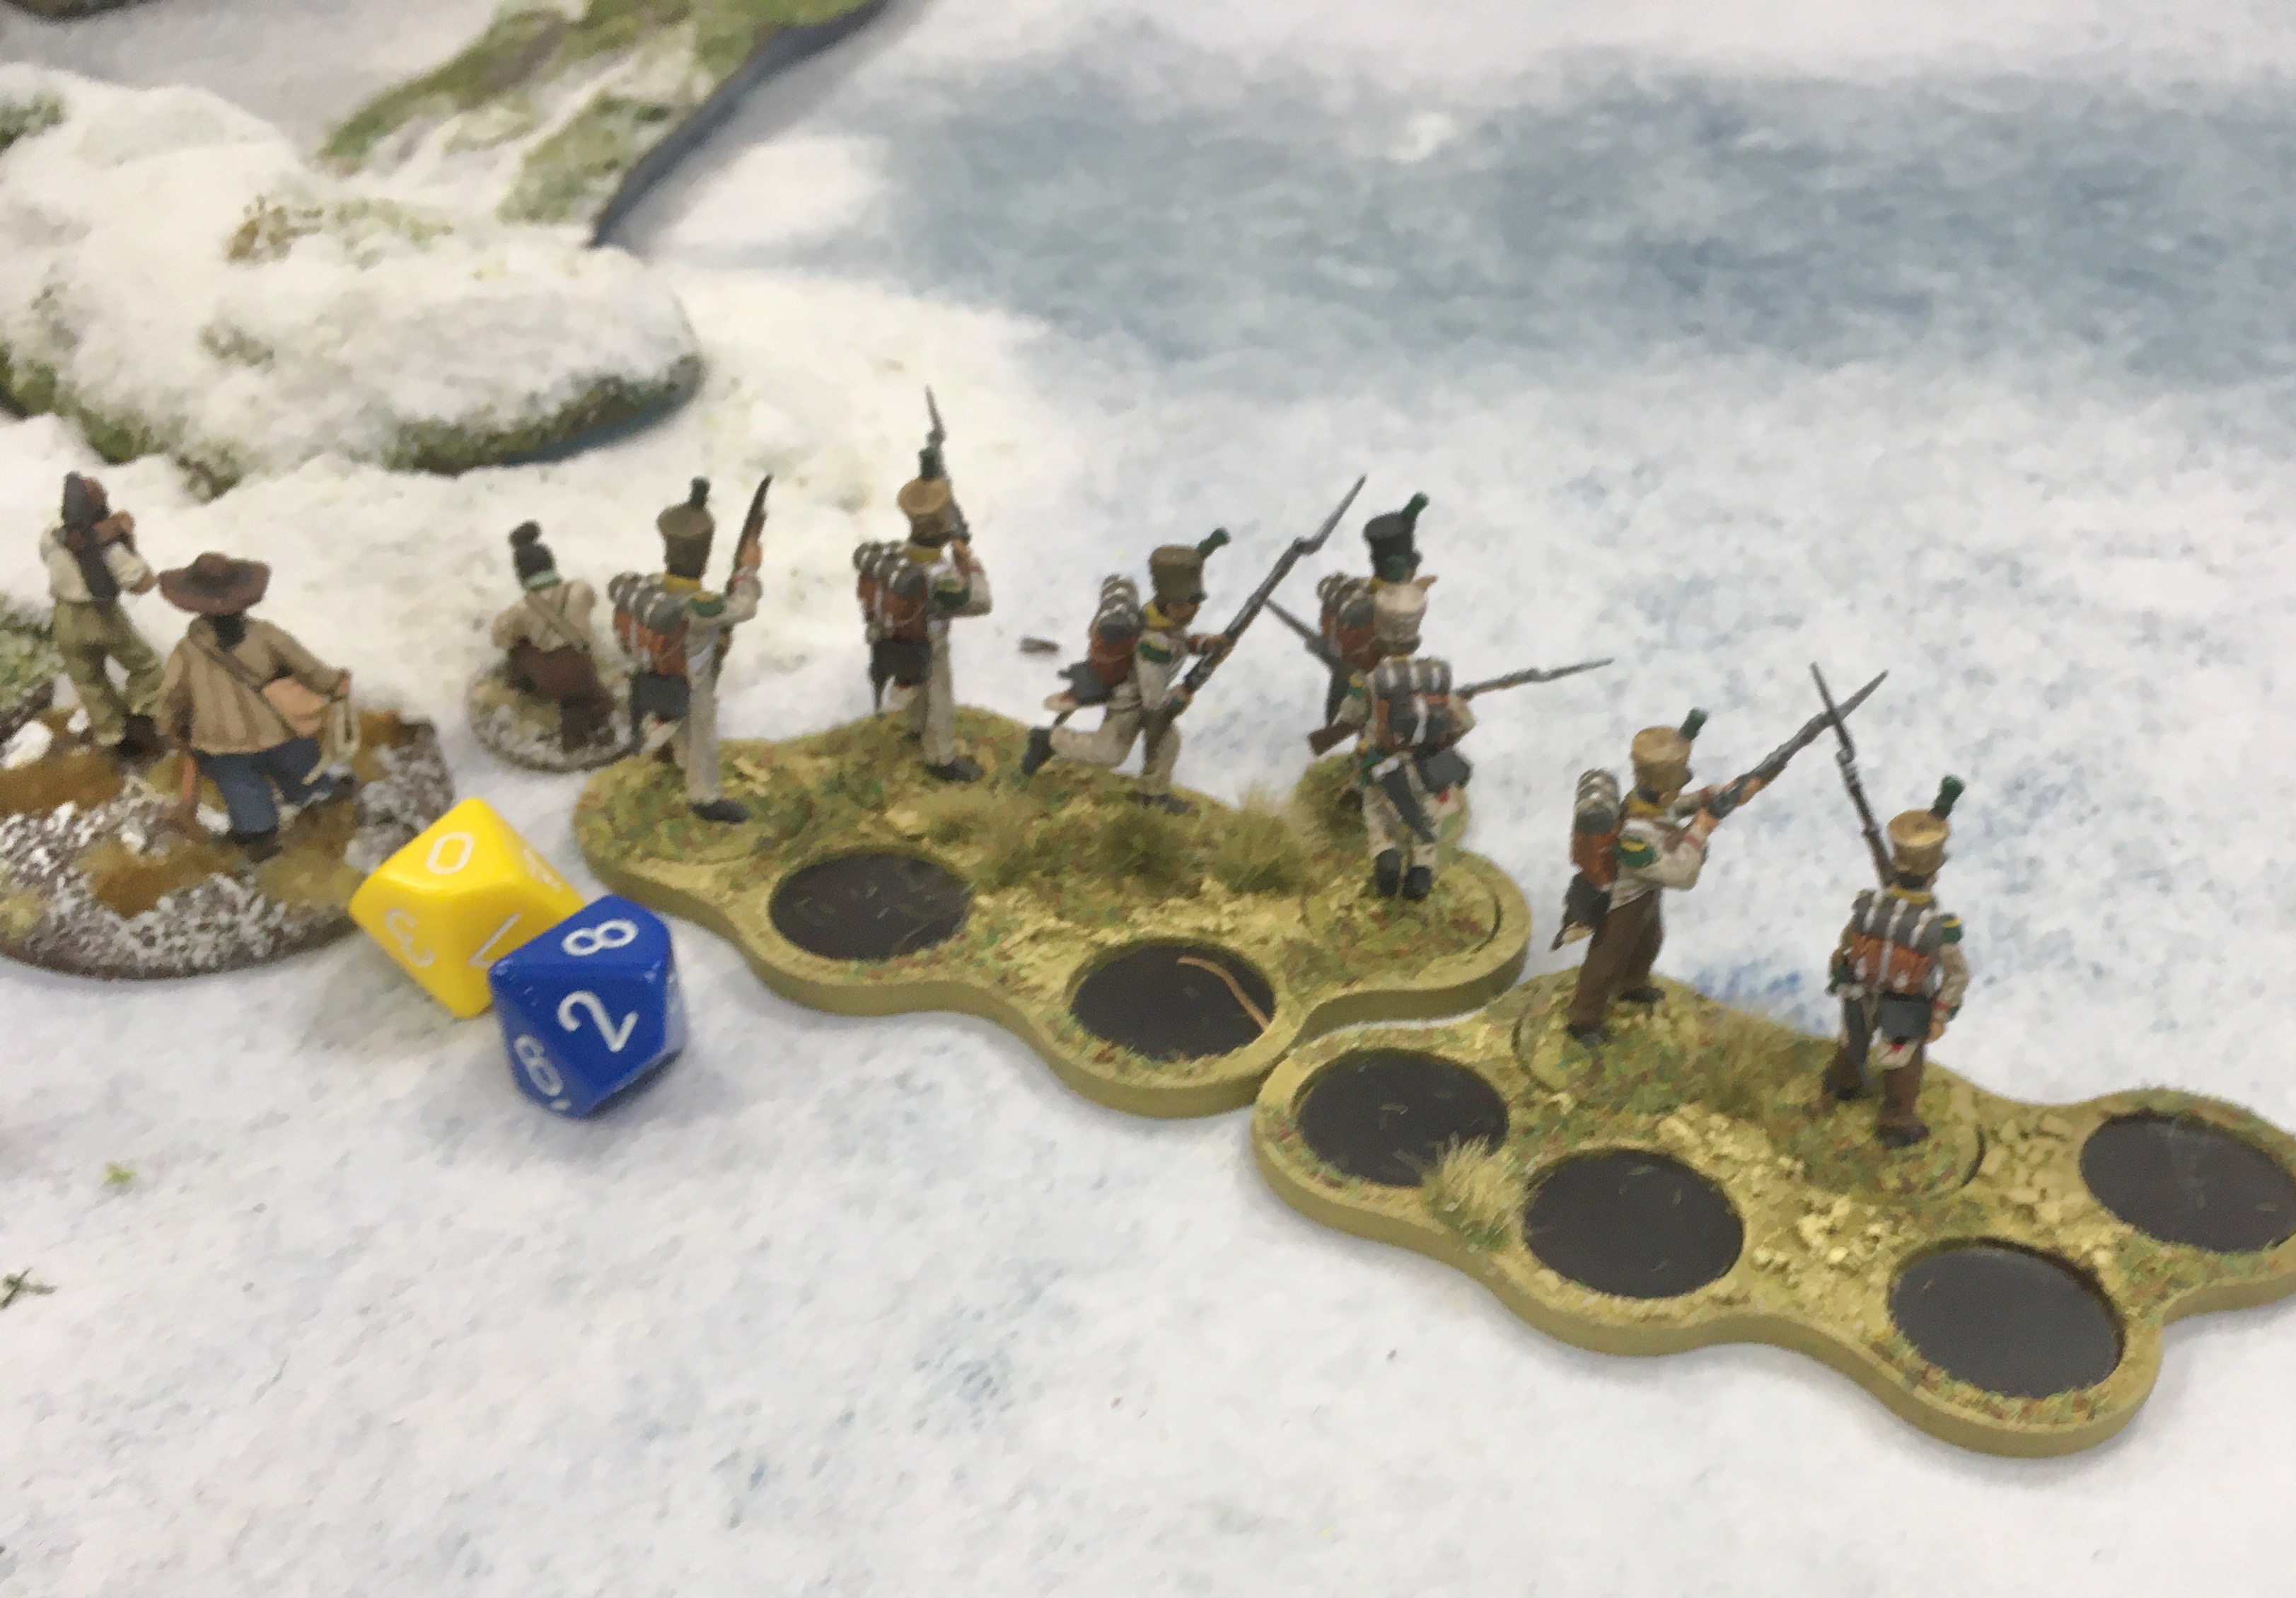
Which of course they begin to do remarkably promptly, Tenente Conte leading two groups of Granatieri and Tenente Tardelli two groups of Fucilieri towards the mass of snow.
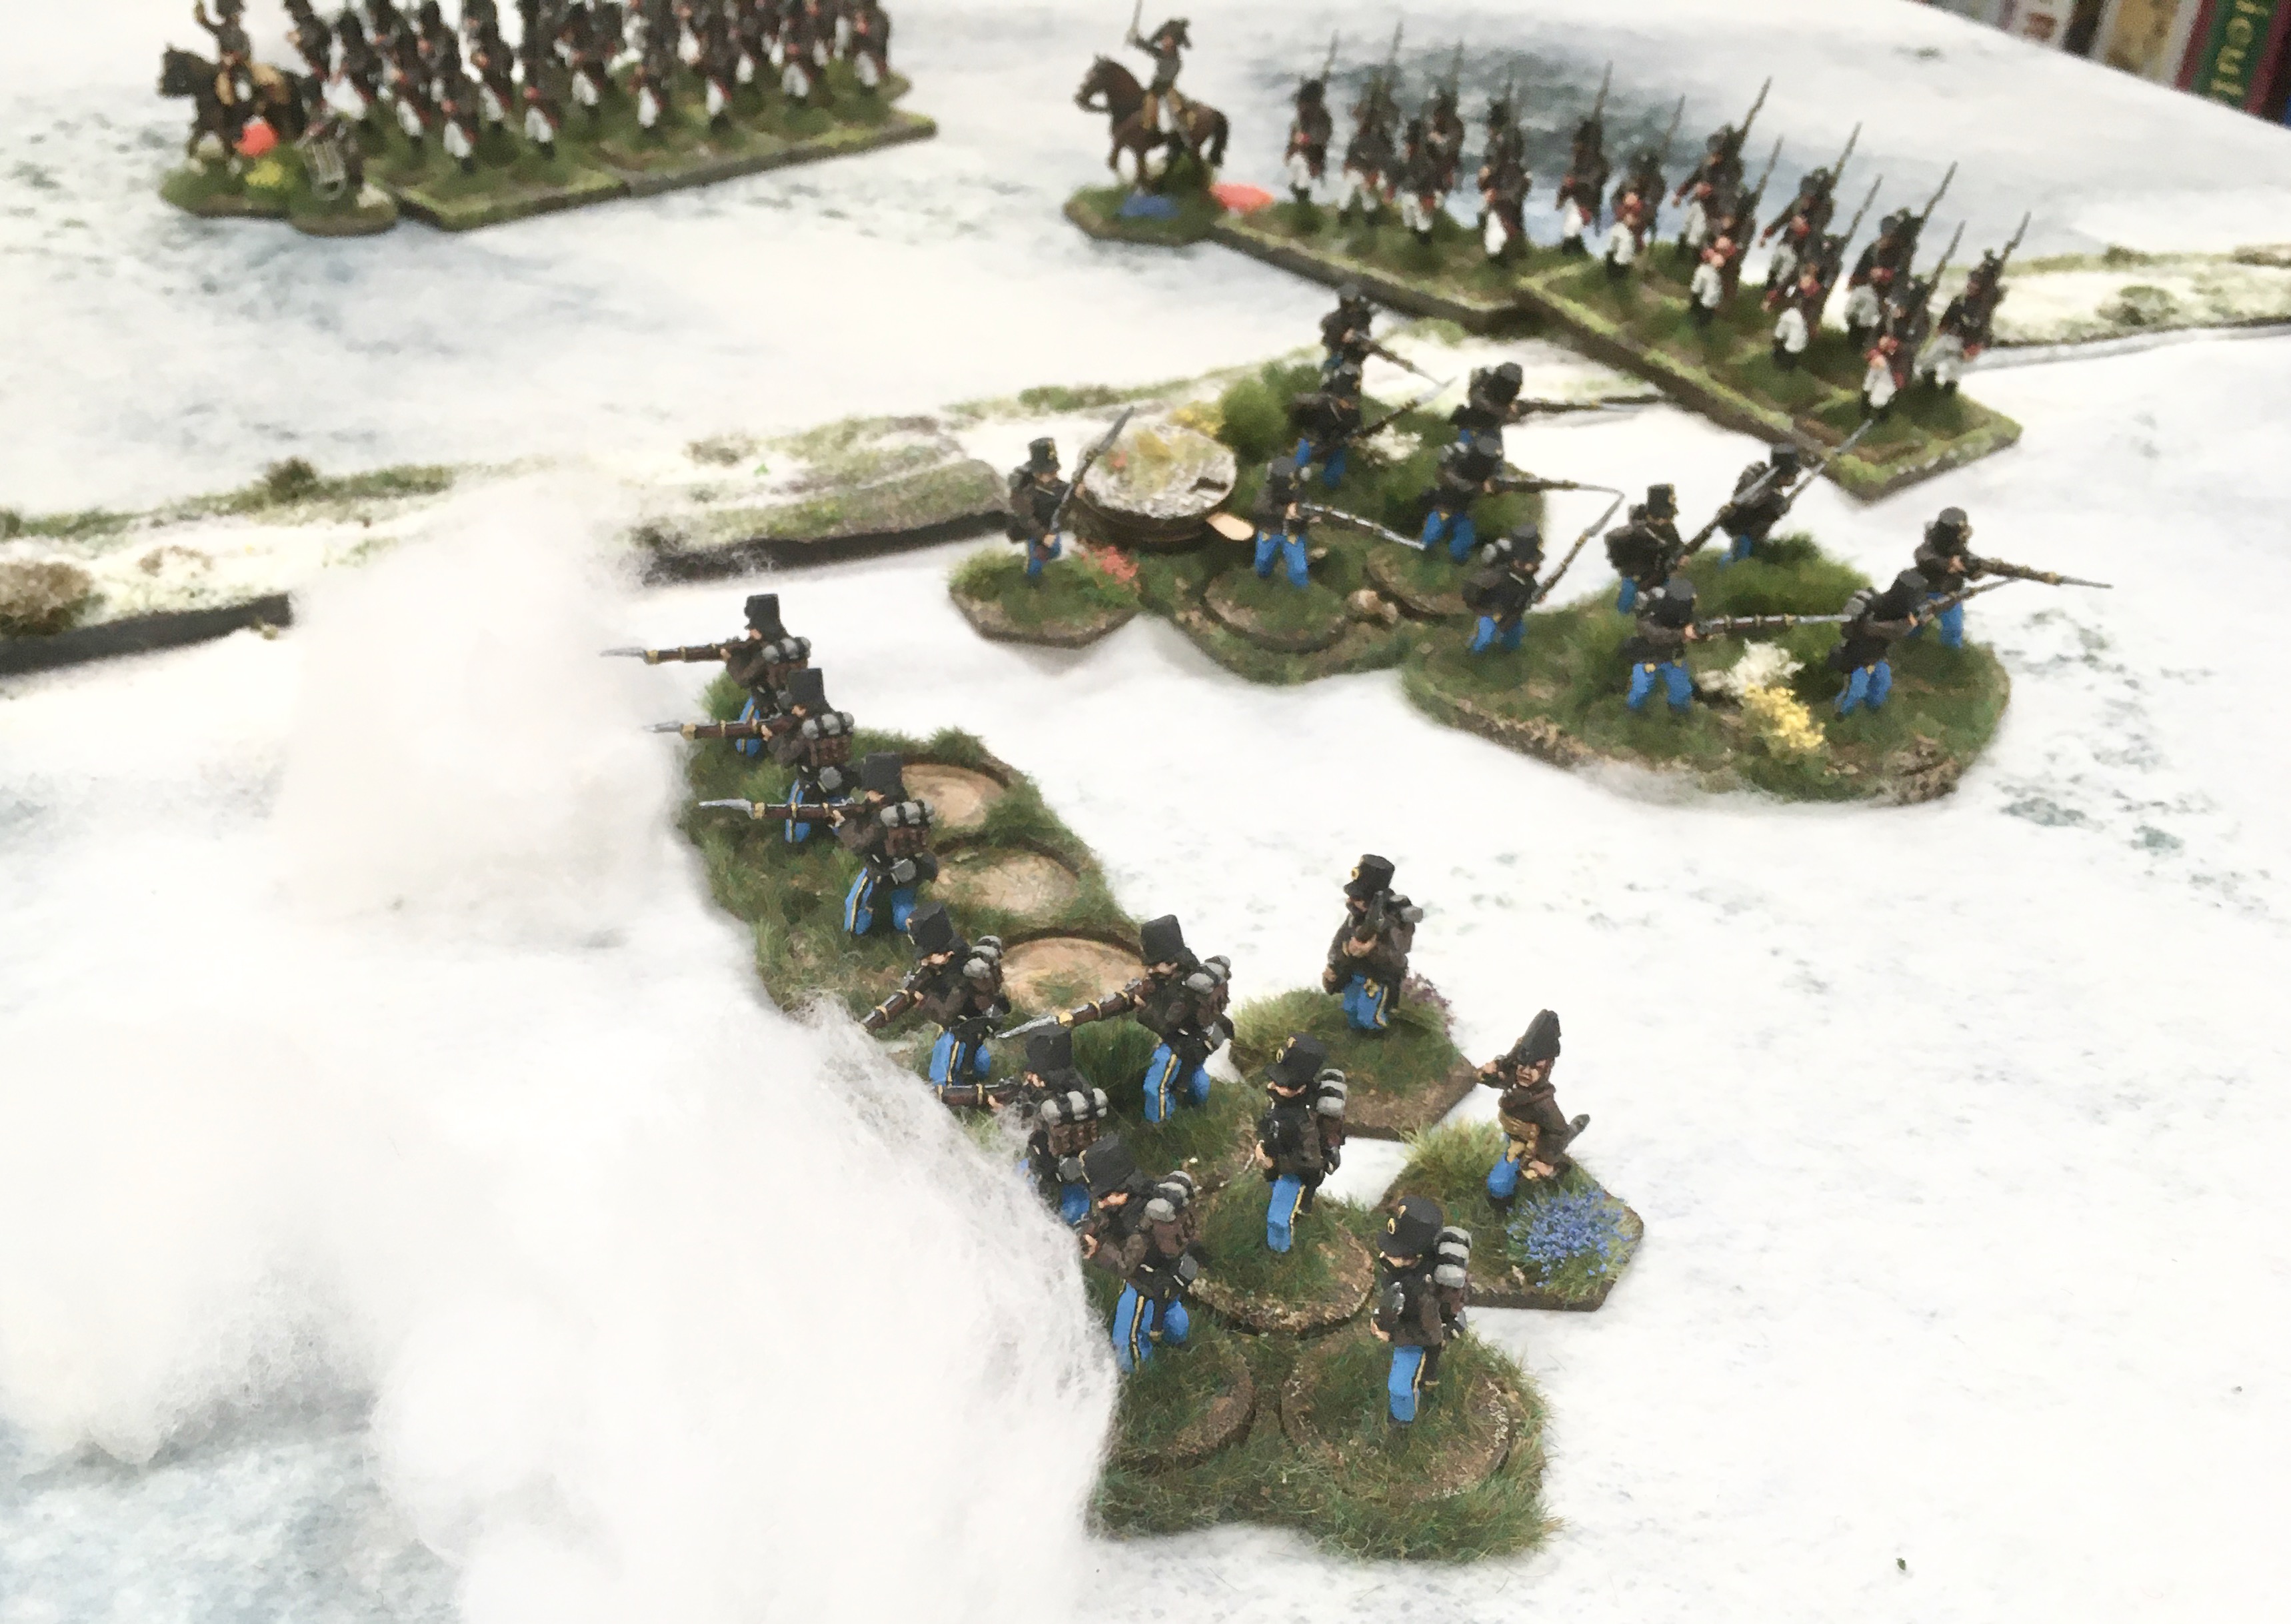
The Volteggiatori Fanteria Leggera guarding the sappers spot movement at the opposite end of the pass - Austrian Landwehr!
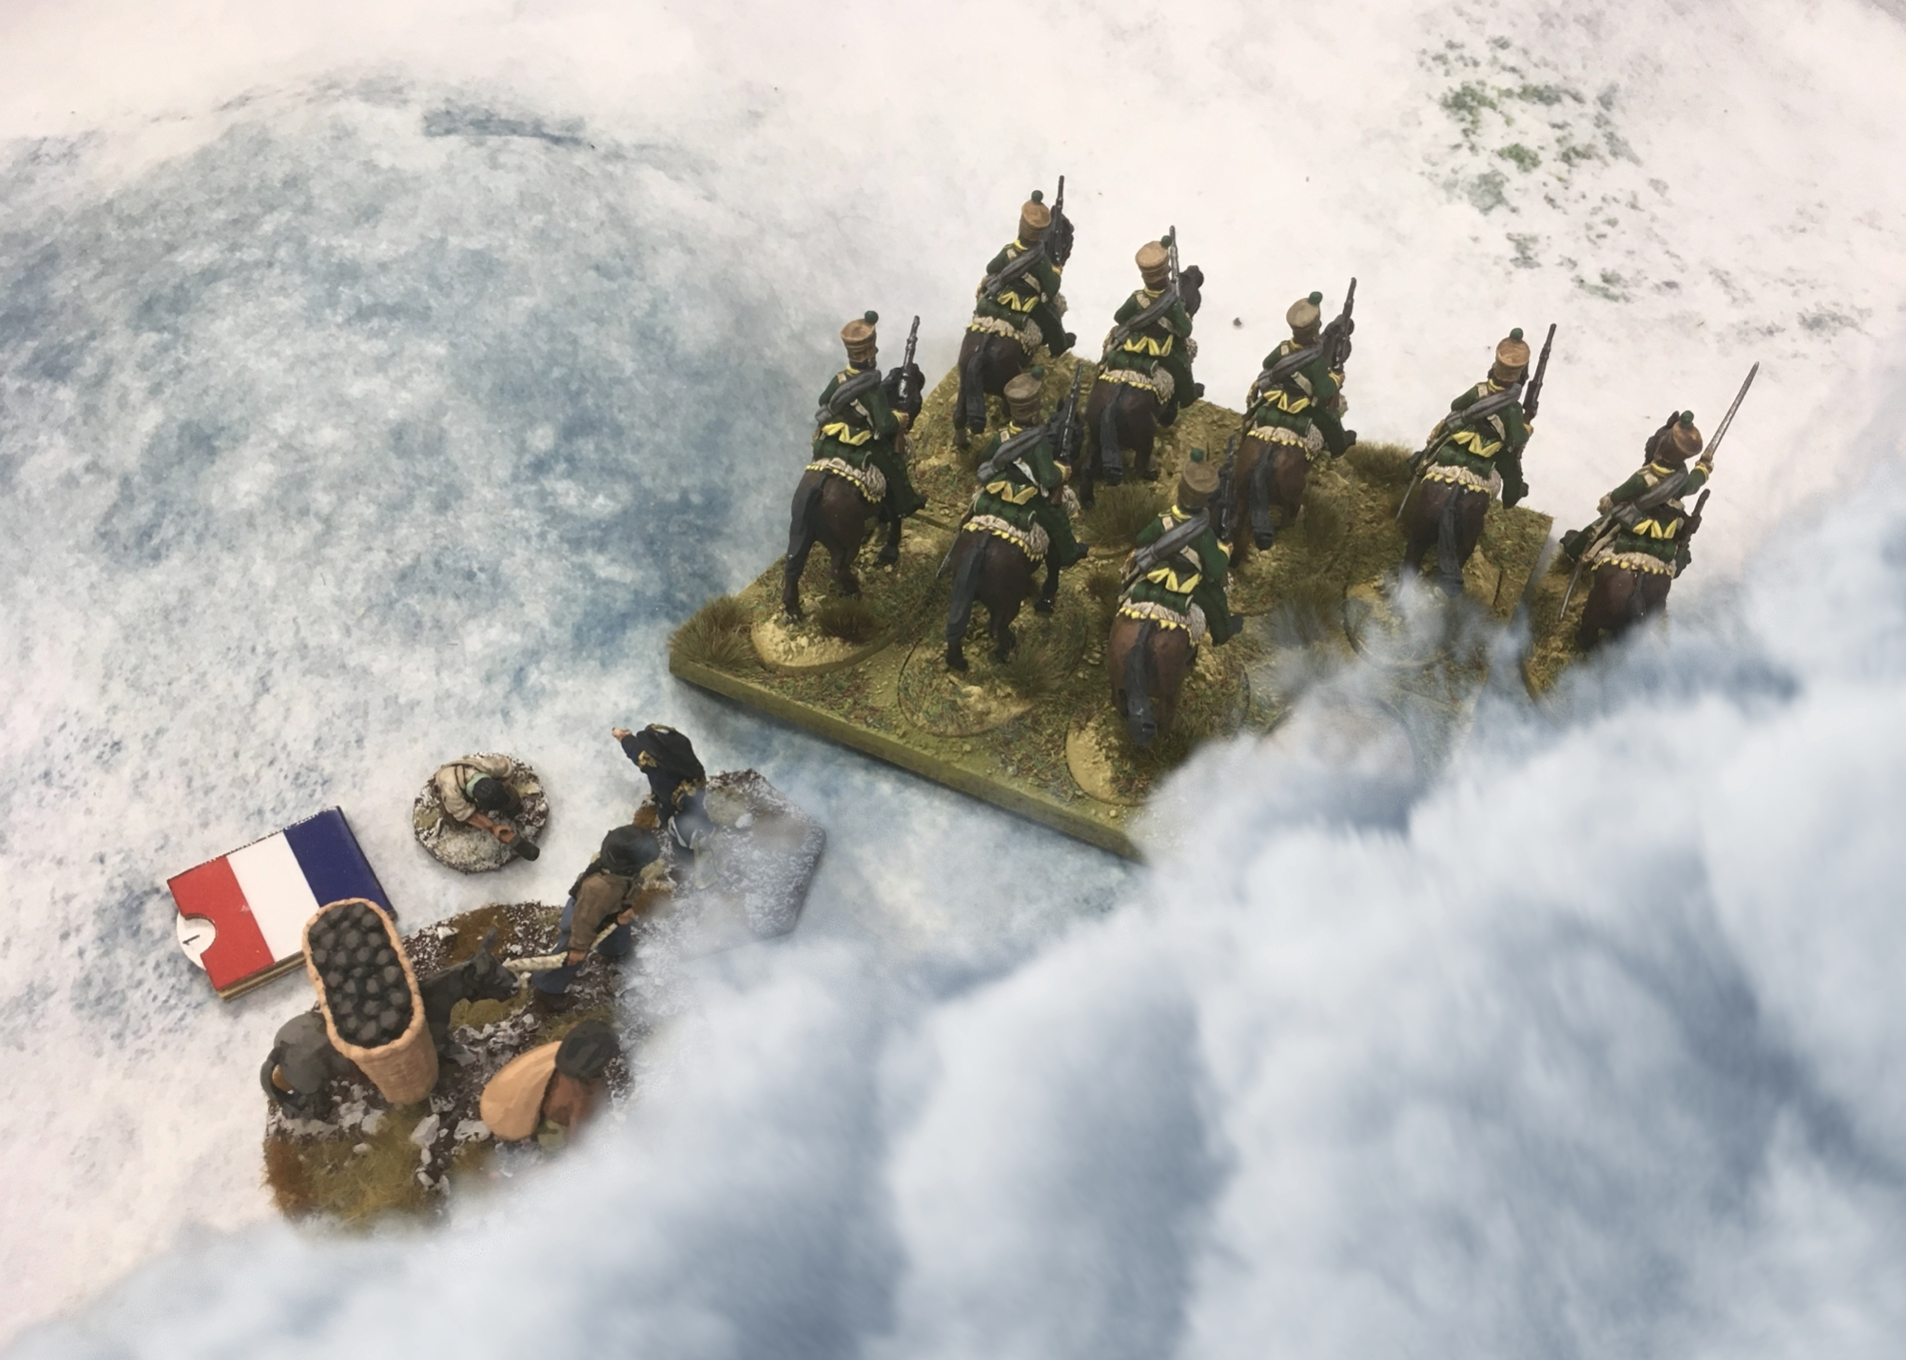
More Italians then arrive, Sergente Altobelli with his Cacciatori a Cavallo...
Emboldening Tenente Baresi to advance his Volteggiatori Fanteria Leggera and give the advancing Austrians a volley of hot Italian lead!
The Volteggiatori fire shocks the Landwehr and their commander, Leutnant Anton Bruckner is lightly wounded. First blood to Italy!
Then out of the mist the musical sound of more Austrians arriving - Lieutenant Franz Schubert with a group of Cheveauxleger cavalry!
Whilst the weather was not a problem this time around, the terrain conditions were treacherous and if a chapter end occurred (when the Tiffin card is pulled first in a turn) then an avalanche would occur...
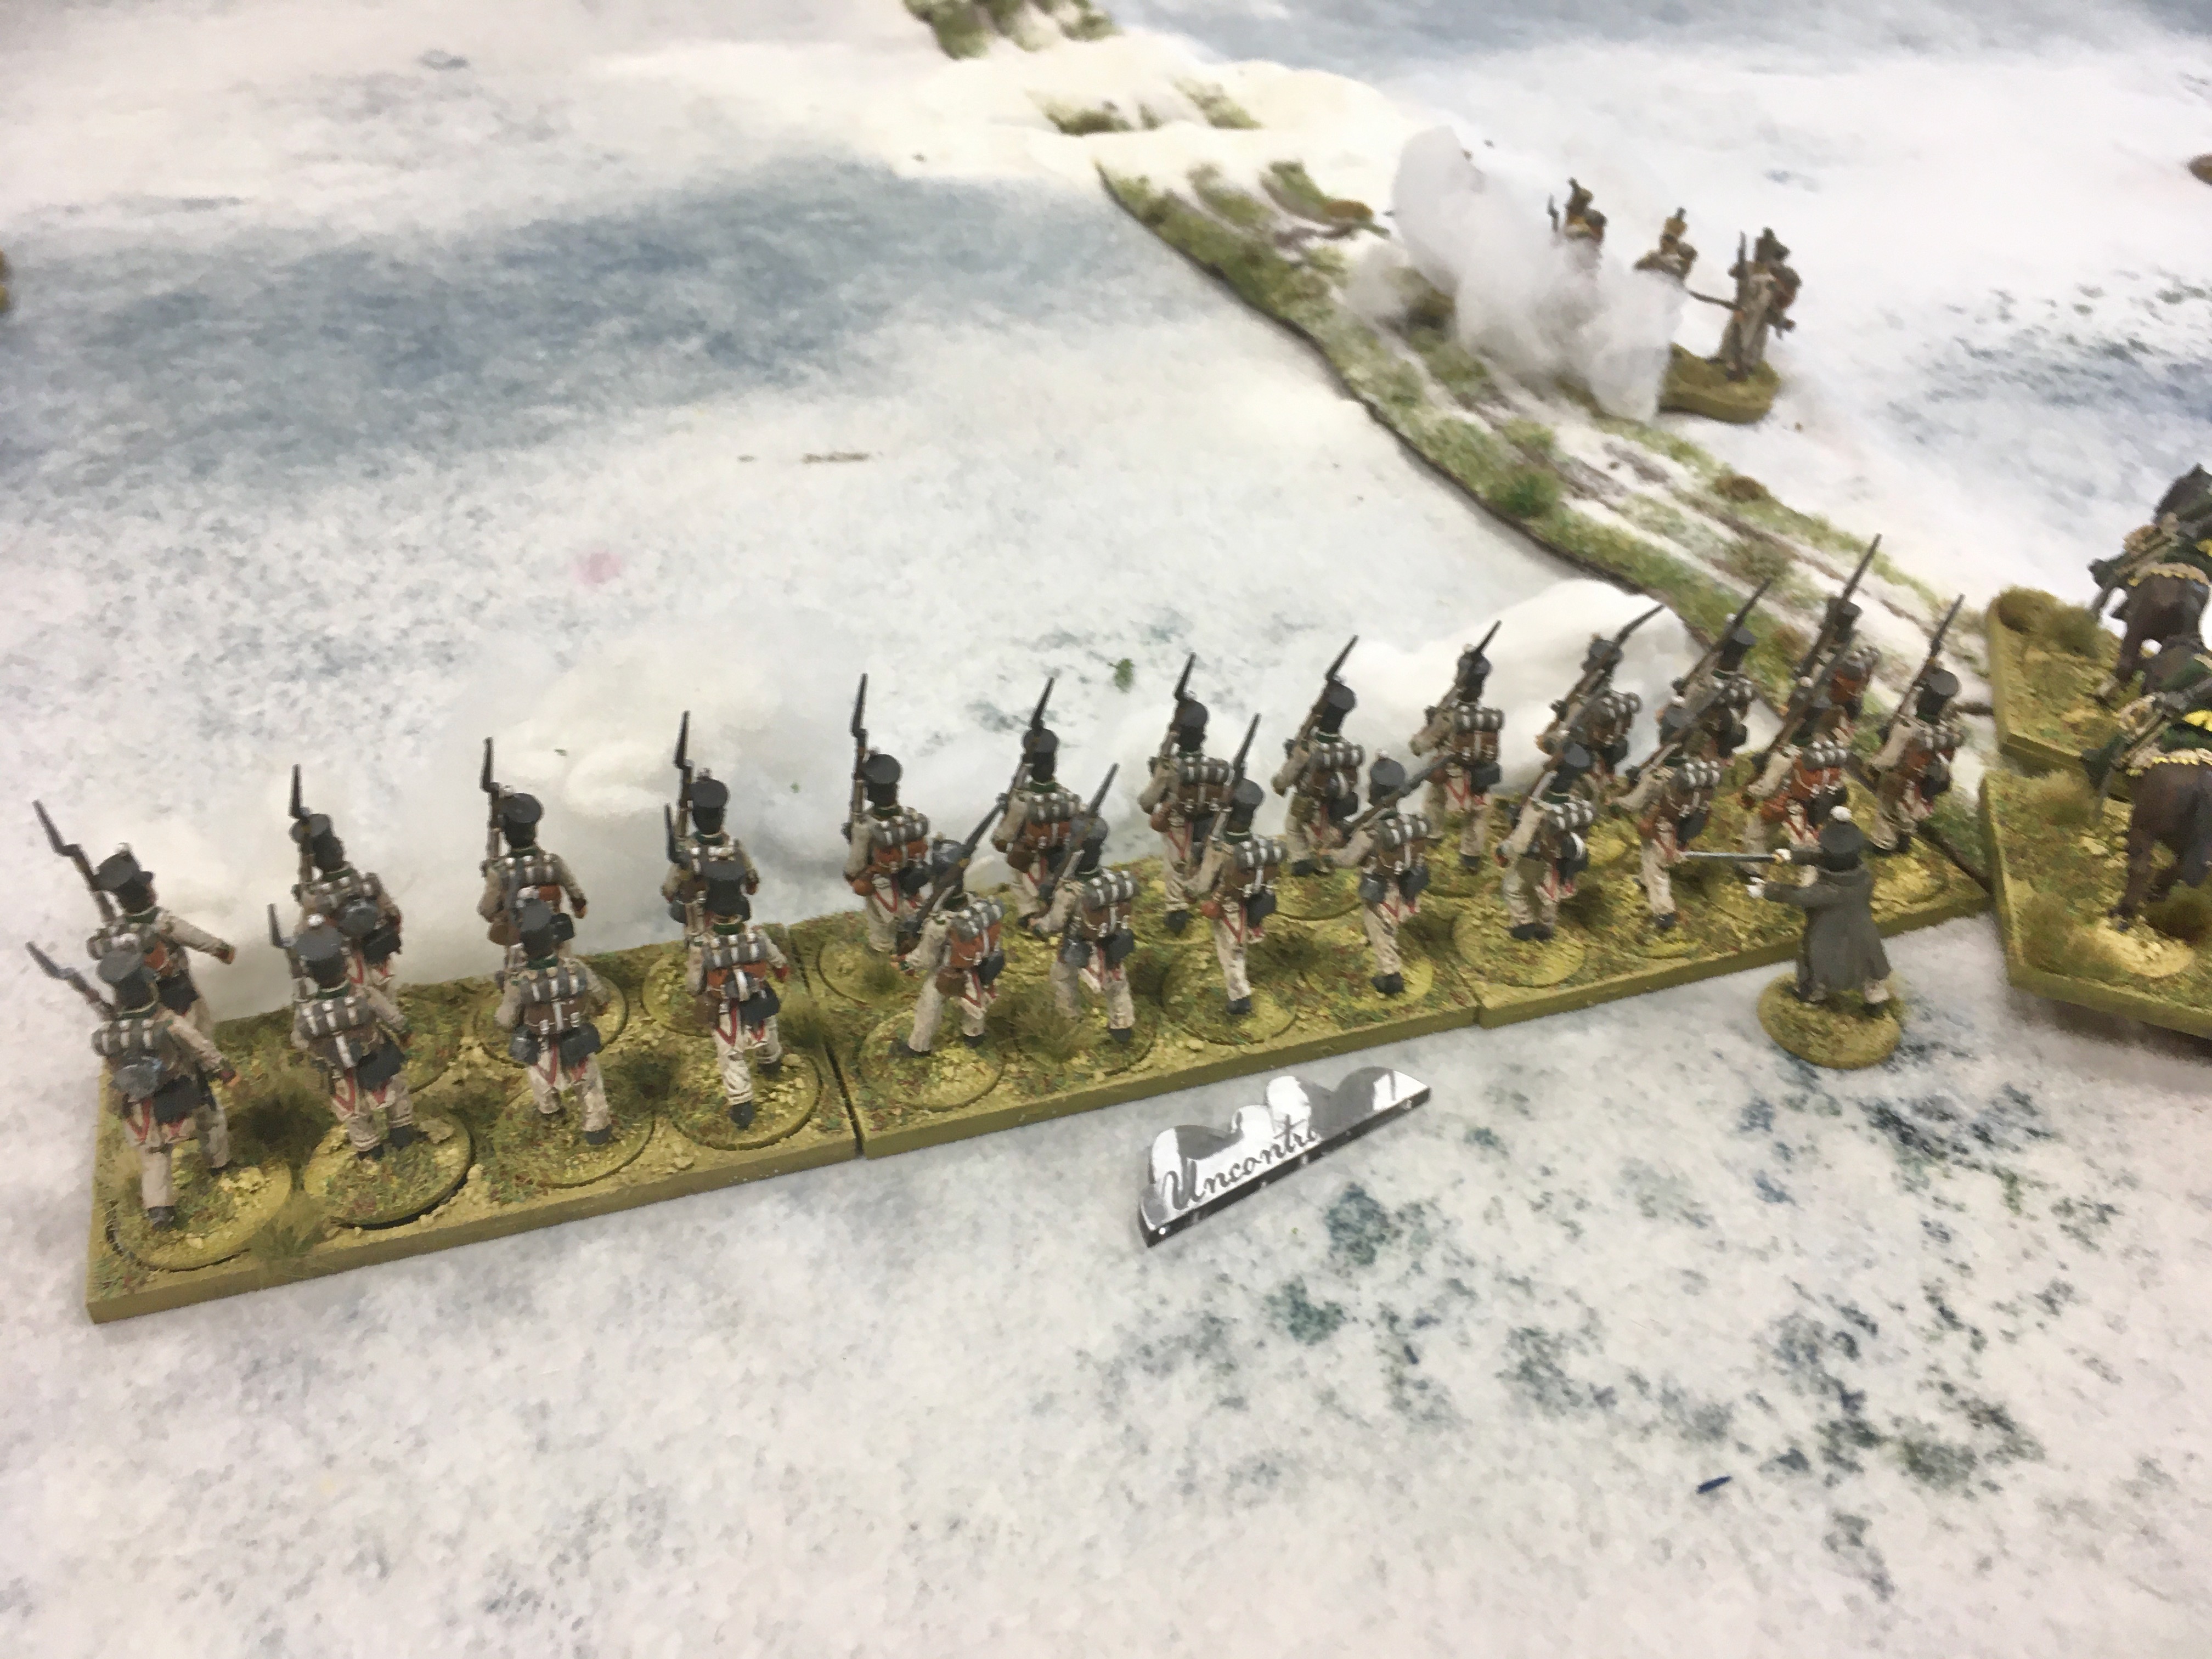
Which of course it then did, the snow sweeping down on the newly arrived Volteggiatori Fanteria di Linea of Primo Corporate Zoff who sees six of his men swept to their doom!
The avalanche also hit the Granatieri with four of Conte's grenadiers lost to the treacherous snow - not a shot fired by the Austrians and the Italians have already lost ten men!
More Austrians then arrived, three groups of Landwehr led by the Austrian force commander Hauptmann Franz Liszt...
Followed by two groups of Grenzers led by Leutnant Joeseph Haydn who immediately orders them to open fire on the Italian light infantry skirmishers!
One of the Volteggiatori Fanteria Leggera falls dead and his comrades take Shock.
More Grenzers then apprear. Three groups commanded by Leutnant Gustav Mahler, who orders his men to fire on the other group of green coated Volteggiatori...
Their shooting is not as accurate, but the Volteggiatori take some Shock and then see Schubert order his Cheveauxlegers forward!
Deciding discretion was the better part of valour, Tenente Baresi ordered the Volteggiatori back and they managed to avoid the cavalry charge.
The Volteggiatori Fanteria di Linea move up to protect the flank of the Zappatore who are doing a sterling job shovelling snow (a task of 30, they had reached 18 in two turns).
Mahler's Grenzers fresh from breaking the other group of Volteggiatori Fanteria Leggera opened fire on the Italian line skirmishers...
Killing two more of Primo Corporale Zoff's Volteggiatori Fanteria di Linea and inflicting Shock on the surviving Italian skirmishers.
Seeing the annihilation of the skirmishers to his front and another close but failed attempt by the Austrian horse to ride Baresi and his men down, Tenente Tardelli snaps his Fucilieri into line and fires a volley at the Cheveauxleger...
One of the Austrian horsemen falls dead into the snow.
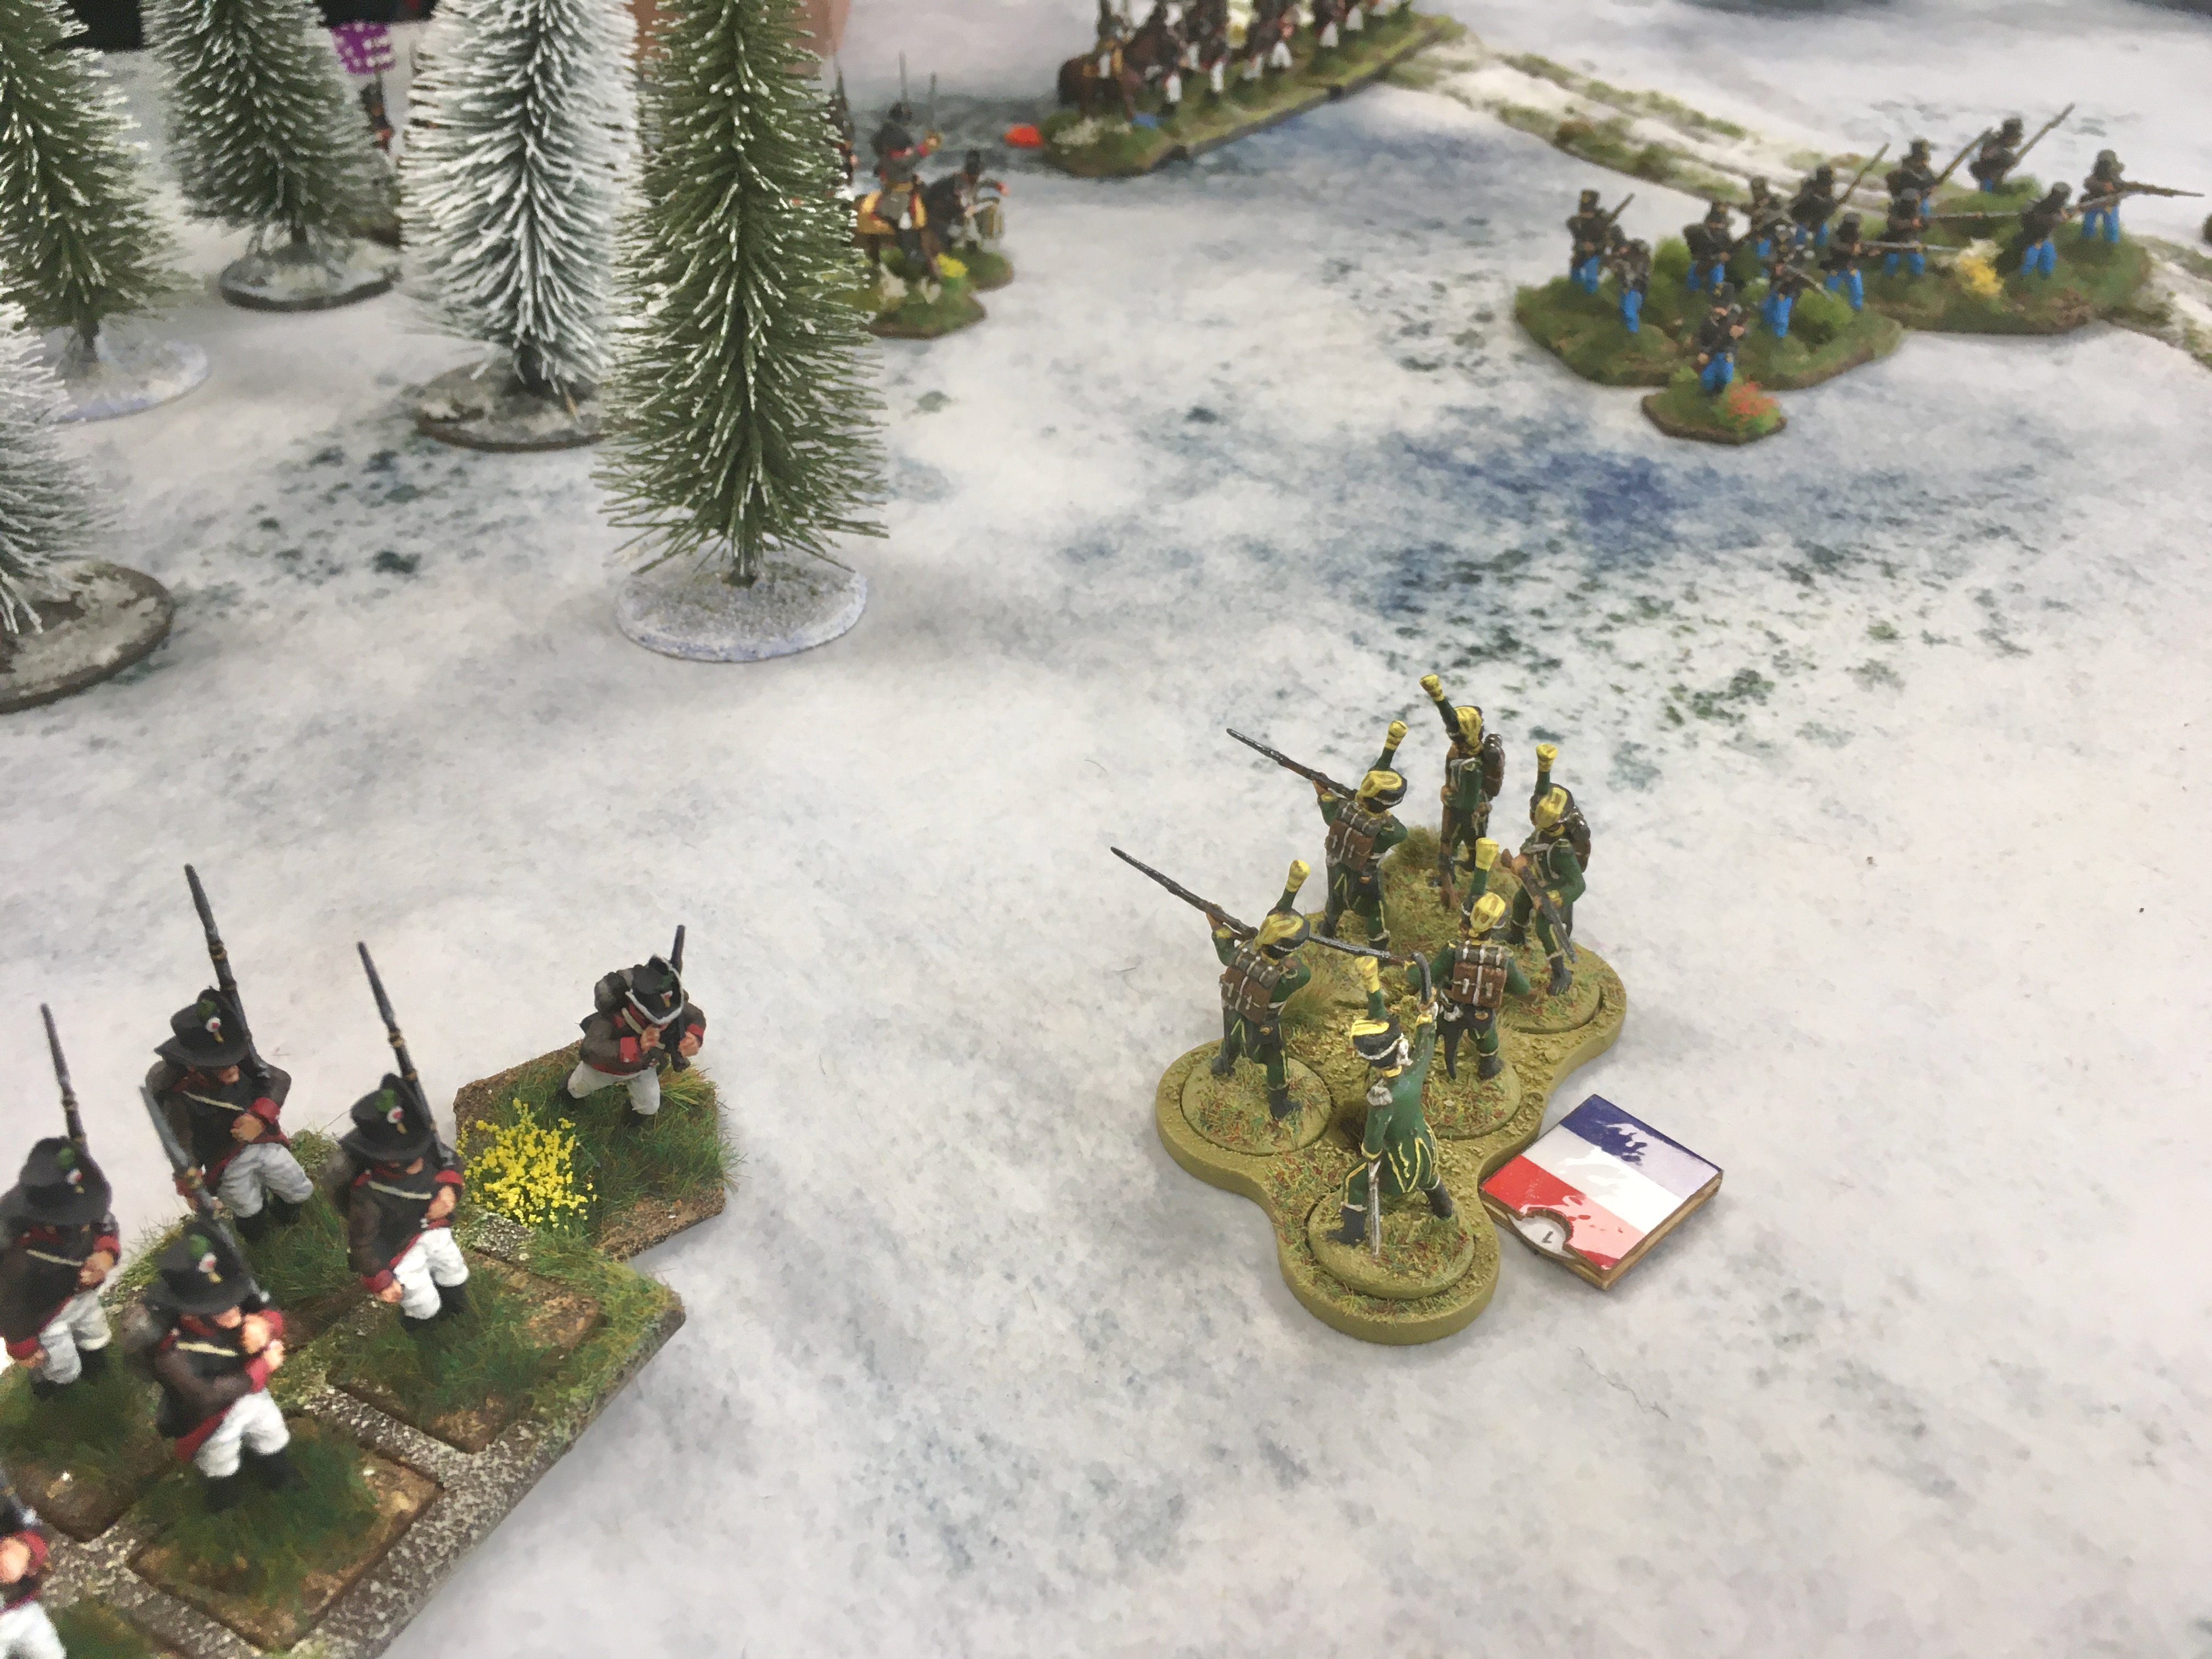
At last Capitano Rossi arrives with three groups of Fucilieri and some useful support options, including a Cantinière.
Spotting the threat of the Cheveauxleger on the Italian left, Primo Corporate Zoff orders his men to ignore the threat of the Grenzers to their front and fire at the Austrian horse...
Whilst they did not inflict a casualty, they piled Shock into the astonished Cheveauxleger forcing them to fall back.
Inspired by the success of the Volteggiatori - or maybe the Grenzers advancing towards them, the Zappatore finished clearing the snowy obstacle. The road was now free for the Italians to advance down to safety - if the Fucilieri could clear the Grenzer and Landwehr to their front.
Having evaded three attempts by the to rise his men down, Tenente Baresi orders his Volteggiatori Fanteria Leggera to fire into the Cheveauxleger...
Killing one more horseman they piled more Shock into the enemy horse breaking the Cheveauxlegers. Until the Austrian cavalry cleared all their Shock off they could no longer advance towards the enemy.
Unfortunately for the Italians Tenente Tardelli was unable to bring his Fucilieri back under control after their volley at the Austrian horse and they loosed another volley to their front...
Killing one of Zoff's men and inflicting Shock on them...
And three of the Zappatore who fled the unexpected attack from their rear!
With Phil and Jenny commanding the Austrians, the Italian force was led by myself and a very experienced Sharp Practice gamer (who we will not name, let's call him Andrea Corvo to spare his blushes) who using some dubious rugby analogy suggested Baresi and his men make a dash through a gap in the Austrian line in an attempt to reach safety...
What Signor Corvo seemed to have forgotten was the Austrian "rugby team" were armed with muskets and the Landwehr promptly wiped out the Volteggiatori Fanteria Leggera leaving a wounded Tenente Baresi clearly wondering where the ball had gone!
Despite the setbacks, and a plummeting Force Morale, the Italians still had enough bodies - and muskets - left to make life awkward for the Austrians.
Still unable to bring his Fucilieri under control Tenente Tardelli was relieved that there were no friendly troops to his unit's front, just the enemy....
Another uncontrolled Italian volley and one Grenzer fell dead, his comrades taking Shock.
Seeing the Granatieri carrying a lot of Shock, Capitano Rossi sent his Cantinière over to give them a sip of Arzente, removing a lot of their accumulated Shock.
Empowered with the warmth of the Italian brandy now coursing through their veins, Tenente Conte orders his Granatieri to loose a volley at the Grenzers to their front.
Two Austrian skirmishers falling dead, the Grenzer unit takes Shock.
Unfortunately for the Italians this success is thwarted by another avalanche! Five Granatieri, three Fucilieri and two Volteggiatori are swept away by the new wall of snow!
Along with one of the Cacciatori a Cavallo and two of the Zappatore... The Italians have lost more men to the treacherous snow than to the Austrians!
Leutnant Mahler's Grenzers continue to trade shots with the Italian Grenadiers, as Haydn brings his men around to protect the Austrian left...
Which looked a bit open and with Bergomi leading the Cacciatori a Cavallo swiftly forward...
Leutnant Haydn's men moved swiftly occupying a wood on their flank and firing at the Italian cavalry...
Knocking an Italian from his horse and inflicting Shock on his comrades.
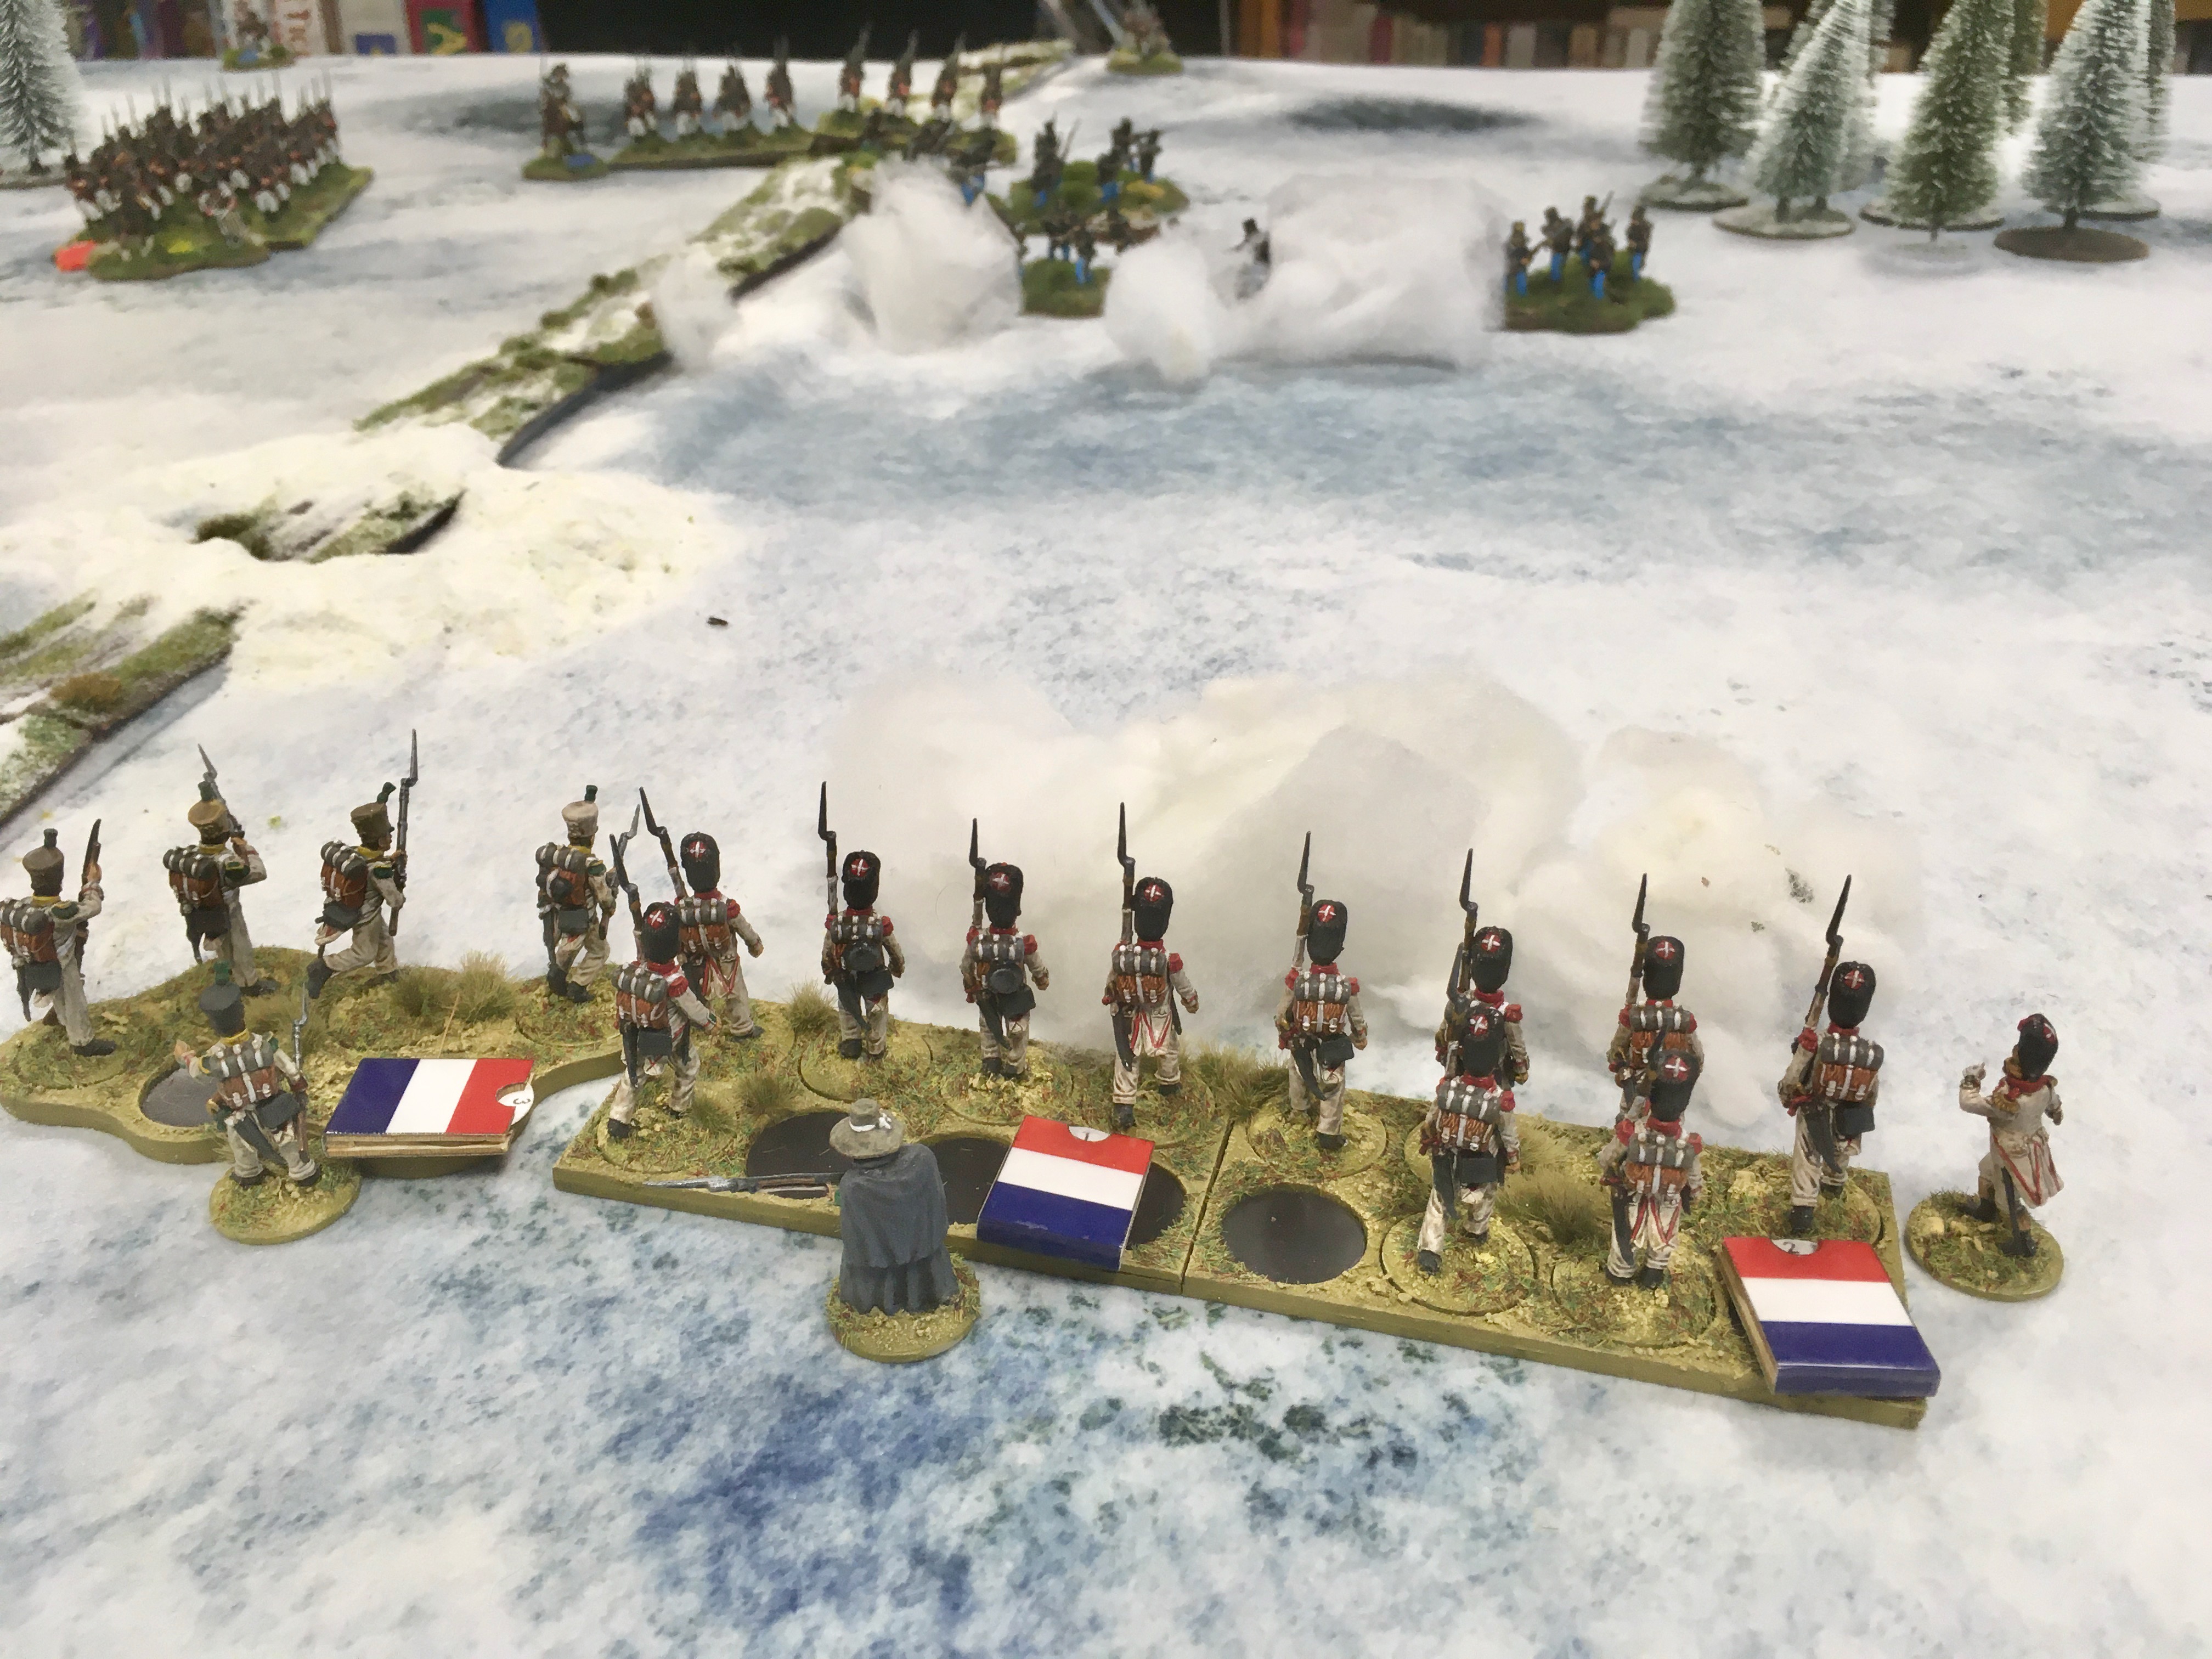
In the centre the Granatieri storm forward in an attempt to plunge their bayonets into the enemy Grenzers, but the battered Italians are not able to close with the Austrians...
Similarly the Cacciatori a Cavallo charge forward in an attempt to crash into the Grenzers to their front but also come up short.
The failure of the Granatieri to reach their enemy and plunge cold steel into them sees them pay the price as they lose two men to the Grenzer musket fire - including Tenente Conte who falls dead with an Austrian musket ball embedded in his breast...
Fortune favoured the cavalry though and they manage to charge into the Grenzers to their front, who elect to stand and fight rather than attempt to evade!
But fortune is a fickle mistress as the Cacciatori a Cavallo find out with the first round of Fisticuffs drawn and Bergomi wounded...
The second seeing seeing the cavalry defeated and forced to retreat, five comrades lying dead in the snow. A series of Bad Things happen tests saw the inevitable conclusion with the Italian Force Morale dropping to zero. Victory for Phil and Jenny, and the Austrian Empire!
A fun and enjoyable game to end 2022 on. Regardless of Signor Corvo's somewhat dubious tactical advice based on a rugby match he has once watched, the effects of the treacherous terrain on the better Italian troops (the skirmishers and Grenadiers) was telling and impacted our ability to combine the Italian units in an effective way to deal with the pesky Grenzers.


 \
\