Friday 23 February 2024

Indian Rebellion: Bengal Artillery

The final piece of the jigsaw of this part of the British Army for next week's Sharp Practice game is this 9-pounder with Bengal Artillery crew...

The model is part of a job lot I picked up off eBay but have identified as Mutineer Miniatures, they are a bit chunkier than Foundry but look ok on the tabletop.

Next on the Indian Rebellion plan is to do up some troops for the state of Jhansi to fight against the Central Field Force and protect the legendary Rani!

Wednesday 21 February 2024

Indian Rebellion: 8th (The King's Royal Irish) Hussars

To support the infantry in next week's Sharp Practice Indian Rebellion game, I painted up a group of Hussars from the Foundry Indian Mutiny range.

The cavalry poses in the Foundry range are very limited - one trooper and one officer - which is a shame, but painting their smocks in different shades of khaki has hopefully helped alleviate the uniform look. Being short a couple of figures for a Sharp Practice unit I converted one officer by removing his helmet and adding a towel wrapped cap to make an extra trooper and used a different mounted figure to act as the unit's commander. British officers often wore different uniforms to their men so no worries he looks different.

Tuesday 20 February 2024

Through The Mud And The Blood: Fracas at Farrington Gurney

By way of a change Andy suggested he dust off his Very British Civil War collection and Too Far Lardies WWI ruleset Through The Mud And The Blood, which was released back in 2009. Adapting a scenario from the Triumphant Standards supplement, Phil was cast in the role of the evil Fascist commander, oppressor of the working man, whilst I took command of the brave Communists, looking to bring the workers paradise to England.

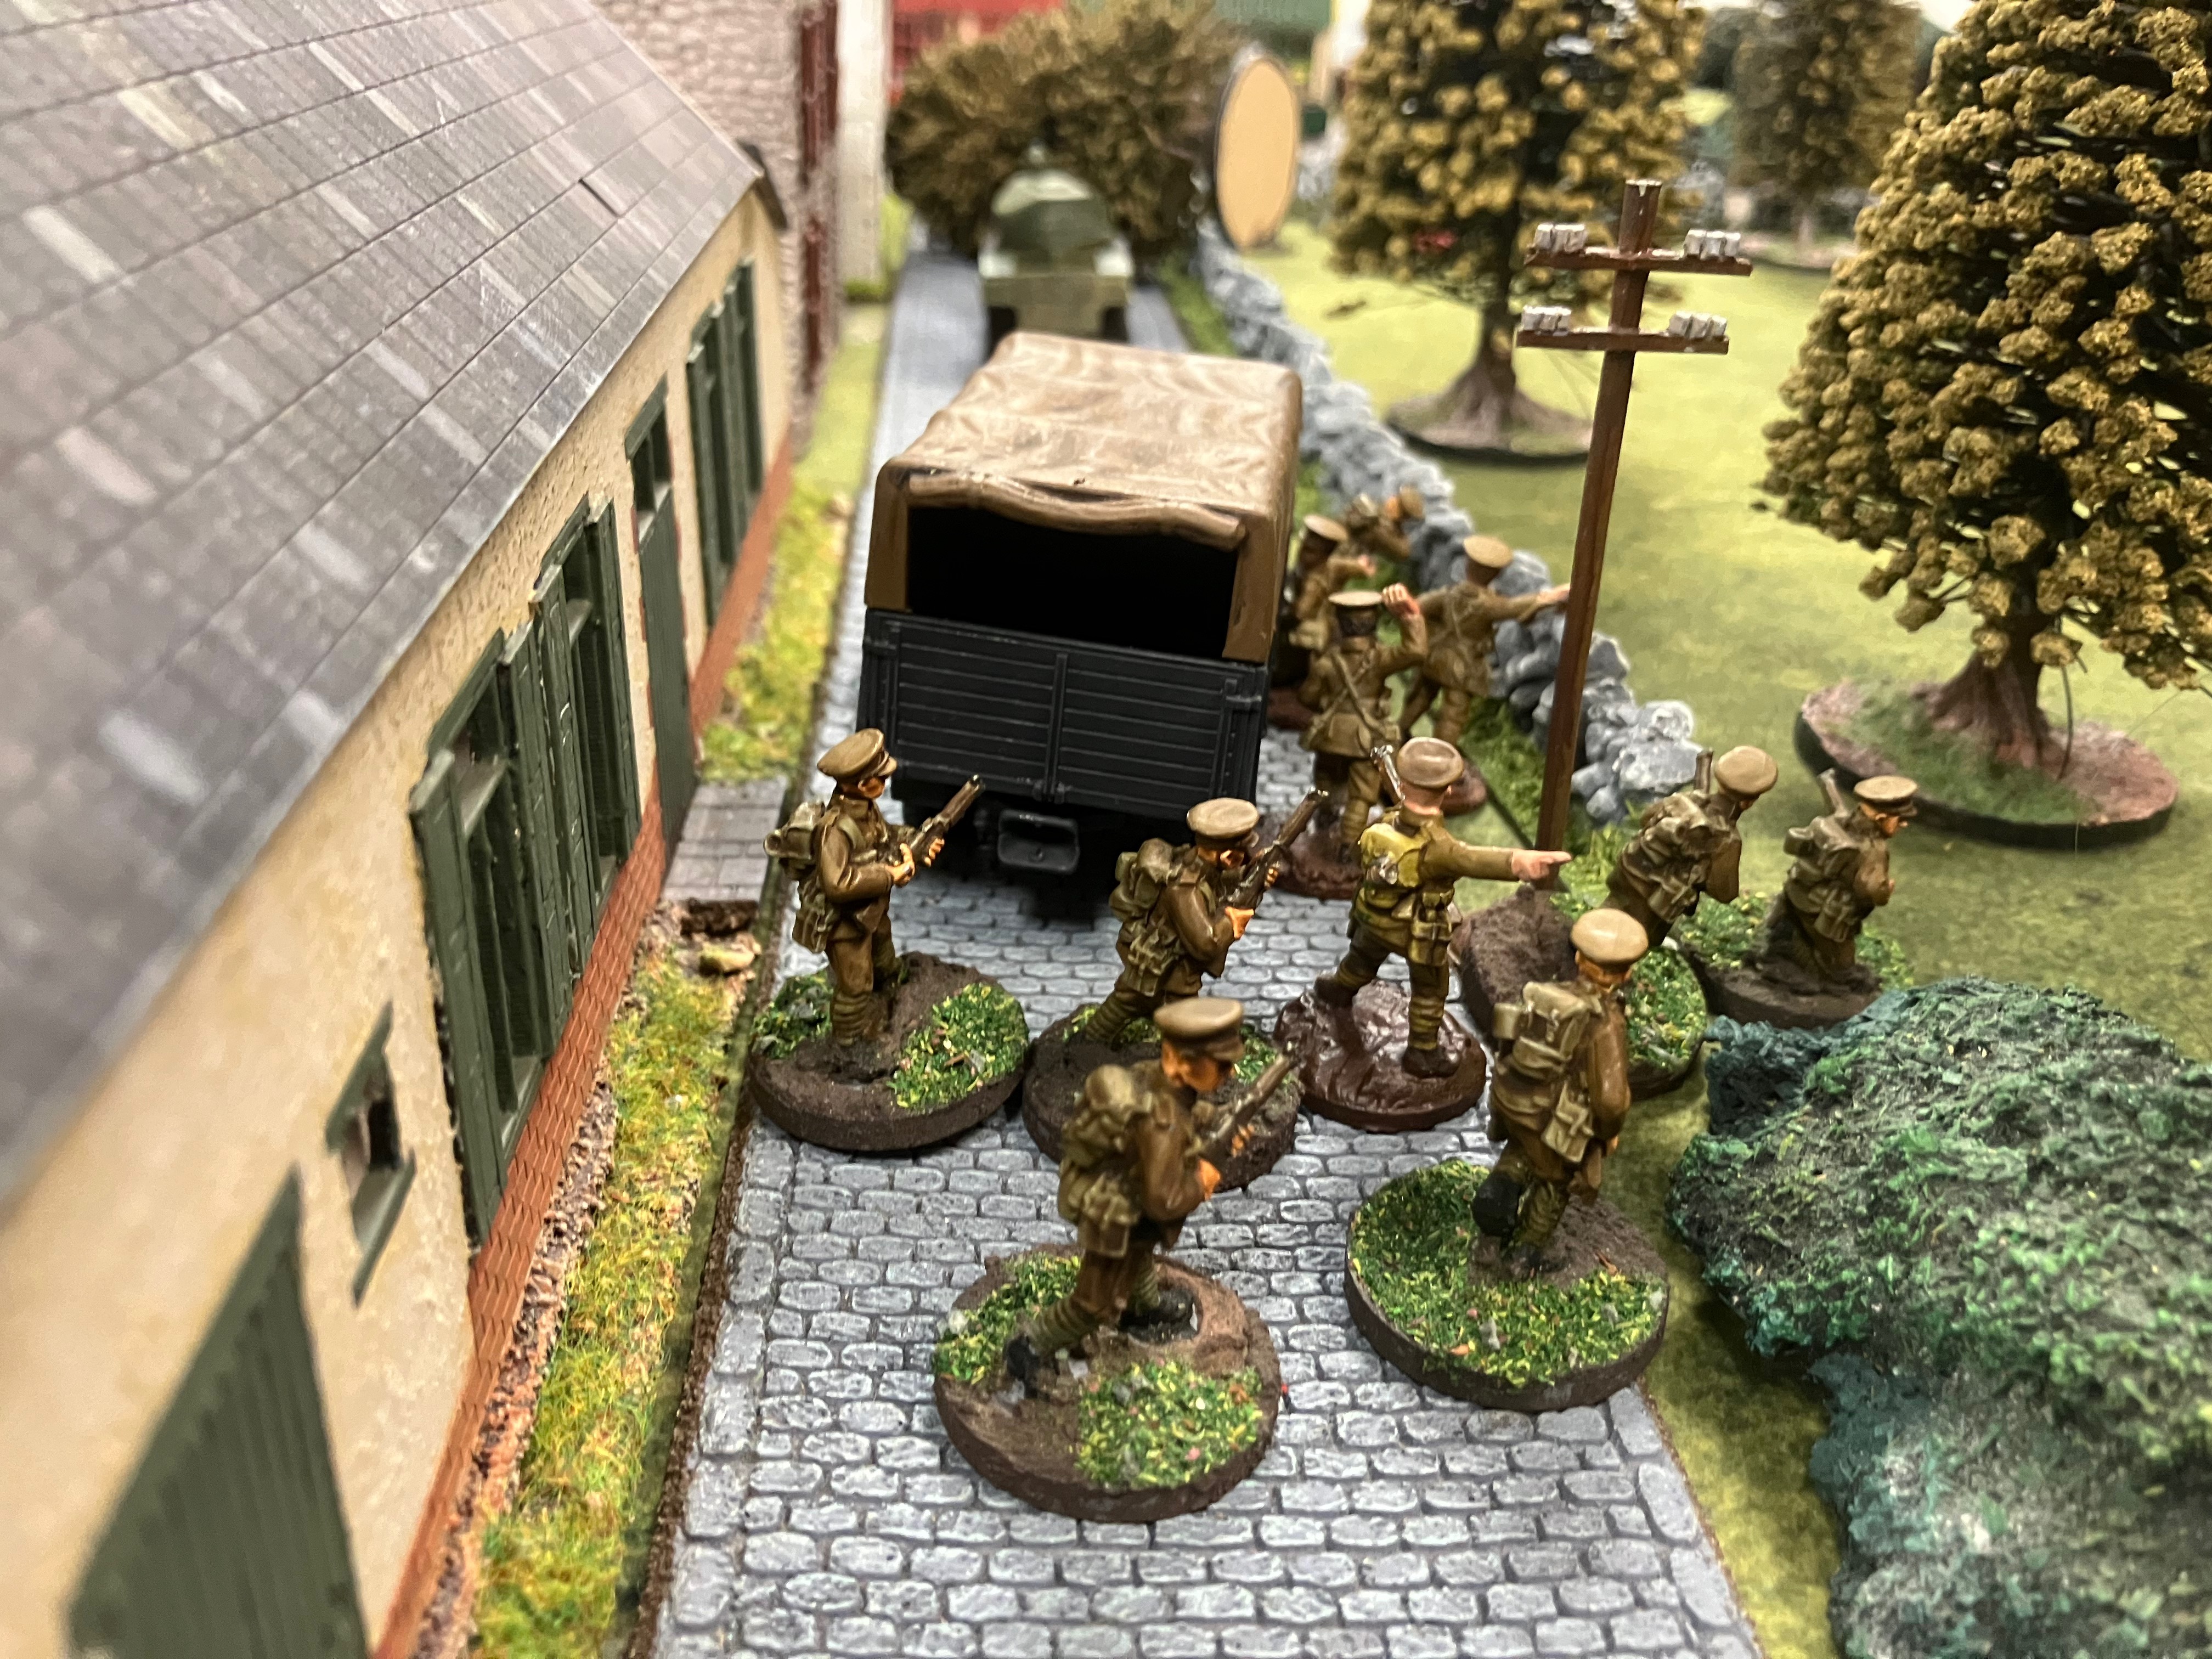
The Fascist force comprised of troops loyal to the Crown in the form of the 8th Bn. Somerset Light Infantry and a local British Union of Fascists (BUF) Militia unit who were guiding their convoy through the sleepy Somerset town of Farrington Gurney to surprise the Communist forces in Radstock.


Fortunately for the Communists news of the Fascist convoy had reached HQ and a small force was put together to stop them. John Dunnet and some comrades grabbed some mining explosives to try and fell a tree across the road which the convoy was due to travel along...


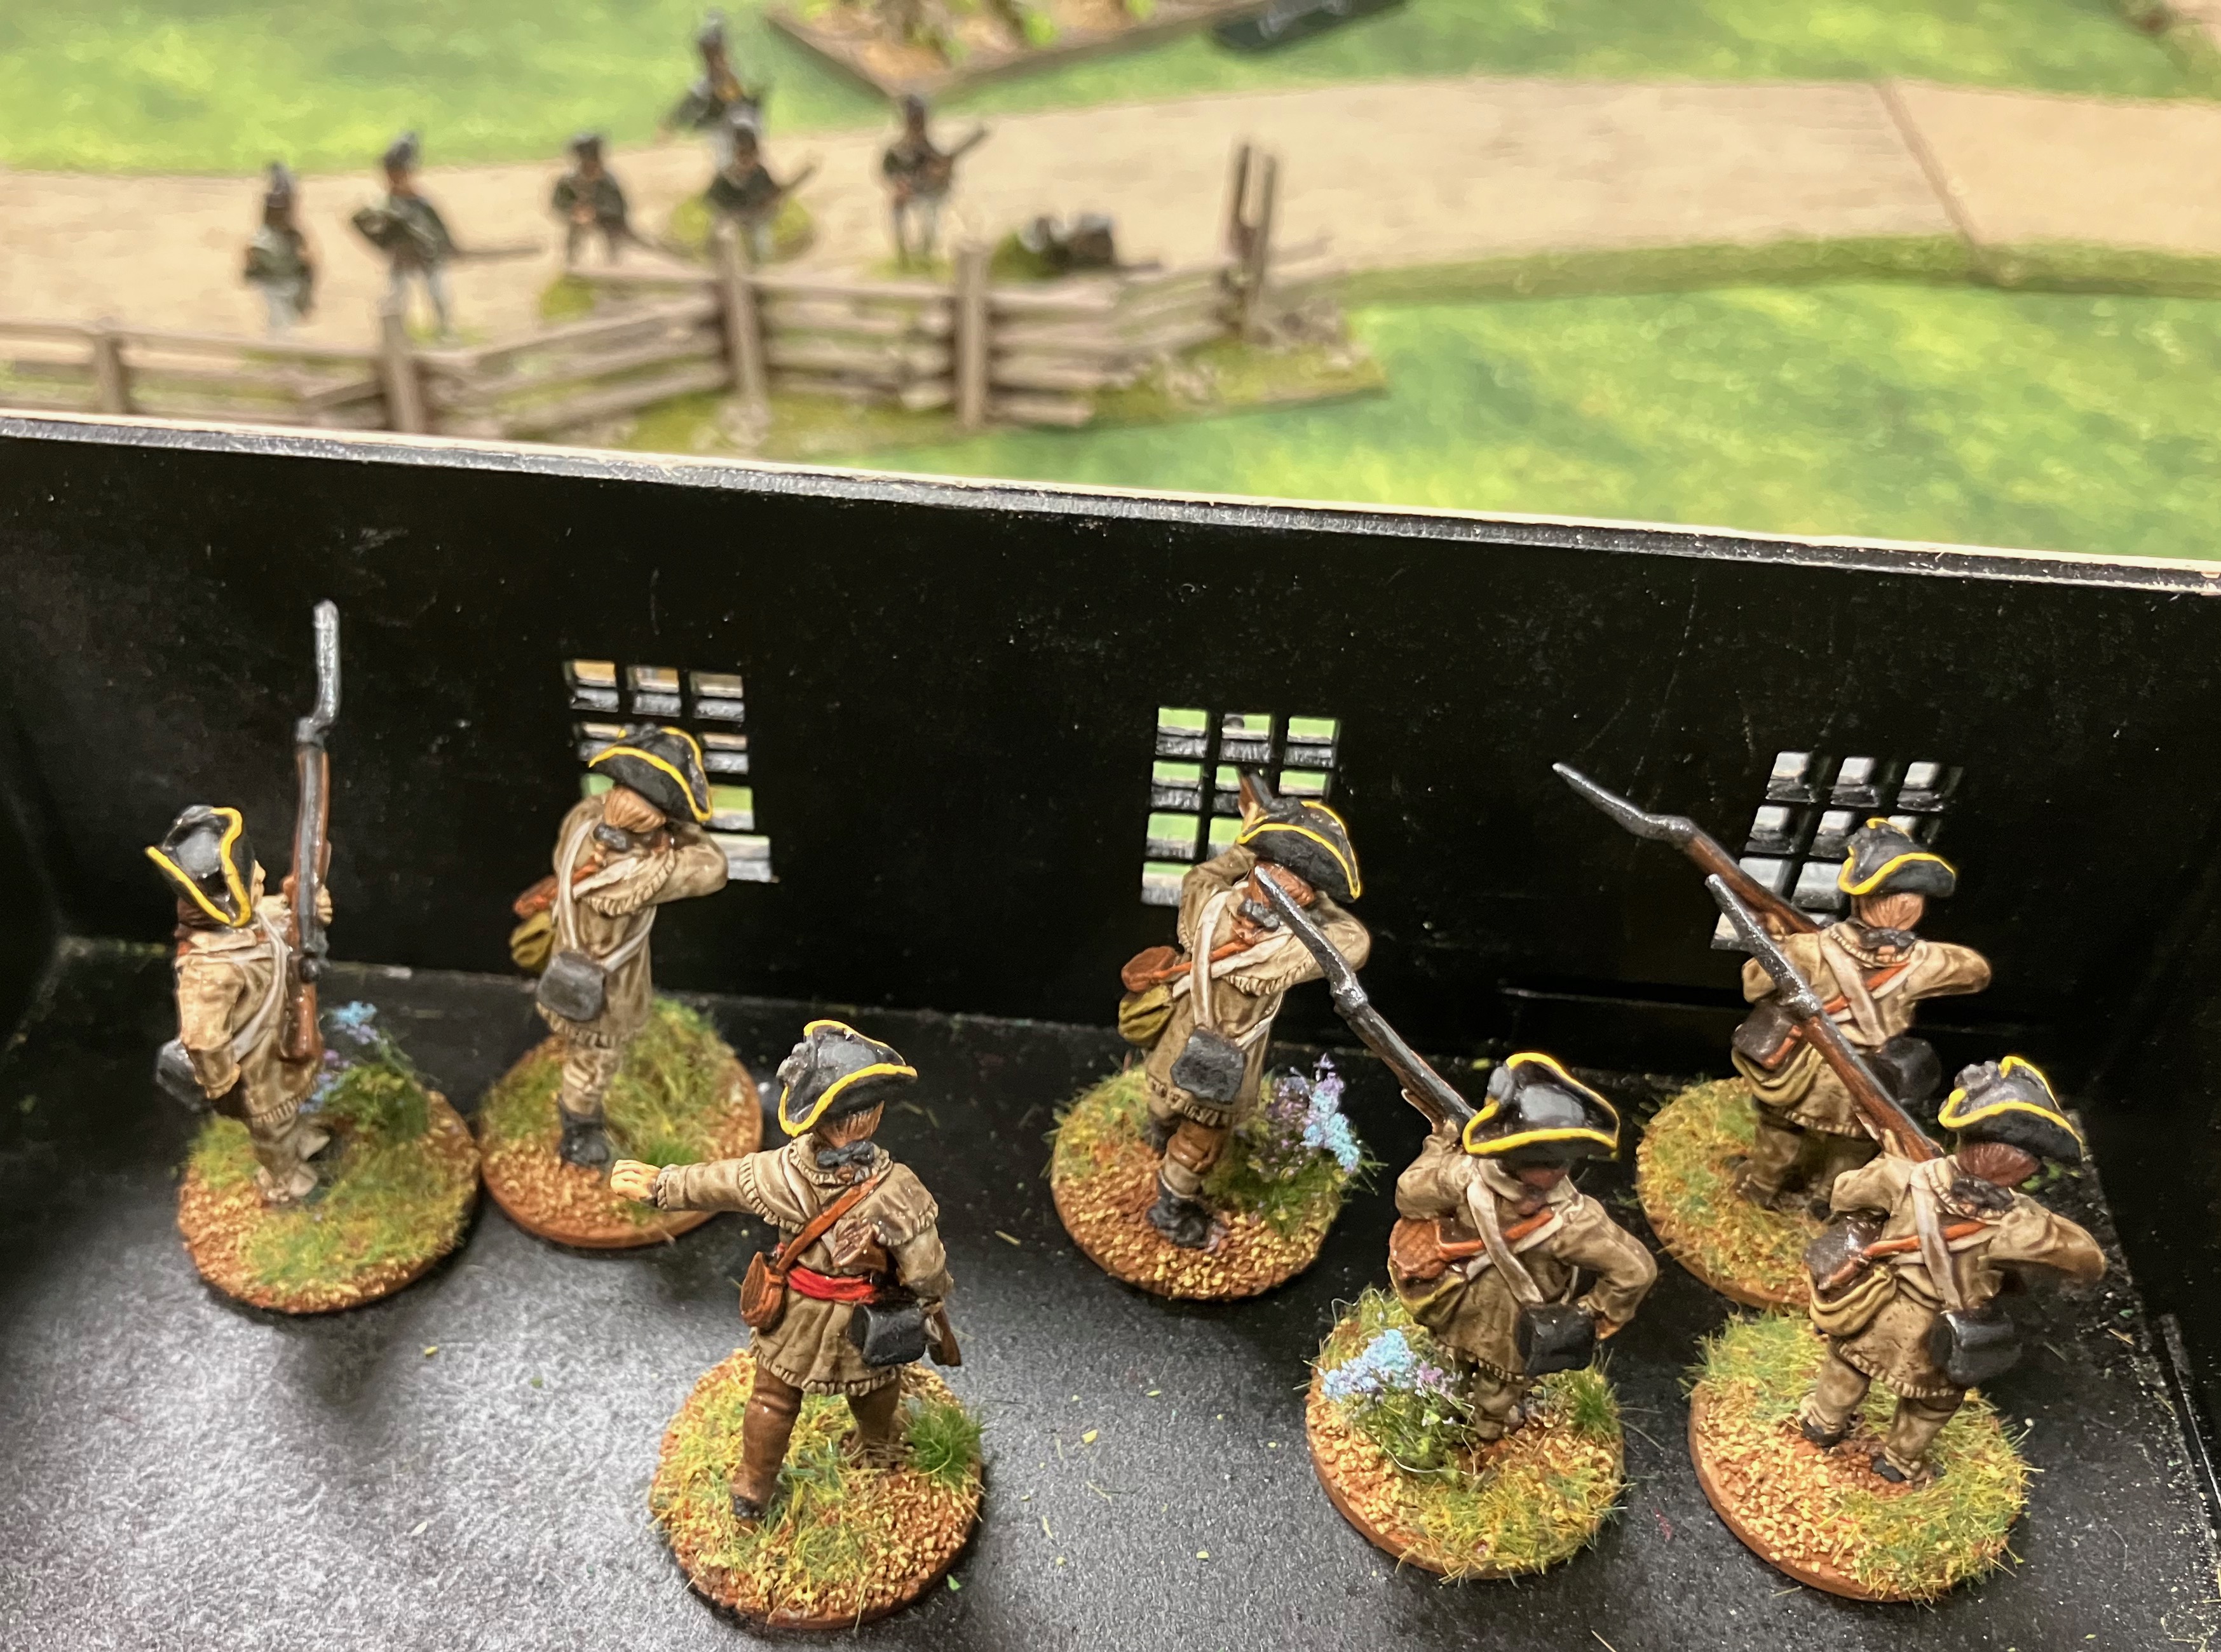
Whilst men under the leadership of Comrade Aldermann took position in the local shop with a good line of fire down the road the convoy must advance up. 


The convoy was spotted! Not just a couple of lorries as believed but a major convoy of several trucks escorted by an armoured car!


Boom! Dunnet blew the charge and the tree fell into the road stopping the convoy dead.


The Somerset's debused, Lieutenant Parker, Corporal Stickers and a section of assault troops from the first lorry...


Corporal Dagenham and a section of infantry from the second...


Captain Romney-Hythe and another section from the third...


With Sergeant Dimchurch and a final section debusing from the last vehicle...


Along with Patrol Leader MacMillan and a group of BUF Militia who promptly occupied the local pub!


Under fire from the armoured car Comrade Dunnet and his men attempted to reach cover but are shot in the back by the Fascist machine-gunner, leaving Dunnet wounded and his comrades dead. Their sacrifice will not be forgotten.


Romney-Hythe's men spotted movement on their left...


It was Comrade Ruskin with men of the local Communist Martyrs Brigade standing ready to repulse the enemy forces.


Aldermann's men spotted movement outside and opened fire...


Inflicting some Shock on Lieutenant Parker and his assault troops.


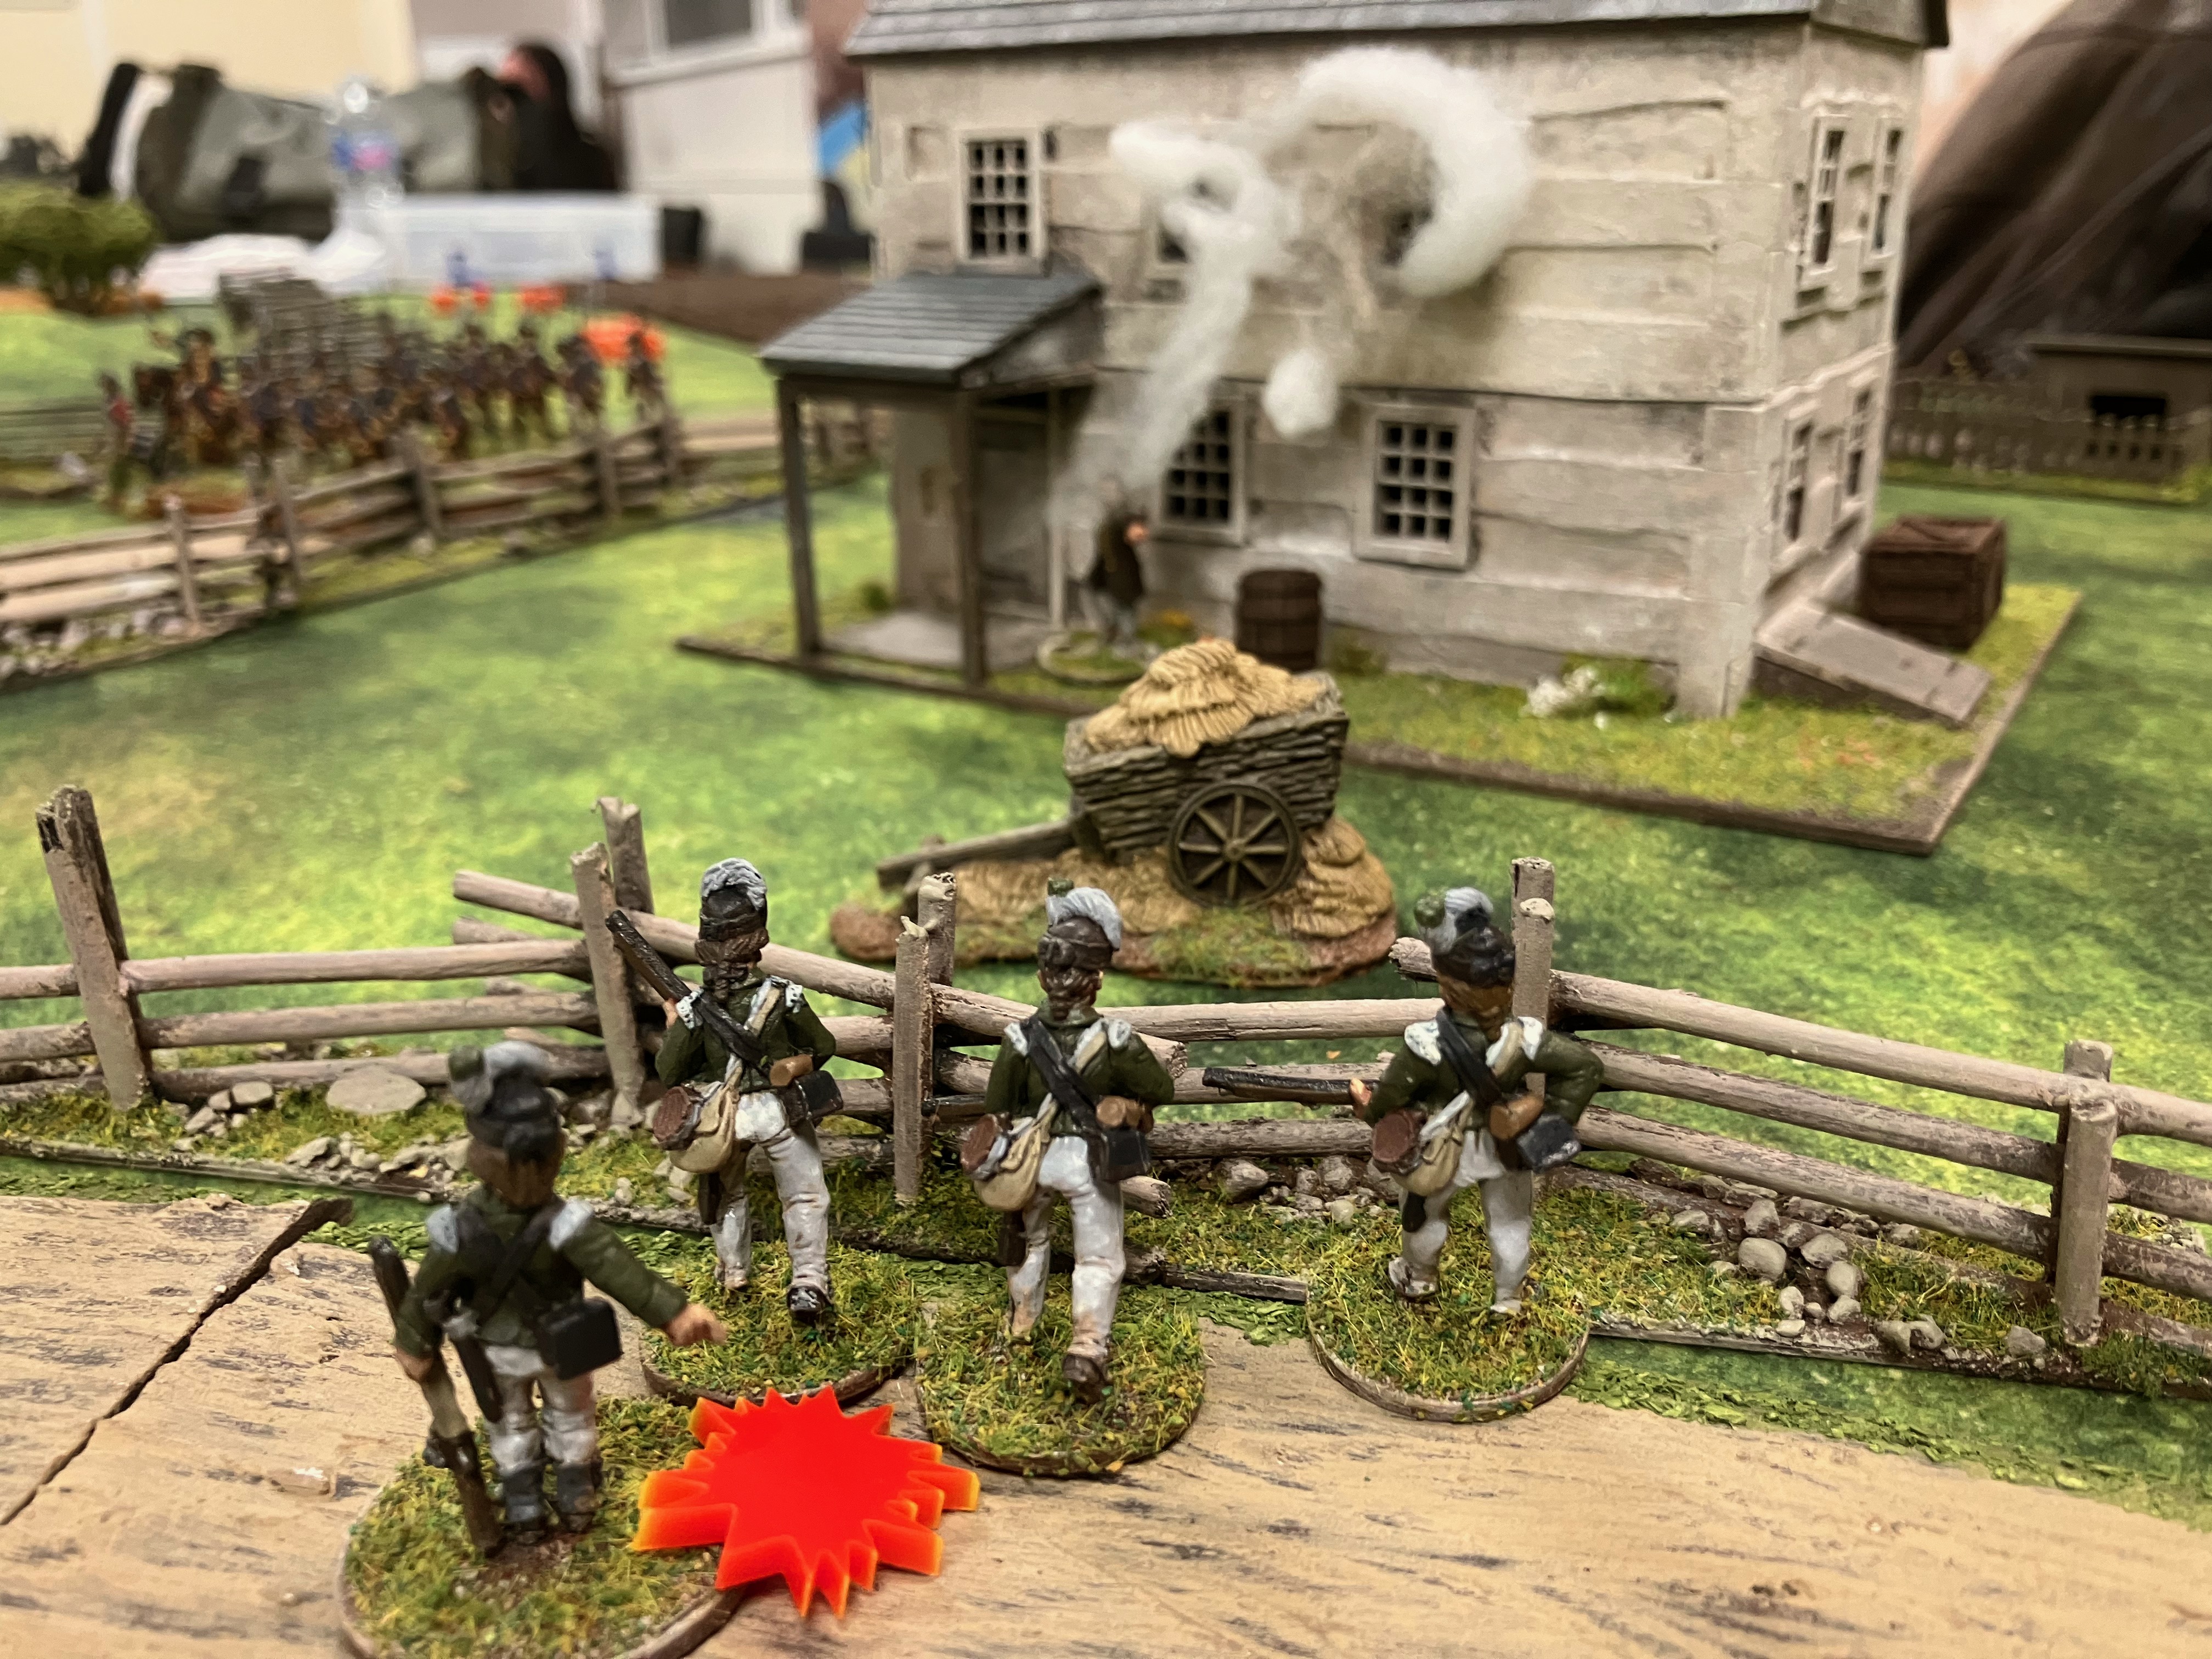
From first floor of the Black Pig pub the BUF opened fire killing two Communists and inflicting Shock on their comrades.


The armoured car also opened fire inflicting Shock on the Lewis gun in the shop.


Hiding in the Black Pig the BUF fired their Lewis Gun out of the window at the Martyrs Brigade...


Killing another brave Communist and wounding Comrade Ruskin!


Meanwhile back at the shop the Communists keep up their fire on the enemy...


Though with little effect.


Unfortunately for the Communists their Lewis gun jammed at this key point and needed unjamming...


Though the riflemen kept up regular fire from the ground floor on the assault troops.


Despite bearing the red badge of courage, Comrade Ruskin ordered his men to engage the Somersets to their front...


Shock and casualties being inflicted on Romney-Hythe's men.


On the right flank Corporal Dagenham ordered his men to advance towards the church.


As reinforcements for the Communists arrived in the form of Corporal (ex-Major) Barry and men from the Radstock militia.


They poured fire into Parker and his assault troops, shooting dead a number of the Fascists.


Barry and his men fired another volley at the Somersets...


Killing Lieutenant Parker, Corporal Stickers and the last of the assault troops.


The armoured car though was a continuing problem and its near continuous fire into the shop saw Comrade Aldermann badly wounded and needing to be escorted to the rear by the remaining men of his unit.


Despite the success in wiping out the Somerset's assault troops and blocking the road, Corporal (ex-Major) Barry realised the local Communist forces were heavily outnumbered (and out gunned) so ordered his men and Ruskins to slip away into the oncoming night to fight another day.

Whilst the Fascists might be able to claim a (Pyrrhic) tactical victory following the Communist tactical withdrawal, having lost more men than their opponents, with two of their Big Men lying dead and having failed to achieve their mission to get through to Radstock it is clear to anyone not reading the Daily Mail at breakfast that this was a moral, political and strategic victory for the British Communists! 

Stand up! Ye wretched ones who labor, 

 Stand up! Ye galley-slaves of want. 

Man’s reason thunders from its crater, 

 ‘Tis th’ eruption naught can daunt.

Monday 19 February 2024

Indian Rebellion: Nusseree Battalion

Well it has taken a few months longer than anticipated to get to the point of playing an Indian Mutiny/Rebellion game but one has been penned in for next week so I'm putting the final touches to a 110 point Sharp Practice force to deal with Phil's Pandies. Joining the 95th (Derbyshire) painted last year we now have two groups of Gurkhas of the Nusseree Battalion (later to be called the 1st Gurkha Rifles).


The figures are from Foundry's old range and although they have been sat unpainted in 'Lead Mountain' for a almost four decades now they are nicely characterful figures, even if the poses are somewhat limited. The black-green uniform is iconic put makes the figures very dark so I gave their caps an off-white linen summer cover for a bit of variety (the only photo of Gurkhas from the Rebellion I've found on-line shows them in white covered caps which was good as it meant I did not have to painted the chequered black/red hat band!)

Wednesday 14 February 2024

Sharp Practice: The Rescue of Captain the Right Honourable Lord Marmaduke Leroy, or a tale of bull, with several illustrations...

After the dust had settled on Winter Wonderlard IV, Andy put on a 110 point a side Sharp Practice game Revolutionary War game set in 1778 Pennsylvania for Phil and myself. Unsurprisingly Phil wanted to lead the the forces of suppression and unrepresentative taxation so he took command of the Lobsterbacks, whilst I hoisted the flag of liberty with my Americans. 


Our mission was to recover a captured British officer, Captain Leroy (who might have been a spy for the boys in blue), the brave Continentals under the command of Captain Blackmore and a contingent of Lee's Legion by Lieutenant Gillan, stealing a march on the redcoats at the start.


The British were not long arriving though, Sergeant Dagenham leading two groups of Regulars towards the advancing Americans...


Followed by Captain Sambridge who also brought two groups of Redcoat Regulars to the fray.


Gadzooks! More Lobsterbacks! Lieutenant Wakefield moved through the woodland towards the farm the spy was being held in with two groups of Light Infantry in Line, with Ensign Belmont leading the way with a group of Light Infantry Skirmishers.


The British were very aggressive pushing a group of Loyalist Ranger Skirmishers under the command of Corporal Danger forward to try and capture the Americans mobile deployment point. Unfortunately for them this brought them into range of a group of Continental Skirmishers with rifles led by Sergeant Lord.


Crack! Rifle fire echoed across the field as one Ranger fell dead and Corporal Danger was wounded, dropping a level to zero.


The main body of Continental troops however found its way forward blocked by the Lobsterbacks who had deployed into line and waited for the Americans to advance into their crossfire...


With the route to the farm where Leroy was being held apparently blocked, Sergeant Paice ordered one of his groups of Rebel Militia to remain at the behind whilst he, and the second group, decided to escort Captain Leroy to the American Deployment Point and safety.


As Paice and his men headed towards safety, Lieutenant Coverdale brought up two groups of Rebel Militia to protect Paice's rear as the British Light infantry moved up.


Across the battlefield two more of the Loyalist Rangers fell to Continental Skirmisher rifle fire...


Whilst a detached group of Coverdale's Militia engaged Ensign Belmont's Skirmishers.


The other two groups of Militia being pushed forward to form a firing line.


Gillan's Legion Light Infantry however were struggling to get across a muddy field...


As Sergeant Dagenham's Lobsterbacks opened fire on Captain Blackmore's Continentals who had snapped  into line, detaching one group who had moved behind the main building to try and flank the British.


The British fire was quite devastating and two braves sons of liberty made the ultimate sacrifice.


Rebel problems were exacerbated as a bull spotted Leroy's red jacket as the Rebel Militia ran him across the field and gave chase!


Despite moving 3D6, the rescue party saw the bull starting to gain ground on them as Umpire Andy decided the bull could move 4D6! (Andy also deciding that shooting the bull, owned by a rebellion supporting local farmer, would result in an automatic British victory!).


Fortunately the Militia were able to get Leroy and themselves over the rail fence before the bull caught them! Phew...


Blackmore and his outnumbered Continental Regulars began to exchange volleys with the British...


Whilst Sergeant Bolin moved his group around the flank to fire at the Loyalist Rangers...


Killing two more. Whilst they did not break as they only had two Shock, Phil decided to pull them back away from the deadly Continental rifle and musket fire.


Coverdale's Militia started to exchange fire with the British Light Infantry...


Killing two of the Redcoats whilst taking some Shock in return...


While Blackmore's Continentals were taking a battering at the hands of the four groups of British Regulars.


Another devastating volley from Sergeant Dagenham's men...


Causing one Group of the Continental Regulars to Break.


Back across the battlefield the Militia were standing firm against the Lobsterback Lights, and although the Shock was starting to add up, an increasing number of dead Brits littered the battlefield.


An Eagle's eye view of the battlefield, which has effectively split into two separate battles.


Having managed to extract themselves from the mud, Gillan's Legion troops managed to get into a position to engage the enemy.


Something Sergeant Bolin was managing to good effect, causing Captain Sambridge to split his formation and have one group try to engage the Continentals.


Paice had almost escorted his charge to safety...


When Sergeant Lord ordered his Riflemen to open fire...


Taking down two of the detached Redcoats!


A final push saw Sergeant Paice and his men reached safety, but not without a final twist! Captain Leroy made a bid for freedom (clearly he was a captured enemy not a brave spy) and a duel was fought between the redcoat Captain and buck-skin clad Militia Corporal. The first round was a draw but the second saw Paice smack Leroy in the face with the butt of his musket and the unconscious British officer was carried off the board for interrogation!


A fun battle and unusual as for once we settled the game by scenario objects and not Force Morale. It swung back and forth especially as Phil stole an early march as the red tokens kept coming out the bag at a 3 to 1 rate at the start, but eventually American valour and tactics proved too much for the forces of oppression...