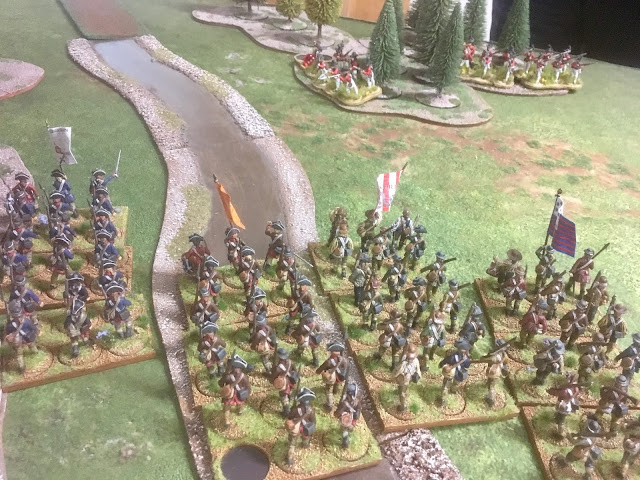
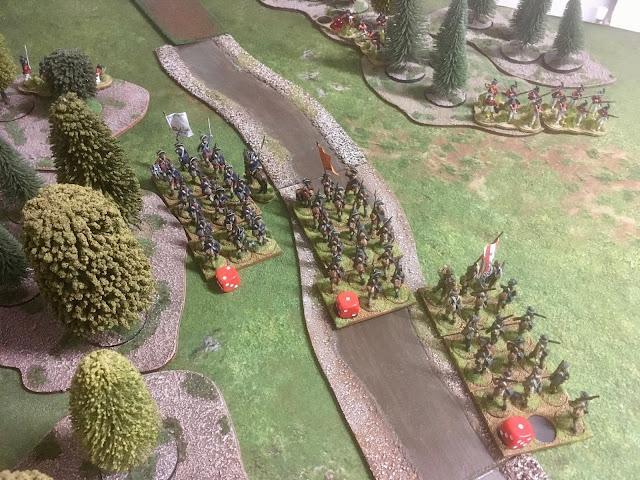
One scenario George and I hadn't played from Rebels and Patriots was A Long Way From Home, which has one force marching home after a successful scouting mission only to be ambushed by a smaller enemy. We played the scenario twice in one evening and as the second game was more interesting than the first I'll report back on that encounter first...
After whooping Banastre Tarleton and the British army at Cowpens the rebel forces are marching back unaware the lobster backs have their route to camp under observation and ready to spring an ambush!
The victorious Americans march along the road heartily singing The Liberty Song... "Come, join hand in hand, brave Americans all..."
Ahead, is that a flash of red in the woods?
Ambush! Musket fire from the woods and a brave Marylander falls. The Americans spread out to confront the redcoats not hiding very well in the green trees!
British skirmishers shoot at the advancing American column.
The 1st Maryland charge the skirmishers in the woods to their front rolling a double six. Checking the appropriate table the Continentals gain an Honour point.
The 1st Maryland force the British skirmishers out of the woods!
Meanwhile the Militia try to take the fight to the skirmishers and light infantry in the woods to their front taking Disorder markers in the process...
A volley of musket fire from 1st Light Infantry battalion...
..breaks one of the advancing Militia units who flee the field. As you can see my dice rolling is as good as ever!
The American army was now spread rather disjointedly across the line of advance with two units Disordered and another struggling through woodland at half movement.
The Lights then follow that up by charging the other Militia unit which as it is Disordered reduced their effectiveness by half - and given their Timid rating that already was half as good as the British in Melee anyway! The end result wasn't as predictable as expected but the Militia were forced back but now with two Disorder markers are now Broken...
The 2nd Maryland then tried to save their comrades by charging the Lights but they too being Disordered are not as effective as they would normally be...
The Lights successfully Evade the Charge and firing at the 2nd Maryland inflict an additional Disorder marker on it so it too became Broken.
Both units now had to take a Morale check and rather predictably both failed and Routed!
Eventually 2/3 of the 1st Maryland reaches safety but it has been a resounding victory for the British with three units routed and one mauled!
Before this we did try the scenario out with a flying British column of light cavalry and light infantry and trying to stop them with regular American forces.

My normal army was not really suited to this scenario with lots of Regular Infantry (which includes Militia) who move at 2/3 the rate of the British Lights so given the initial dispositions of the army it was going to be hard to catch them.

Banastre Tarleton tried to lead his infamous Britsih Legion cavalry to safety, supported by the 1st Light Battalion.

The Americans found it hard to intercept the British, not helped by the lackadaisical Militia who couldn't be bothered to march at pace.
The Skirmishers though were more up for a scrap and one group got ahead of the British with another moving on the British rear.
The 2nd Lights found themselves under fire from two units of Maryland Continentals on their right flank taking losses and gaining a Disorder marker. The Legion cavalry charged into the wood to dislodge the American skirmishers who Evaded their charge...
,,,and take one of the hated horseman down, albeit at the cost of one of their own.
The Legion cavalry took the opportunity to Follow Up and routed the Skirmishers, but this move took them into range of the (slowly) advancing Militia who blasted them with accurate musket fire, killing another three - Tarleton then routing from the table!
Unfortunately the loss of their leader didn't affect the British Lights (they didn't like Tarleton that much either it seems) and they continued their march to safety.
Another unit of Skirmishers took pot shots at the British infantry...
Whilst not as intense as the other game, largely down to the bulk of the Americans not being able to keep pace with the British, it was still fun, especially when the British Legion charge took them into the Militia musket range.
Another two defeats for my Americans which seems historically right given Nathanael Greene's quote of "We fight, get beat, rise, and fight again”! :-) but a lot of fun - I clearly need to get my Dragoons painted up and recruit some Light Infantry - Lee's Legion anyone?


A great looking game Steve.
ReplyDeleteBeautiful!
ReplyDelete