Following last week's largely successful attempt at porting a Rebels & Patriots scenario across to Sharp Practice, Andy and I decided to do it again this week at Bristol Independent Gaming. Plans for playing the Defend Mendenhall's Battery scenario swiftly unravelled as I forgot to bring my cannon with me, so a quick look through the scenarios and we decided to play another bridge themed game, Bridge to Victory - this week I had to build not capture one!
Having lost one bridge across Widow Creek to the Rebels, the British have been destroying the remaining ones to protect their lines from being outflanked not realising the Americans have despatched men from the Corps of Sappers and Miners to rebuild one!

Upon hearing of the Rebel plan, the British dispatch Lieutenant Haddock and Sergeant Wakefield with four groups of Regulars to investigate.

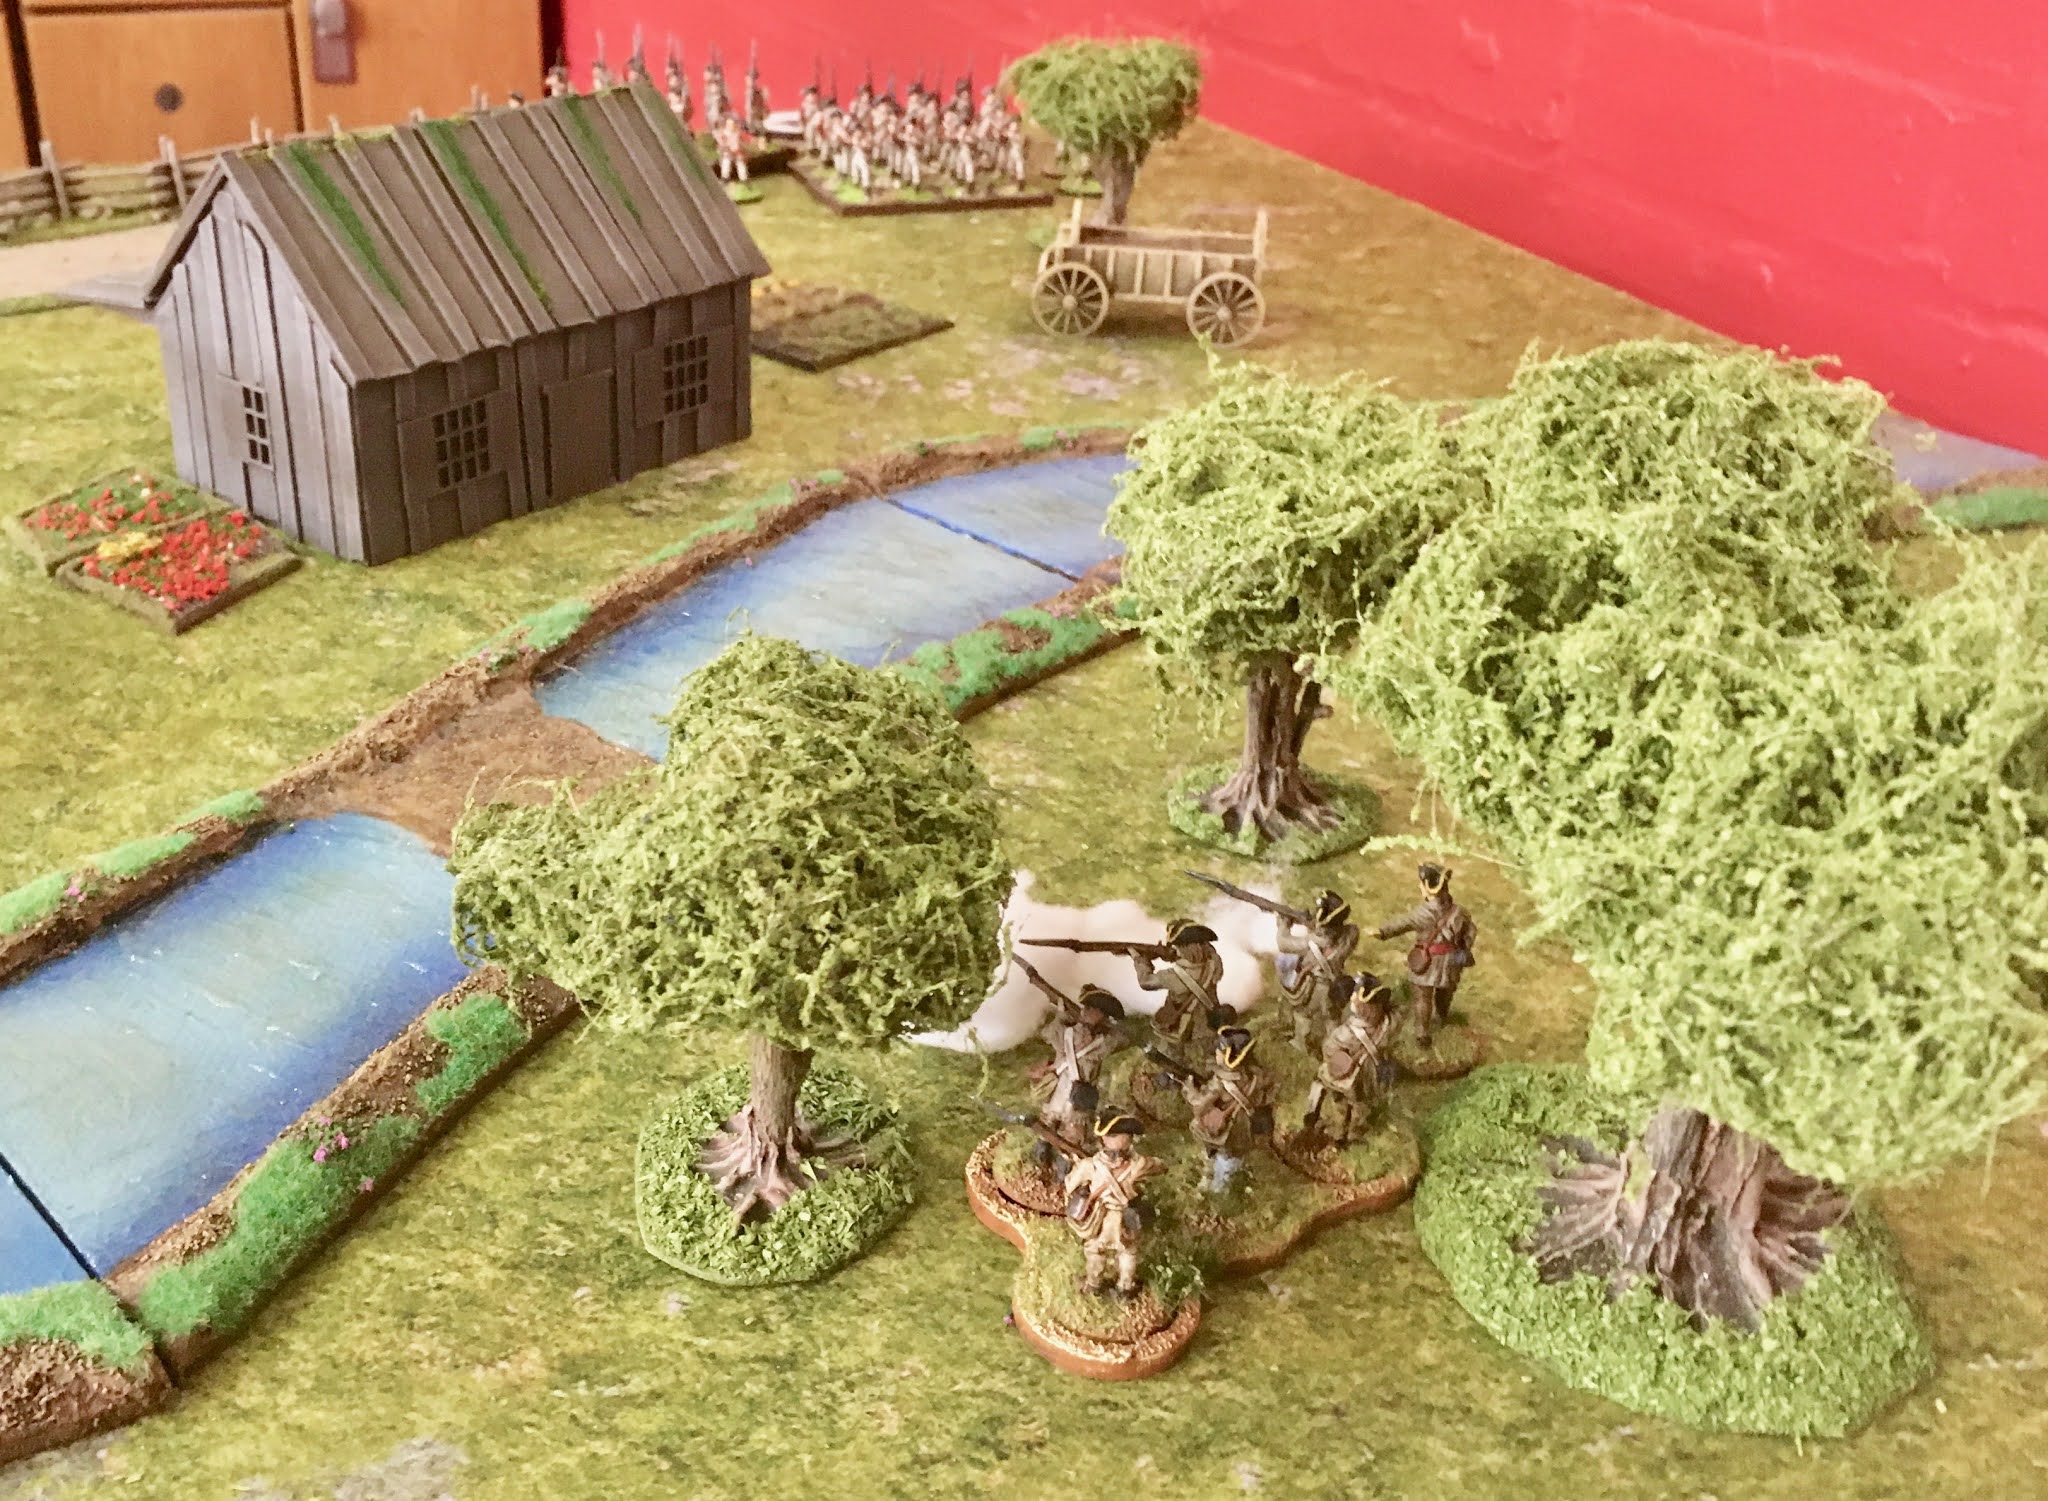
As they approach the ruined bridge they come under fire from a group of Continental Skirmishers, under the Command of Corporal Horowitz, hiding in the trees. Due to some fortuitous pulling of Command Chips the Skirmishers manage to pour three rounds of fire without reply into the unfortunate British inflicting a number of casualties and Shock on them.
To make matters worse for the British, Captain Whitfield and three groups of Continental Line arrive on the field of battle...

Lieutenant Haddock advances his men towards the Rebels, supported by Ensign Harrow and two groups of Light Infantry skirmishers, and open fire!

The skirmishers take a couple of points of Shock and then return fire...

...inflicting more casualties and Shock on the lobsterbacks! Haddock's men were taking a battering.

Meanwhile three groups of Militia Skirmishers deploy in the Creek near the ruins of the bridge (I did make a mistake here not realising they could not operate as a formation so until they moved Andy kindly agreed that they could operate as a formation under Corporal Rowsick until they moved when they would revert to groups).

The Militia Skirmishers soon found themselves under fire from Sergeant Wakefield's Regulars.

Taking Shock and a casualty.

Having ineffectively returned fire, three Command chips were pulled in a row resulting in a random Firing Event for the Skirmishers. I managed to roll 9 on 2D6 - "Charge Them to Hell!", the Skirmishers decided the British were done for and surged forward to attack them!

Meanwhile the Continental Line began pouring Presented Volleys into Haddock's men across the Creek.

Whilst Harrow's Lights returned fire killing one Rebel and inflicting a small amount of Shock on the brave Virginians!

The American fire was too much for the Redcoats and they fell back behind the Skirmishers, causing the British Force Morale to drop.

Ensign Harrow orders his men forward to plug the gap left by Haddock's battered men.

Meanwhile Corporal Stringer enters the field and moves a third group of Skirmishers up supporting Wakefield's men.

At the site of the ruined bridge, the men of the Corps of Sappers and Miners arrive to begin rebuilding it. Using a mix of rules we activated the Engineers when their chip was pulled and rolled 2D6 to see how much of the bridge they had rebuilt, needing a cumulative total of 60 to complete the task. (Not having any bespoke engineer figures I used some Foundry Militia).

Whilst Lieutenant Haddock, obviously still suffering from his concussion in the last battle, was not covering himself in glory, the dependable Sergeant Wakefield was pouring fire into the Rebels near the bridge.

The Militia Skirmishers finding the British not quite as 'done for' as they thought take more casualties and Shock, two groups falling back to their initial position.

Two turns of bridge building sees the Engineers cracking on, almost rebuilding 1/3 of it in quick time.

Elsewhere Haddock moves his men back up to engage the Americans whilst Harrow's Light Infantry Skirmishers trade musket fire with the Continental Line.

Unfortunately for Andy return fire from the Continental Lights sees Haddock's men Break and run away! The British Force Morale now fell to just 4.

Meanwhile with the revolutionary song 'Chester' on their lips ("Let tyrants shake their iron rod,
And Slav'ry clank her galling chains, We fear them not and trust in God") the Engineers crack on at pace, rebuilding almost half the bridge!

Whilst things were clearly going the way of the Patriots, the Engineers position was still quite exposed protected only by three groups of Militia Skirmishers who had taken a fair bit of Shock. As Sergeant Wakefield advanced on the bridge supported by Corporal Stringer's Lights, two groups of Virginian Militia under Sergeant Watson march down the road towards the Engineers and Corporal Horowitz having seen off Lieutenant Haddock advances across a ford to flank Wakefield.

Horowitz's action however gives the British the opportunity to regain the initiative and Ensign Harrow's Light Infantry Skirmishers charge the Continental Skirmishers, throwing tomahawks at them and inflicting four points of Shock!

Bayonets are then plunged into the floundering Rebels - four die in the round of Fisticuffs, Horowitz is wounded (for the fourth battle in a row!) and the Shock is piled on!

The Continental Skirmishers unsurprisingly break and flee to safety...

Unfortunately their route takes them through the advancing Militia who take the excess Shock and themselves break!
The cumulative impact from all these events takes the American Force Morale from a healthy 8 to a rather worrying 3!

Meanwhile, with the noise of battle growing louder the pace of the Engineers work slows with just over half the bridge rebuilt. Could the British snatch a victory that looked extremely unlikely just one turn before?

The short answer is no. Having charged the Continental Skirmishers, Harrow's men had exposed their flank to Captain Whitfield's Continental Line who fired a volley into the British Skirmishers.

One group of the Skirmishers broke and the effect on the British Force Morale saw it reduce to zero handing victory once again to the Rebels.

Another hugely enjoyable game, I thought Andy had snatched victory from the jaws of defeat when his Light Infantry caused chaos by breaking my Continental Skirmishers and Militia. If I had not been fortunate in being able to activate the Continental Line immediately after, his remaining Regulars and their Light support could well have reached the bridge and broken the Militia Skirmishers there.
With a little work it looks like the Rebels & Patriots scenarios port across quite nicely and provide a good Sharp Practice game, so even if you don't play the Osprey game itself, the twelve scenarios within are worth the purchase price alone.
Great stuff. How many scenarios are included in the rebels and patriots book?
ReplyDeleteTwelve. The only one that might be difficult to port across might be the Great River Chase one but still fancy giving it a go...
ReplyDeletehttps://bleaseworld.blogspot.com/2020/03/rebels-and-patriots-blood-on-black-river.html