The table was quite terrain heavy with five potential hiding places for the spy marked with little bits of paper...

The American deployment was delayed and each time their force commander's chip was pulled they roll 2D6. Once the total of that reached 14 they begin deployment on subsequent leader activations. This allowed the British to steal a march on the Americans with two groups of Light Infantry Skirmishers, two groups of Light Infantry in Line and three groups of Regulars swiftly entering the field of play...
Fortunately, for me, it only took two turns for me to roll a cumulative 14 and a group of Rebel Militia Skirmishers under the command of Corporal Rowsick quickly deployed into the orchard.
The British were swiftly moving up the board though, with Captain Simmonds detaching one group of Regulars under the command of Sergeant Palmer to investigate a house to see if the spy was within. Lieutenant James deployed the Light Infantry into line, whilst Sergeant Crawley and the skirmishers moved up past their flank.
Fortunately for the Americans two groups of Lee's Legion (Light Infantry in Line - using the British stat line) arrived under the command of Lieutenant Kraslow...
And then a unit of Militia commanded by Sergeant Horowitz who slowly moved into the orchard behind the skirmishers.
Spotting Lieutenant James's Lights nearing the road junction Rowsick's skirmishers opened fire but missed!
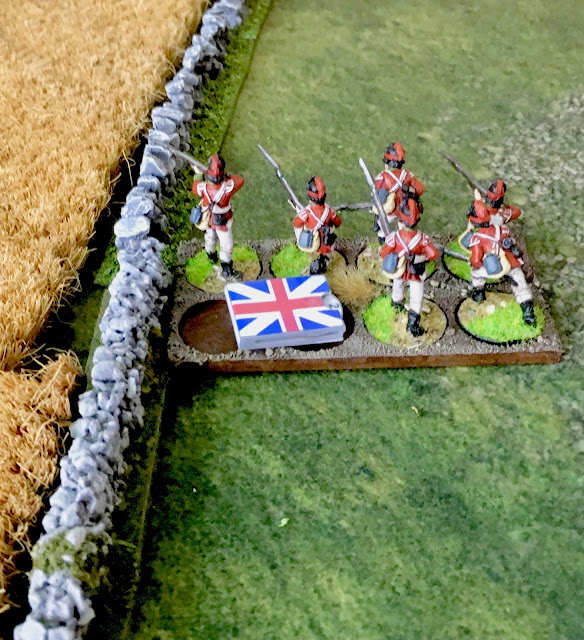
Crawley and the two units of British light skirmishers rushed past the junction and up the road...
They then mercilessly stabbed the retreating Americans in the back capturing Corporal Rowsick! The American Force Morale dropped two points after this disastrous engagement!

.Captain Simmonds ordered Sergeant Palmer to hurry up bringing his house searching Regulars into line. A Firing Event caused by three flags in a row being drawn saw a pall of smoke settle between the British and Americans reducing the ability of both to hit their opponents.

Whilst Sergeant Palmer and his Regulars searched the first building... only to find Tom Bettys was not inside.
By now Captain Pollack and this three groups of Continental Line had arrived along with another two groups of Militia under Ensign Dorfman.
Lieutenant James's Lights started trading volleys with the Lee's Legion formation under Lieutenant Kraslow's, both sides taking casualties and the British a lot more Shock than the Americans...
Corporal Rowsick's Militia skirmishers opened fire on one group of the British skirmishers, again missing the target (...so much for their legendary sniping capability!)
The British charged, throwing tomahawks at the Americans, forcing them to flee and taking double shock!

Meanwhile Captain Pollack deployed his Continentals into Line despite marching through a wood.
And whilst this allowed Simmonds and his Regulars to get a volley off at them and inflict a small amount of Shock and one dead, they were able to retaliate with a devastating volley!
Rocked, the British regulars lost three men and gained a lot of Shock, but the ordeal was not over!
Before they could react, Pollack's Command chit was drawn again and the Continentals fired another volley into the British Regulars killing four more, piling the Shock on and forcing them back! The British Force Morale took a hit here...
Back in the orchard, Sergeant Horowitz split his formation, deploying one group of Militia against the British skirmishers who had captured Corporal Rowsick.
Eleven muskets shot out and three British redcoats fell dead, the remainder of the group taking Shock. Fortunately the captured Corporal Rowsick was not hit!
The other group of British Light skirmishers under Sergeant Crawley moved into the orchard and charged the second group of American militia...

A bloody melee ensued with four Redcoats dying but also five Americans with Sergeant Horowitz being wounded...

However he was still in command range of the other Militia group who themselves attacked the remaining British skirmshers...
...wiping them out...
...and capturing Sergeant Crawley in the process. With a group destroyed and a leader captured the British Force Morale dropped again!
Subsequently the Militia opened fire on the Redcoat skirmishers with the captured Rowsick. Accurate musket fire killed the remaining British, though the poor Corporal was knocked out by a glancing musket ball!
Back in the centre Sergeant Dorfman moved his militia up through the wood between Lee's Legion and the Continentals, one group unleashing a volley on James's Lights from the treeline...
Inflicting casualties and adding to the Shock built up against Lee's Legion, James's Lights were pushed back...
With one group breaking and running for the safety of their own lines! This resulted in the British Force Morale reducing to zero, the Americans had won the day!
A very enjoyable battle, I am getting a better handle on the rules, though thankfully Andy is a patient teacher when I get a bit confused! It was interesting to see how much more effective my Militia were in Sharp Practice compared to their usual ineptitude in Rebels and Patriots, though they still suck in melee combat.
Epilogue: aftre the battle Thomas Bettys was found hiding in the orchard by Patriot militia and will be tried and executed as a spy at a date to be decided by General Washington.


Cool looking game Steve, thinking gonna give Sharpe Practice a go, I've had the rules for years now and never had a game.
ReplyDeleteThere is a bit of a learning curve tbh, whilst the rules are quite simple, there are lots of little things to assimilate. That said when you get your head around them... Suggest watching the Lardy videos on YouTube whilst reading the rules!
DeleteYeh, another blogger said the same thing. I'll have to give them a watch. Cheers!
Delete