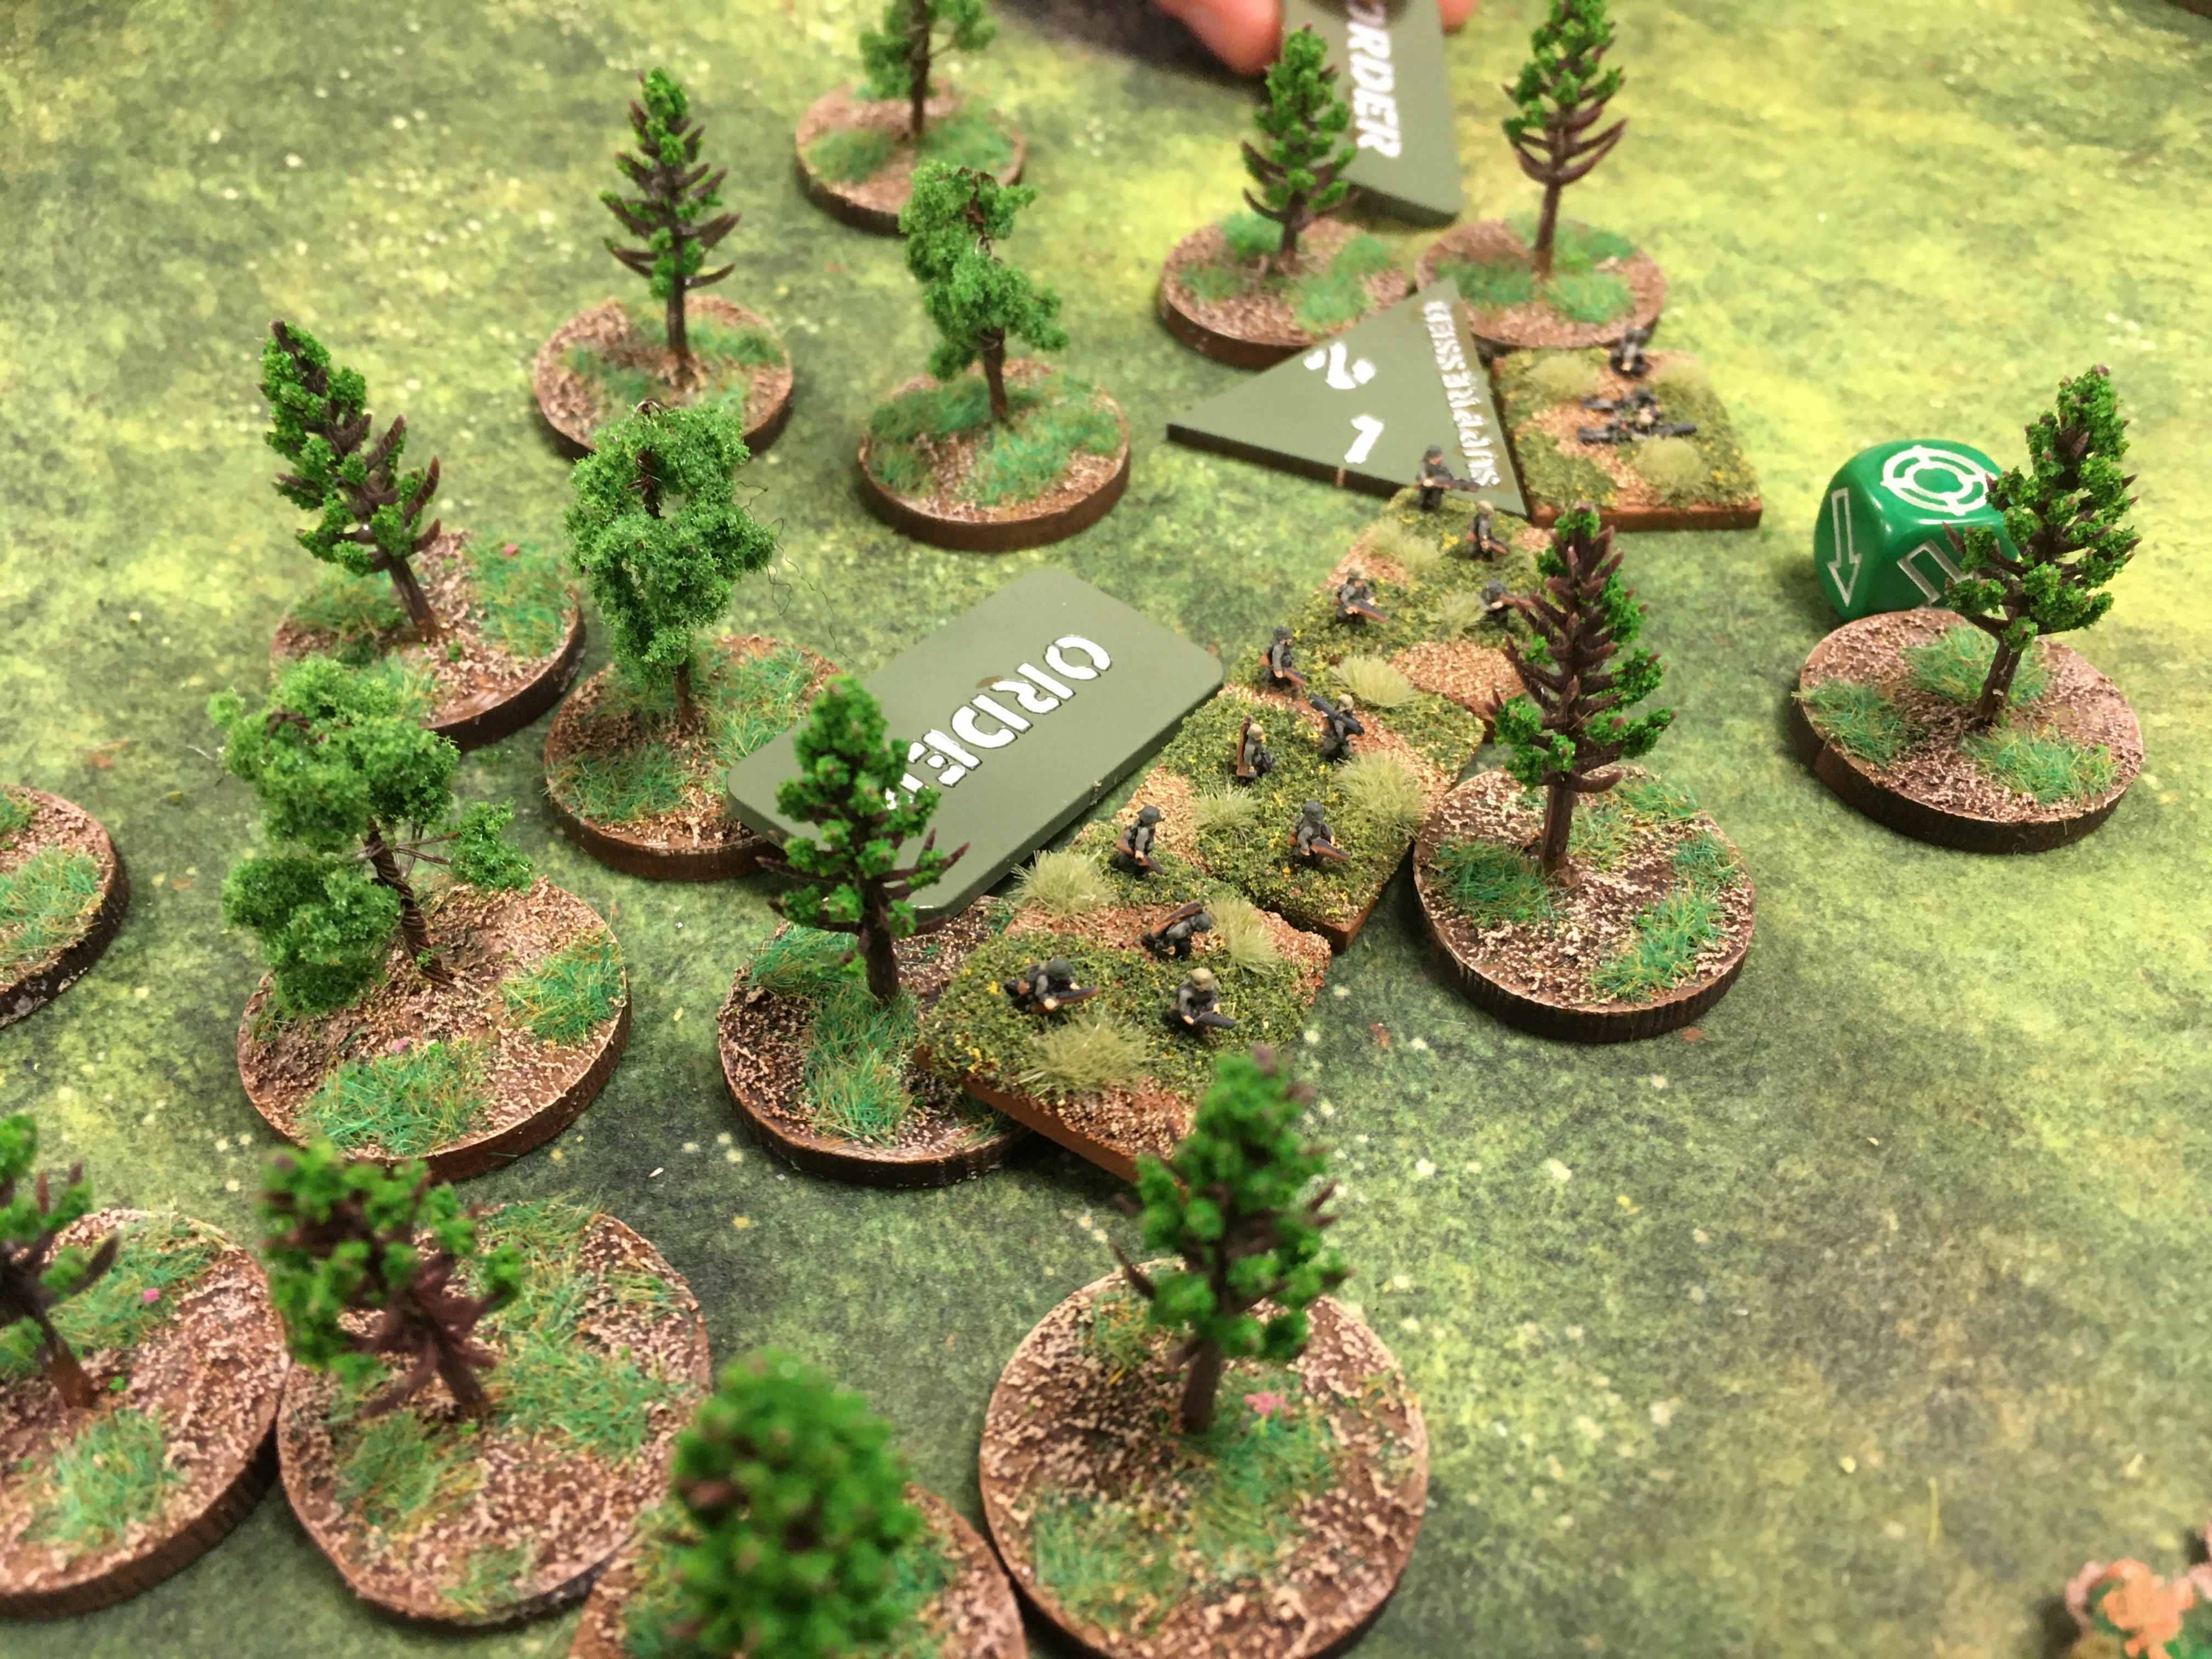
This weekend Andy and I tried out the TooFat Lardies/Reisswitz Press WW2 Battalion level game 'O' Group. We''d both bought copies when it was released but had not got around to giving it a spin so I dug out the 6mm German and US battalions I'd painted up and we popped down Bristol Independent Gaming to give it a go..
Whilst there are some broad(ish) similarities with the likes of Chain of Command, the game plays in a very different way with more emphasis on ordering platoons to do things. Like CoC you roll several dice at the start of each turn (here called Battalion dice); 1's being discarded (though roll too many and you can be in trouble - see later, 2 through 5 giving you a Company Order open and 6's a HQ Order. HQ Orders (from your Battalion HQ) can be used to supplement your Company Orders in a turn or held back in a pool - the amount you have in store is added as a modifier to the start of turn initiative roll so the question you need to ask is whether best to save them or use them...
At the start of this scenario my Americans had two units (each of two sections) of Recon troops who can attempt to reconnoitre any terrain feature or a spot a Combat Patrol (more on these later) forcing it to withdraw.
My Recon troops with Baker Company successfully spotted a platoon of German infantry hidden in the woods.
Whilst most actions only require one Order, it takes the FOO two first time around to initiate a mortar stonk (though only one Order is needed for subsequent stonks on the same target point). You don't need to deploy mortar models on the table (or the Battalion HQ) but I think it looks good to have something back near your baseline.
My FOO successfully zeroed in the mortar battery on the German position...
The barrage inflicting two points of Shock on the Germans. This made them Hesitant so they were now restricted to only firing at close range or fall back until Andy could spend an Order in an attempt to rally Shock off in his half of the turn.
One of the key features of the game are Combat Patrols which operate totally differently to the Patrol Phase in Chain of Command. Each Company has a maximum of three Combat Patrols at any one time (they can recycle) and you can move them around the board to provide a deployment point for a platoon or other unit. Recon units - above - who spot a Combat Patrol cause its removal and this restricts your opponent as they have lost a potential deployment point until they can move a new Combat Patrol up.
With Andy's German platoon Hesitant I pushed a Combat Patrol forward and deployed a platoon of infantry from Baker Company who opened fire on the Germans, unfortunately not managing to inflict any more Shock which would have caused them to be Suppressed.
One the other side of the table Andy spent a Company Order moving one of his Combat Patrols into a wooded area (we used his CoC Deployment Points for CP's in this game but I plan to make some up using spare Jeeps and Kubelwagens as that will look better on the table).
Issuing a second Company Order he deployed a platoon off the Combat Patrol...
Opening fire on Able Company's American Recon unit to their front.
And inflicting two points of Shock.
Andy then brought his mortar into action...
Dropping shells on Able Company's recently deployed platoon, inflicting two Shock.
Turn two saw me retain the initiative and push forward a Combat Patrol from Baker Company on the US right flank. Deploying a second platoon from the company there...
And then assaulting the Suppressed German platoon in the wood, hitting them in the flank.
This saw two German sections wiped out and the third fall back towards their company commander.
B Company's recon troops 'spotted' a German Combat Patrol on the flank, removing that as a potential threat. Also as B Company had reached its previously declared Phase Line I was now able to consolidate my position and bring on the US reserve of Charlie Company.
On the US left Able Company was struggling to make headway against the German defenders in the wood, accumulating Shock which saw the 1st platoon become Hesitant and the recon troops Suppressed.
However whilst Hesitant the 1st Platoon could still fire, although losing a dice in the process...
This was still enough to increase the Shock on the Germans and make them Hesitant.
Unfortunately not everything was going the US way with an attempt to rally off Shock on the 1st platoon Baker Company seeing them turn tail and start falling back towards their table edge.
The first two turns had gone really well for the Americans so the Gods of War(gaming) decided it was time for a laugh and my Battalion dice roll saw me roll three 1's, which not only meant I only had four Company and Battalion Orders available in Turn 3 but also that one of my Companies would be Hesitant - rolling a D6 it turned out to be Baker Company.
Hesitant Companies are different to Hesitant Platoons/Units (those with 2 Shock) and when the Company is Hesitant none of its units can only fire at close range targets or rally off Shock.
Fortunately having Charlie Company command on the table now I was able to deploy two Combat Patrols of theirs from my limited Order pool, whilst Andy pushed two of his own forward into the centre of the battlefield.
One of these I used to deploy 1st platoon C Company....
Andy using one of his Orders to react to this deployed an MMG section and raked them with fire...
A decisive roll of dice saw the Americans Suppressed and one section wiped out.
With Baker Company Hesitant and effectively hors de combat for this turn I decided to get boots on the table and deployed Charlie Company's 2nd platoon...
...and used my two remaining Orders to try and stonk the German MMG section.
The US mortar fire was unerringly accurate and inflicted two Shock on the Germans.
I managed to seize the initiative for turn four, although again I managed to roll three 1's (well actually four) so another Hesitant Company for this turn - Baker Company again! However with the mortars ranged in I slammed another stonk on the German MMG killing one and Suppressing the survivor who fell back.
Using my remaining orders I deployed two Combat Patrols for Able Company on the left flank.
Andy moved one of his Combat Patrol's into the left most wood opposite Able Company giving him the opportunity to deploy more infantry on that flank if needed.
Not that he really needed any more. Despite being Hesitant with two Shock his infantry platoon opened fire on the advancing Able Company.
And with some inspired dice rolling managed to wipe out the American 1st platoon!
This meant I had lost four sections in total now, resulting in me receiving a FUBAR token, resulting in me losing one Battalion dice to roll at the start of each turn going forward, and the Americans suffering a Command Crisis which could potentially lose them HQ Orders. I had to place a D6 on the table hidden from Andy and he had two opportunities to guess what side was face up. Fortunately he did not guess I'd picked 3 and so the Americans survived the Command Crisis!
However with less dice to generate orders I'd have to be more thoughtful in what orders I employed, the situation not helped when I rolled three 1's again - this time Charlie Company becoming Hesitant!
With the American right flank on a go slow, I decided to concentrate on the left and deployed the 2nd platoon, but they soon came under fire from the Germans in the wood...
And German mortar fire...
Suppressing the Recon troops and making the platoon and MMG section Hesitant.
Next turn Andy deployed another Platoon in the central woods - risking getting stonked by the American mortars who were ranged in on the wood.
Whilst the now un-Hestitant Charlie Company deployed its 3rd platoon who along with the mortars managed to Suppress the newly arrived Germans.
Things for Able Company continued to deteriorate as the 2nd platoon was Suppressed and then fell back...
However the Recon unit did some reconnoitring...
Spotting another German platoon in the left most woods. This meant that in the game the Recon units had revealed all the hidden German units on the battlefield so now the US could not lose the game. If the Americans could take the farmhouse, victory would be theirs!
With Able Company's 3rd platoon now deployed on the road and engaging the dogged Germans on the wood...
Charlie Company's 3rd platoon engaged the Suppressed Germans to their front...
Wiping out one of the enemy sections...
Before in the penultimate turn charging the Abelard farm...
The German Company commander who had been deployed there deciding to fall back.
Did the Americans have victory in their grasp?
The Germans focussed their efforts on trying to recover the farmhouse. The platoon in the woods engaging the US troops...
But ailing to hit the Americans and then receiving two points of Shock from the US return fire.
The second German platoon also opened fire...
And managed to inflict one point of Shock on the farmhouse's defenders.
The MMG survivor also firing but to no effect.
As we entered the final turn, disaster for the Germans as the Company in position to attack the farmhouse became Hesitant and could now not advance and only fire if in close range (which one platoon wasn't).
However the German mortars were still able to fire...
As was the MMG section...
And between them they managed to Suppress the Americans in the farmhouse.
And with a 'Hail Mary' move (or should that be a 'Heil Marlene' move?) the surviving two sections from the 2nd German Platoon in the central woods (not part of the Hesitant Company) stormed the farmhouse...
Forcing the defenders out and securing Andy a draw.
We weren't 100% certain that Andy should have been able to do that. Companies have quite strict sectors to operate in and the platoon that charged the farmhouse moved out of its sector into the other Company's to do so. However boundaries can be altered if the battle situation changes; maybe the player should have to stipulate this before rolling their dice at the start of the turn? Whatever it was a dramatic and exciting end to the battle!
Overall I must say I found our first 'O' Group battle an enjoyable experience. Andy is a great opponent and the rules relatively simply putting the emphasis on players command decisions. I'm already looking forward to our next battle when we get to push a few tanks around on the table!